You can build an Azure Windows virtual machine without clicking through a long portal wizard. In this guide, Terraform creates the resource group, virtual network, subnet, network security group, network interface, managed OS disk, and Windows Server VM as one repeatable deployment.
The result is a private VM with no public IP address. That detail matters. A Windows server does not need to expose Remote Desktop Protocol (RDP) to the internet simply because an administrator needs to manage it. Microsoft recommends controlled access through Azure Bastion, a point-to-site VPN, or time-limited Just-in-Time access instead of leaving management ports open on public workloads.
If this is your first Infrastructure as Code project, read the Terraform Basics reference first. The Azure Fundamentals reference explains subscriptions, resource groups, and Azure Resource Manager in plain language.
What this Terraform deployment creates
Terraform will create these Azure components:
| Component | Purpose |
|---|---|
| Resource group | Holds the lab resources so they can be managed and removed together |
| Virtual network (VNet) | Provides a private address space for the workload |
| Subnet | Places the VM network interface in a smaller network segment |
| Network security group (NSG) | Filters inbound and outbound traffic using ordered rules |
| Network interface (NIC) | Connects the Windows VM to the subnet |
| Windows virtual machine | Runs Windows Server 2022 on an Azure-managed OS disk |
| Random string | Adds a short suffix to names that should be unique within the deployment |
| Random password | Creates a strong initial local administrator password |
Azure also creates the managed OS disk used by the VM. A subnet is part of its VNet, so it does not appear as a separate top-level resource in the resource-group list.
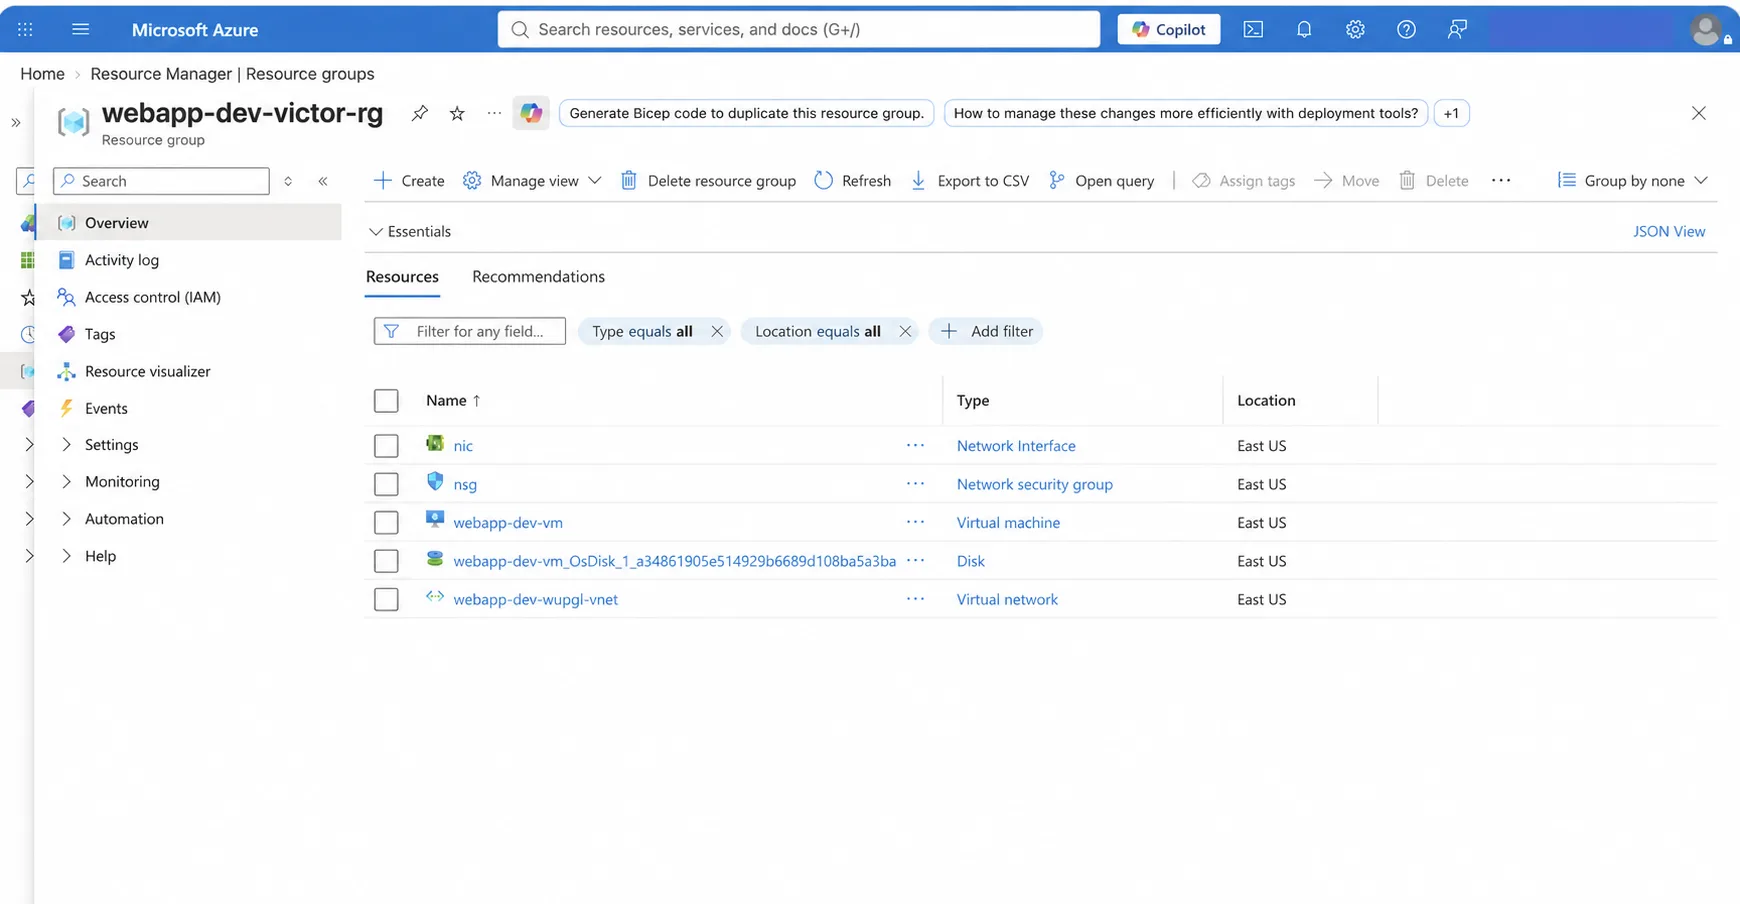
In simple terms, the path is:
The Azure Networking reference explains how VNets, subnets, and NSGs work together. The Azure Compute reference helps you decide whether a VM is the right service or whether a more managed option such as App Service would be simpler.
Before you start
You need:
- An Azure subscription with permission to create resource groups, networks, and virtual machines
- Terraform installed locally
- Azure CLI installed locally, or Azure Cloud Shell
- A code editor such as Visual Studio Code
- Enough Azure quota for the selected VM size in your chosen region
Authenticate with Azure CLI and verify the active subscription before Terraform runs:
az login
az account list --output table
az account set --subscription "YOUR-SUBSCRIPTION-NAME-OR-ID"
az account show --query "{name:name, id:id, tenantId:tenantId}" --output table
AzureRM 4.x requires a subscription ID. For a local Bash session, pass the active Azure CLI subscription through an environment variable instead of hardcoding it in a .tf file:
export ARM_SUBSCRIPTION_ID="$(az account show --query id --output tsv)"In PowerShell, use:
$env:ARM_SUBSCRIPTION_ID = az account show --query id --output tsvFor automation, use workload identity federation or another short-lived identity rather than a developer login or a long-lived client secret. Microsoft documents the supported choices in Authenticate Terraform to Azure.
This deployment creates billable resources
Azure charges for the VM while it is allocated, along with storage and any optional networking services you add. Complete the cleanup section when the lab is finished. I check the Azure pricing calculator and current regional availability before choosing a production size.
Project structure
Terraform reads every .tf file in the current directory as one root module. Splitting the configuration by responsibility does not change Terraform's dependency graph; it only makes the project easier for people to read.
- terraform-azure-windows-vm
- main.tf
- variables.tf
- terraform.tfvars
- network.tf
- security.tf
- compute.tf
- outputs.tf
- .gitignore
This is a good size for a learning project. Larger environments should move reusable groups of resources into tested modules rather than growing one root configuration indefinitely.
1. Configure the providers and resource group
I create main.tf:
terraform {
  required_version = ">= 1.8.0"

  required_providers {
    azurerm = {
      source  = "hashicorp/azurerm"
      version = "~> 4.0"
    }

    random = {
      source  = "hashicorp/random"
      version = "~> 3.0"
    }
  }
}

provider "azurerm" {
  features {}
}

resource "random_string" "suffix" {
  length  = 5
  upper   = false
  special = false
}

resource "random_password" "admin" {
  length           = 24
  special          = true
  min_upper        = 2
  min_lower        = 2
  min_numeric      = 2
  min_special      = 2
  override_special = "!@#%_-"
}

locals {
  name_prefix = "${var.project_name}-${var.environment}"

  common_tags = {
    environment = var.environment
    managed-by  = "terraform"
    owner       = var.owner
    project     = var.project_name
  }
}

resource "azurerm_resource_group" "main" {
  name     = "${local.name_prefix}-${random_string.suffix.result}-rg"
  location = var.location
  tags     = local.common_tags
}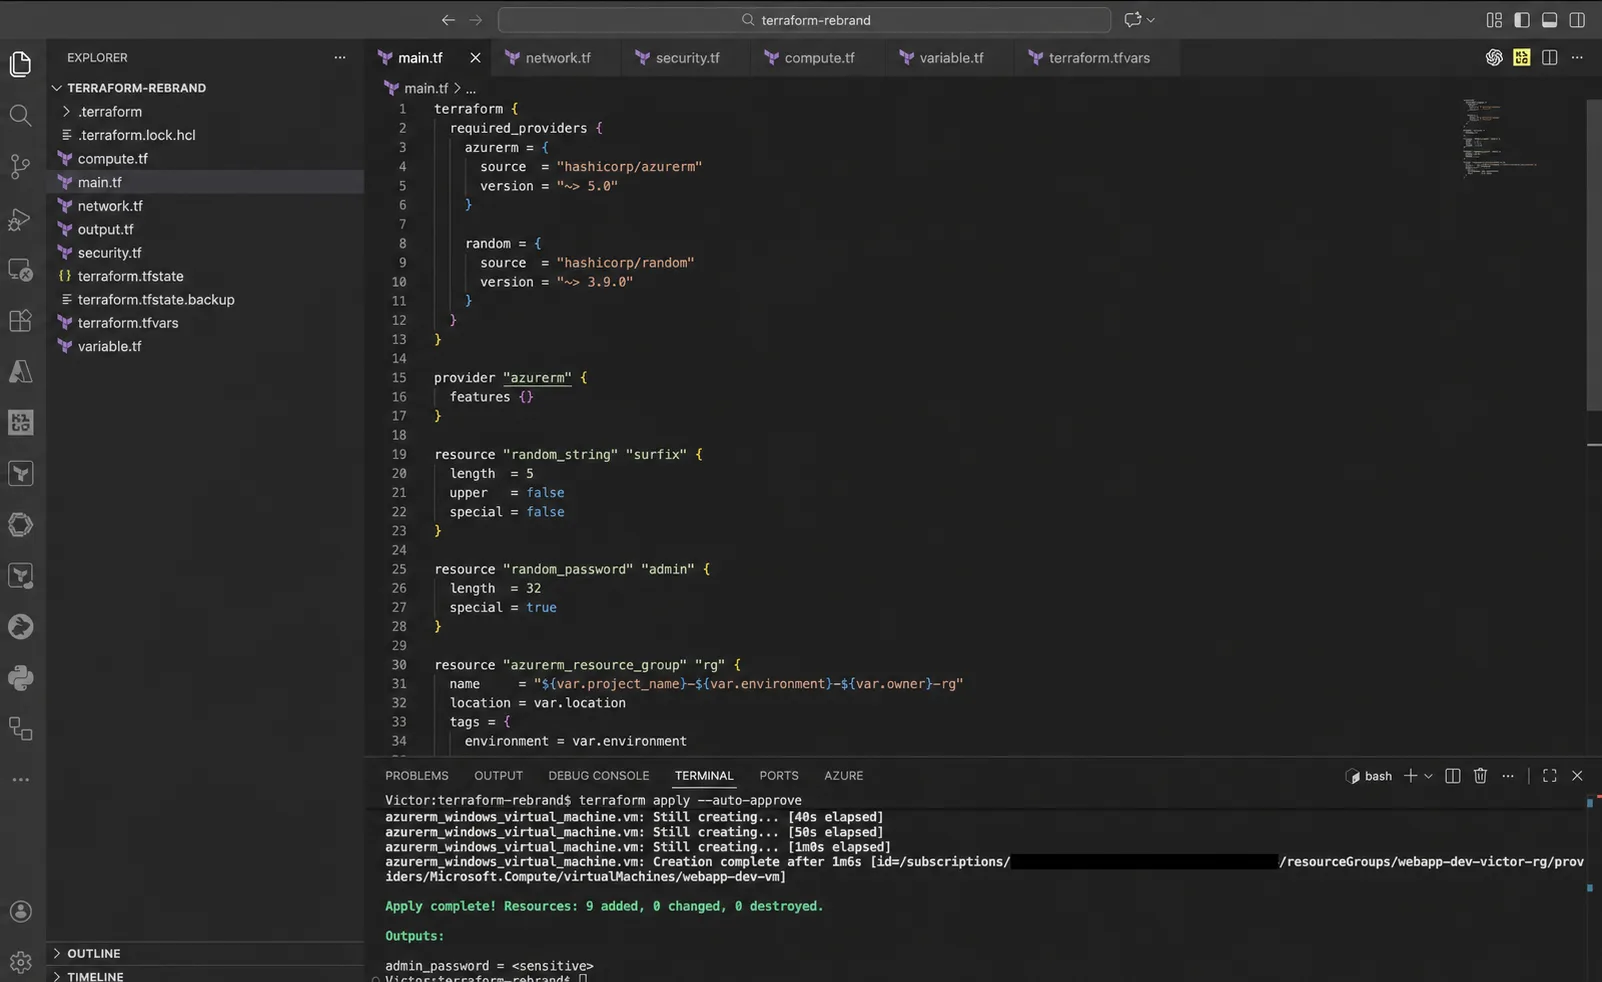
The screenshot shows an earlier ~> 5.0 constraint. At the time this guide was verified, the current AzureRM provider remains on major version 4, so the runnable configuration uses ~> 4.0. Always confirm the available version in the official AzureRM provider registry before upgrading. Commit the generated .terraform.lock.hcl file so local and CI runs use the reviewed provider selection.
The random suffix avoids naming collisions. The password resource avoids placing a password in source code, but it does not remove the password from Terraform state. We will secure state later in this guide.
2. Define typed input variables
I create variables.tf:
variable "project_name" {
  description = "Short name used in Azure resource names."
  type        = string

  validation {
    condition     = can(regex("^[a-z0-9-]+$", var.project_name))
    error_message = "project_name must contain lowercase letters, numbers, or hyphens only."
  }
}

variable "location" {
  description = "Azure region for the deployment."
  type        = string
  default     = "East US"
}

variable "environment" {
  description = "Environment name such as dev, test, or prod."
  type        = string

  validation {
    condition     = contains(["dev", "test", "prod"], var.environment)
    error_message = "environment must be dev, test, or prod."
  }
}

variable "owner" {
  description = "Team or person responsible for the resources."
  type        = string
}

variable "admin_username" {
  description = "Initial local administrator account name."
  type        = string
  default     = "azureadmin"
}

variable "management_source_cidr" {
  description = "Trusted private management range allowed to reach RDP, such as a VPN client pool or Bastion subnet."
  type        = string
}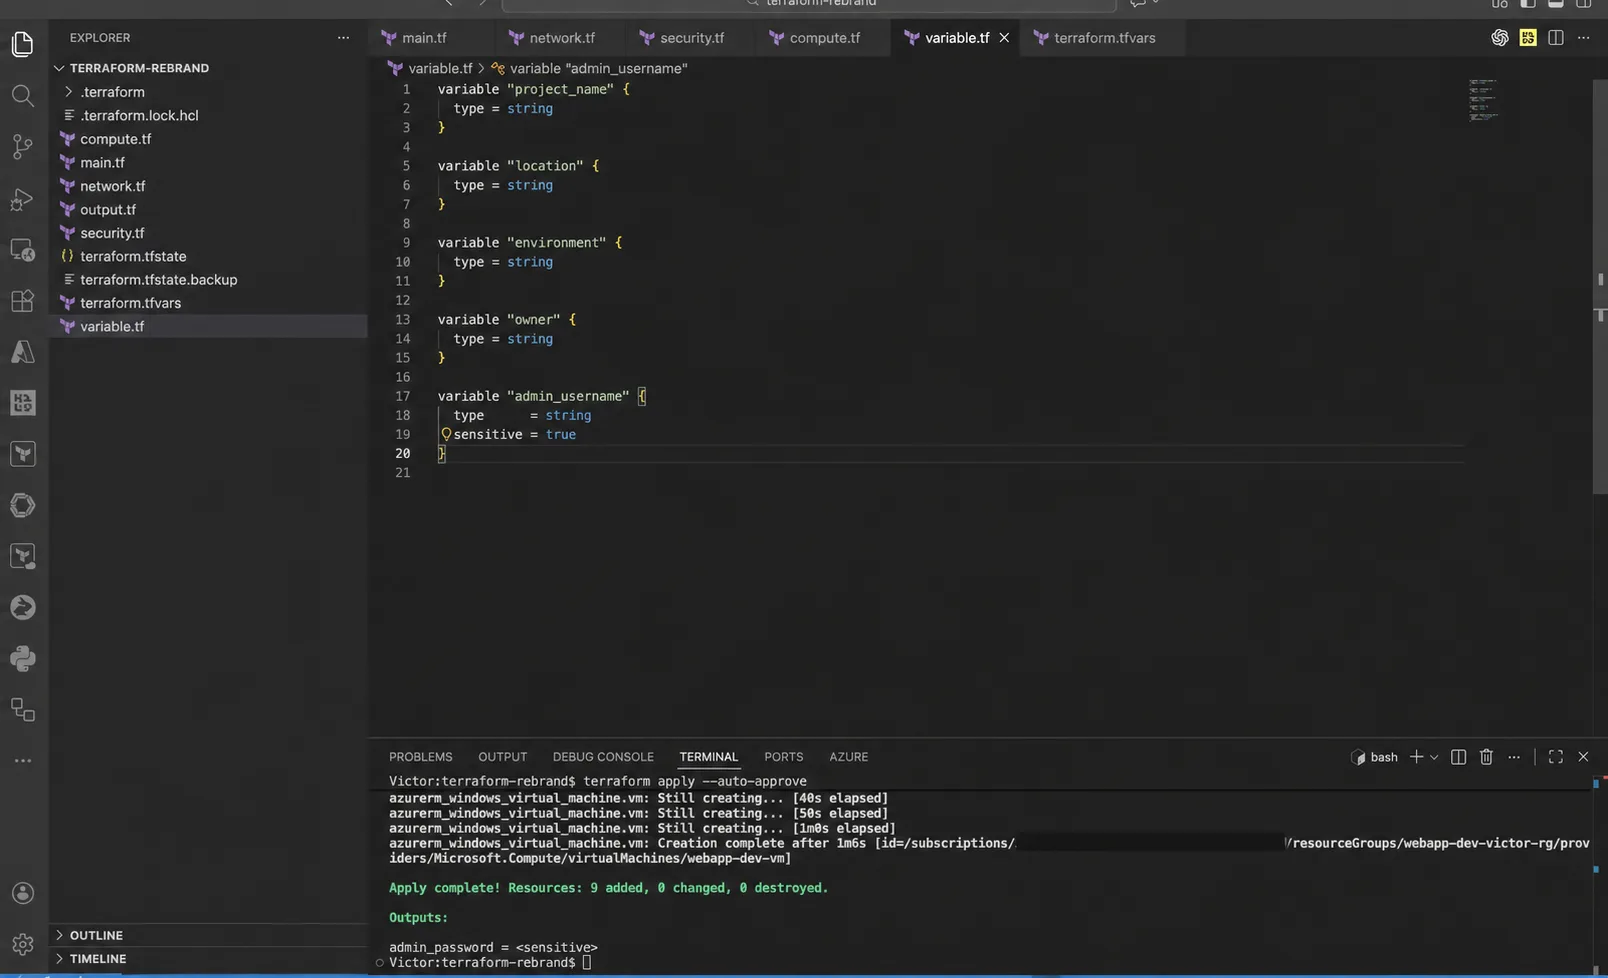
Descriptions and validation rules turn hidden assumptions into useful error messages. The administrator username is not normally secret, so it does not need sensitive = true. The generated password is sensitive.
Now create terraform.tfvars:
project_name           = "webapp"
environment            = "dev"
location               = "East US"
owner                  = "platform-team"
admin_username         = "azureadmin"
management_source_cidr = "10.10.0.0/24"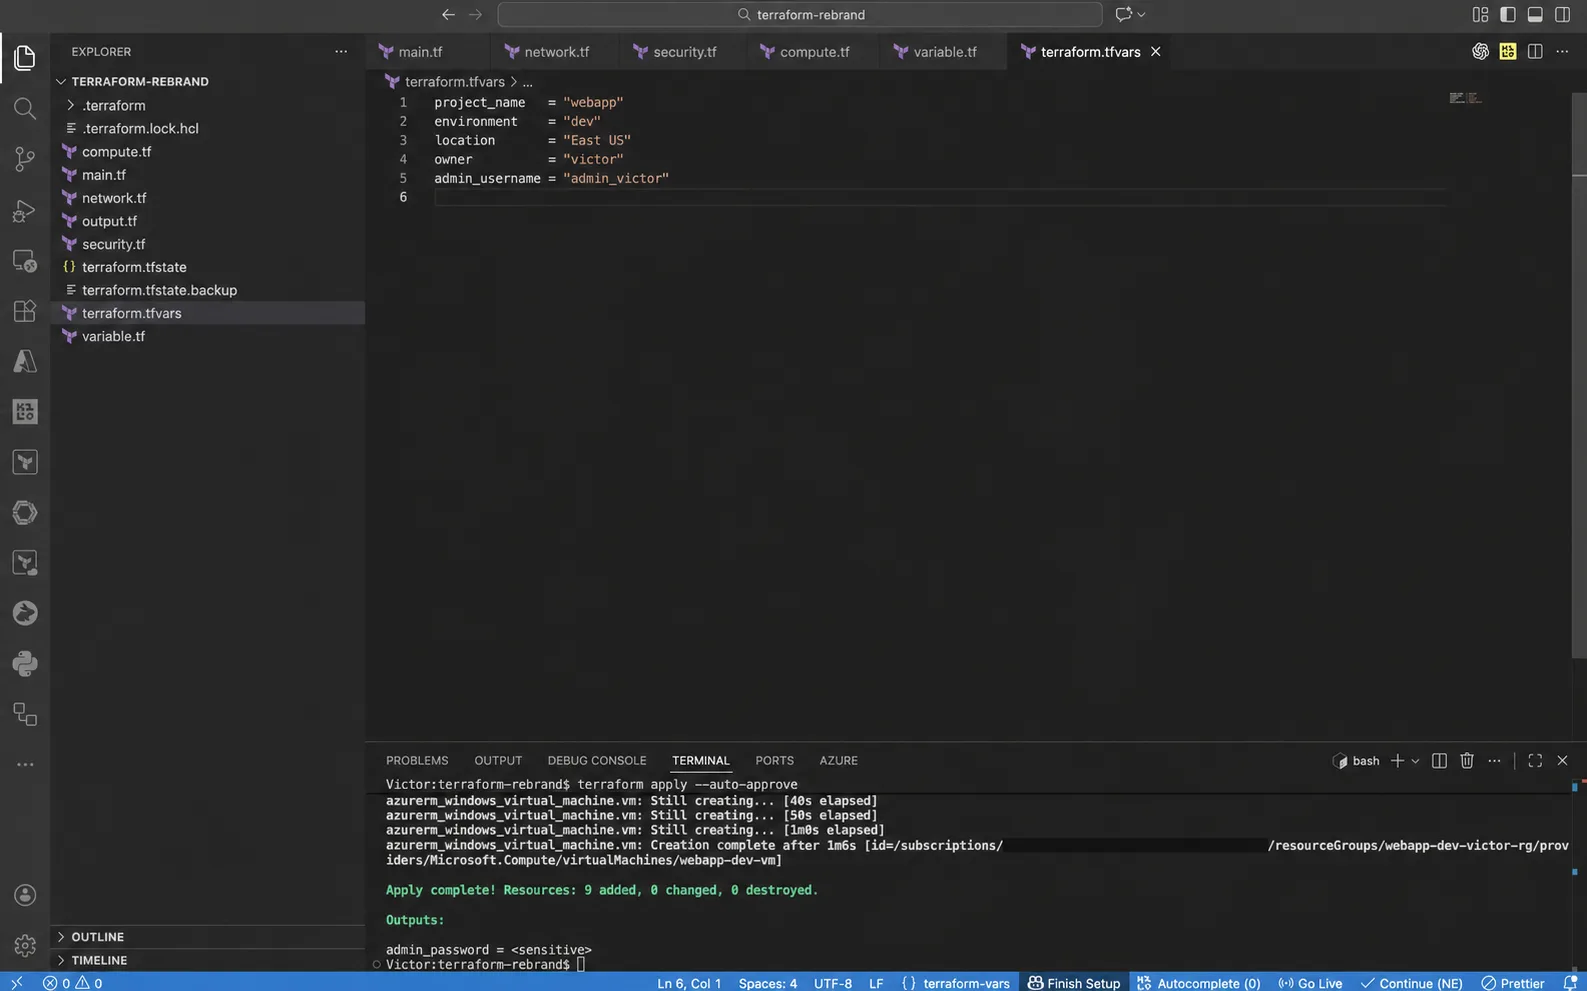
Replace 10.10.0.0/24 with a routed private range used by your administrators, such as an Azure VPN client address pool or a dedicated management subnet. I do not replace it with 0.0.0.0/0.
Values in terraform.tfvars are inputs, not a secrets vault. I do not store passwords, access keys, tokens, or other credentials in this file. The Secrets Management reference covers safer patterns for applications and deployment pipelines.
3. Build the virtual network, subnet, and NIC
I create network.tf:
resource "azurerm_virtual_network" "main" {
  name                = "${local.name_prefix}-${random_string.suffix.result}-vnet"
  resource_group_name = azurerm_resource_group.main.name
  location            = azurerm_resource_group.main.location
  address_space       = ["10.0.0.0/16"]
  tags                = local.common_tags
}

resource "azurerm_subnet" "workload" {
  name                 = "${local.name_prefix}-workload-subnet"
  resource_group_name  = azurerm_resource_group.main.name
  virtual_network_name = azurerm_virtual_network.main.name
  address_prefixes     = ["10.0.1.0/24"]
}

resource "azurerm_network_interface" "vm" {
  name                = "${local.name_prefix}-vm-nic"
  resource_group_name = azurerm_resource_group.main.name
  location            = azurerm_resource_group.main.location
  tags                = local.common_tags

  ip_configuration {
    name                          = "primary"
    subnet_id                     = azurerm_subnet.workload.id
    private_ip_address_allocation = "Dynamic"
  }
}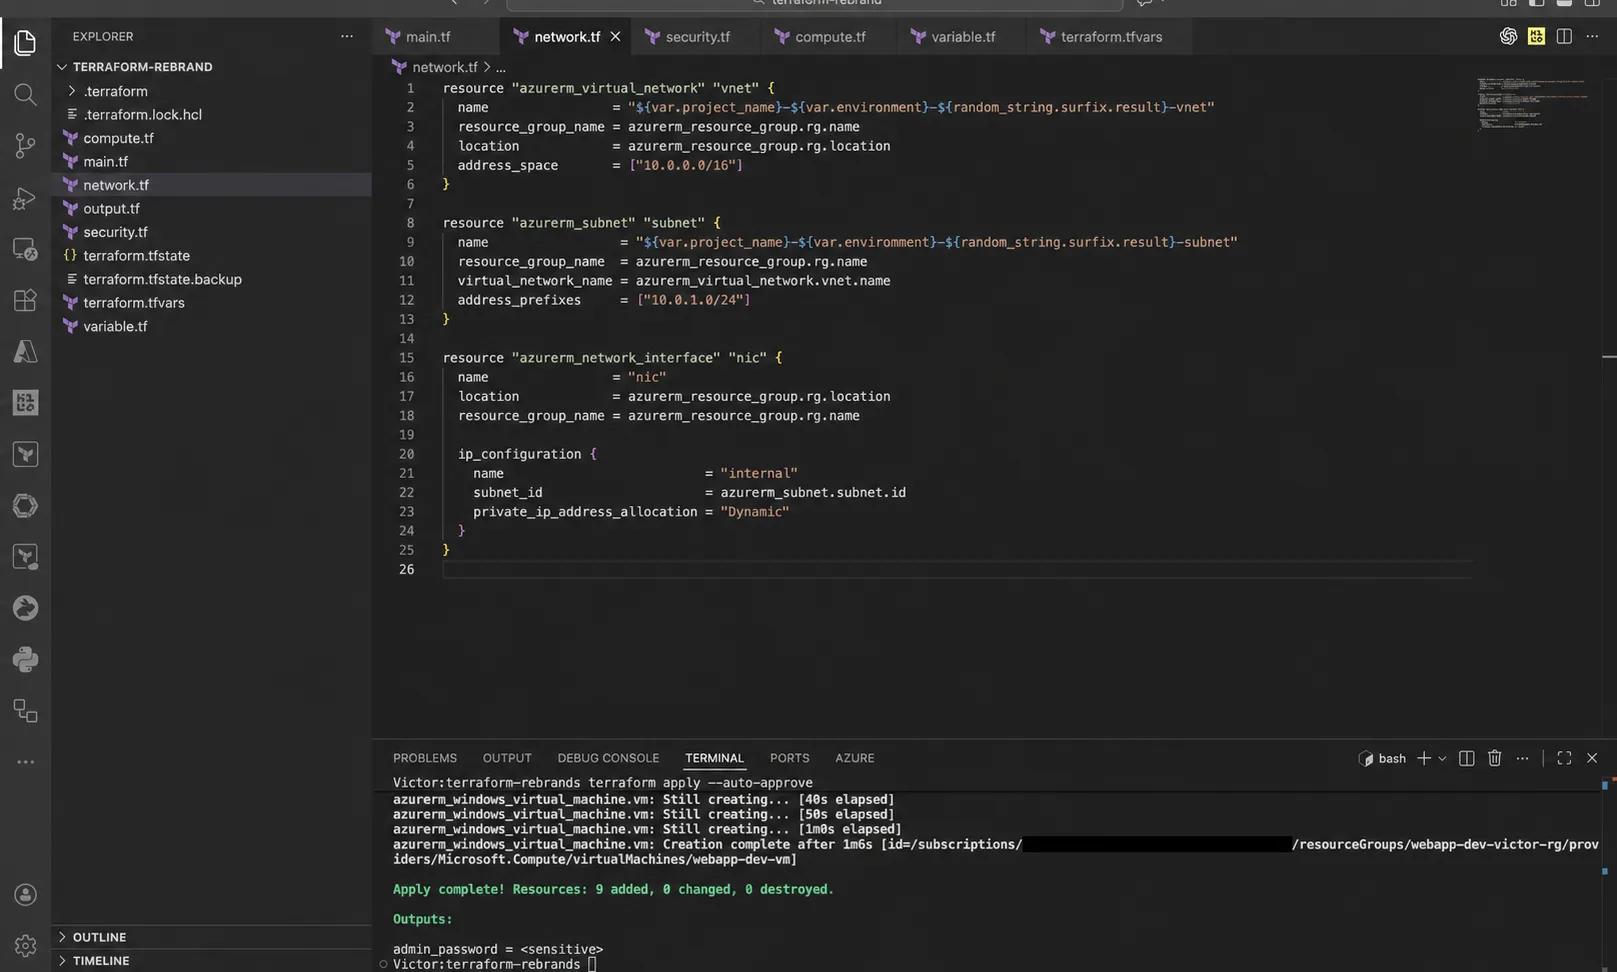
The references between resources create implicit dependencies. Terraform can see that the subnet needs the VNet and that the NIC needs the subnet, regardless of which file contains each block.
There is deliberately no azurerm_public_ip resource. The VM receives a private address from the subnet and is managed through private connectivity.
4. Add a safe network security rule
I create security.tf:
resource "azurerm_network_security_group" "workload" {
  name                = "${local.name_prefix}-nsg"
  resource_group_name = azurerm_resource_group.main.name
  location            = azurerm_resource_group.main.location
  tags                = local.common_tags
}

resource "azurerm_network_security_rule" "allow_rdp_from_management" {
  name                        = "allow-rdp-from-management"
  priority                    = 110
  direction                   = "Inbound"
  access                      = "Allow"
  protocol                    = "Tcp"
  source_port_range           = "*"
  destination_port_range      = "3389"
  source_address_prefix       = var.management_source_cidr
  destination_address_prefix  = "*"
  resource_group_name         = azurerm_resource_group.main.name
  network_security_group_name = azurerm_network_security_group.workload.name
}

resource "azurerm_subnet_network_security_group_association" "workload" {
  subnet_id                 = azurerm_subnet.workload.id
  network_security_group_id = azurerm_network_security_group.workload.id
}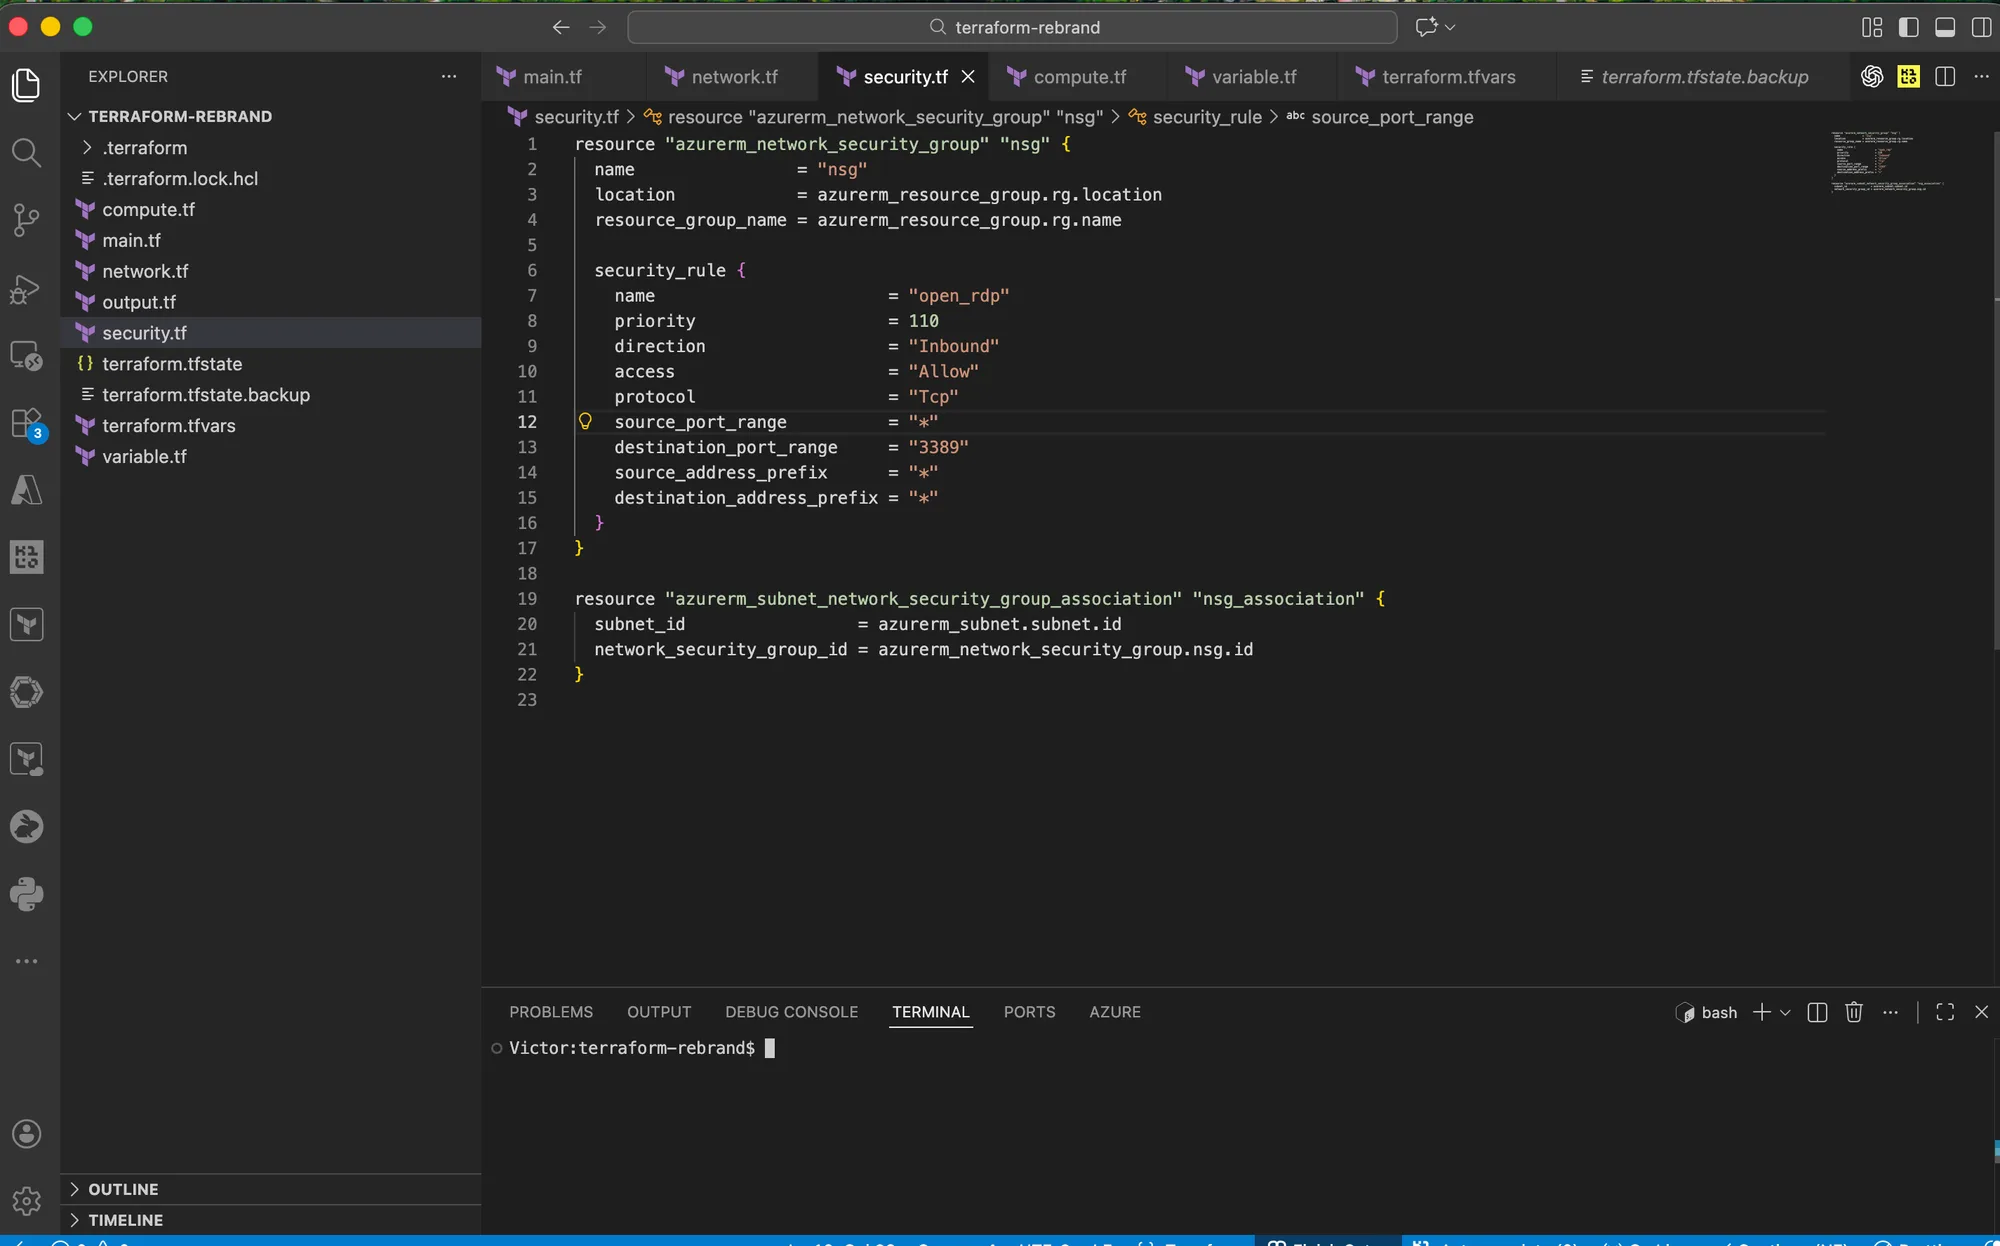
The corrected screenshot places * in source_port_range and 3389 in destination_port_range. That direction is correct because the Windows VM is the RDP server listening on TCP 3389, while the administrator's client normally starts the connection from a temporary source port.
The screenshot still uses source_address_prefix = "*", which allows any reachable source address. Treat that wildcard as a lab-stage configuration, not the finished security rule. The runnable example replaces it with var.management_source_cidr so access is limited to a trusted Bastion subnet, VPN client pool, or dedicated management network. I never publish RDP to the whole internet with * or 0.0.0.0/0. Automated scanners continuously probe public management ports, and a password, even a strong one, is not a good reason to expose the service.
Prefer private administration
Microsoft recommends Azure Bastion for browser-based RDP without a public IP on the VM, a point-to-site VPN when administrators need wider private-network access, or Just-in-Time access for workloads that must retain public IPs. This guide's rule expects traffic from a trusted, routed private management range.
For a practical VPN walkthrough, see How to Configure a Point-to-Site VPN on Azure. For the underlying rule evaluation model, use Azure Networking and Microsoft's NSG overview.
5. Create the Windows Server VM
I create compute.tf:
resource "azurerm_windows_virtual_machine" "main" {
  name                = "${local.name_prefix}-vm"
  computer_name       = "webappdevvm"
  resource_group_name = azurerm_resource_group.main.name
  location            = azurerm_resource_group.main.location
  size                = "Standard_B2s"
  admin_username      = var.admin_username
  admin_password      = random_password.admin.result
  network_interface_ids = [
    azurerm_network_interface.vm.id,
  ]
  tags = local.common_tags

  identity {
    type = "SystemAssigned"
  }

  os_disk {
    caching              = "ReadWrite"
    storage_account_type = "Standard_LRS"
  }

  source_image_reference {
    publisher = "MicrosoftWindowsServer"
    offer     = "WindowsServer"
    sku       = "2022-datacenter-azure-edition"
    version   = "latest"
  }

  boot_diagnostics {}
}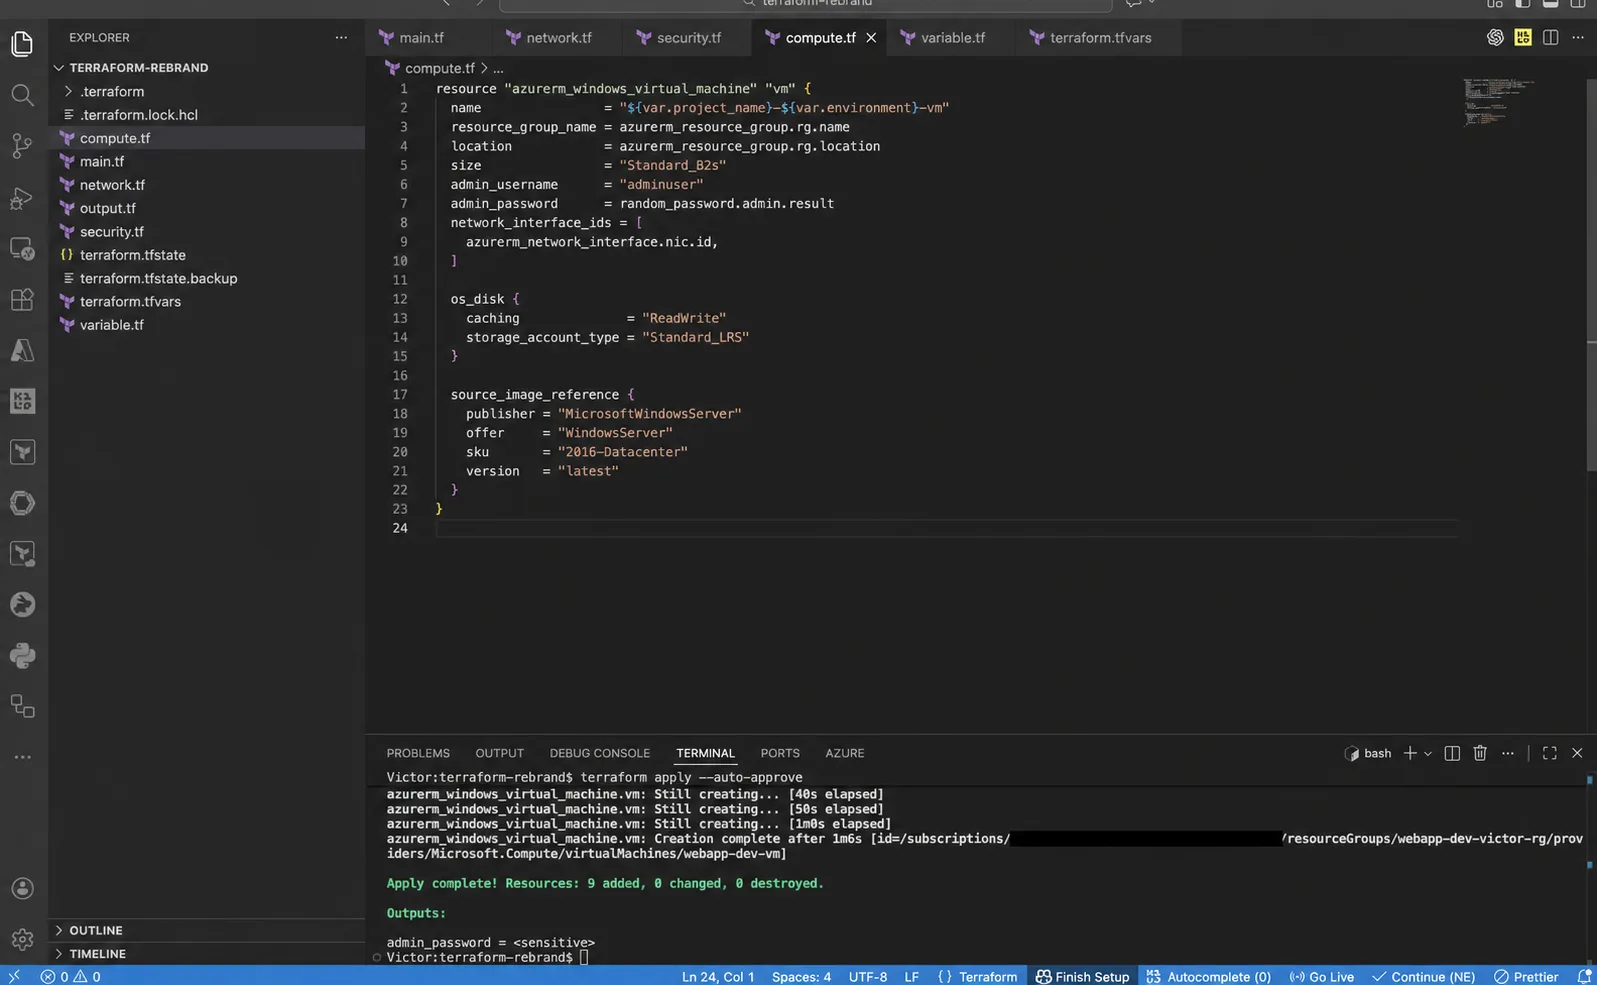
The screenshot uses the older 2016-Datacenter image. The example above uses Windows Server 2022 Datacenter: Azure Edition, matching Microsoft's current Windows VM Terraform quickstart. Before a production rollout, pin and test an image version according to your patching and change-control policy instead of accepting latest without review.
Standard_B2s is a modest lab size, not a universal recommendation. Confirm that it is available in your region and choose CPU, memory, disk performance, availability zones, backup, and recovery settings from the workload's actual requirements.
The system-assigned managed identity gives the VM an Azure identity without embedding a client secret. It receives no permissions by default; grant only the roles the workload genuinely needs.
6. Add useful outputs
I create outputs.tf:
output "resource_group_name" {
  description = "Name of the deployed resource group."
  value       = azurerm_resource_group.main.name
}

output "vm_name" {
  description = "Name of the Windows virtual machine."
  value       = azurerm_windows_virtual_machine.main.name
}

output "private_ip_address" {
  description = "Private IP address assigned to the VM network interface."
  value       = azurerm_network_interface.vm.private_ip_address
}

output "admin_password" {
  description = "Generated initial administrator password for this lab."
  value       = random_password.admin.result
  sensitive   = true
}
Terraform will display the password as <sensitive> in normal output. That prevents accidental display in a terminal log, but sensitive = true is redaction, not encryption. HashiCorp documents that sensitive values can still be present in state and saved plan files.
For this lab, retrieve the password only when you need it:
terraform output -raw admin_passwordThat command prints the actual value. I do not run it in a recorded terminal, paste it into tickets, or expose it in CI logs. For production, prefer Microsoft Entra-based VM login or an approved secret-management workflow, and protect the state backend with least-privilege access.
7. Keep generated and sensitive files out of Git
I create .gitignore:
.terraform/
*.tfstate
*.tfstate.*
*.tfplan
crash.log
crash.*.log
*.tfvars
!example.tfvars
Commit .terraform.lock.hcl; it records the selected provider checksums and versions. I do not commit the local state, saved plans, or a real terraform.tfvars file that may later gain environment-specific or sensitive data.
For a solo disposable lab, local state is easy to understand. For shared or durable infrastructure, use a protected remote backend. Microsoft explains how Azure Blob Storage provides remote state, locking, and encryption at rest in Store Terraform state in Azure Storage.
The Infrastructure as Code Security reference covers state protection, identity, policy checks, and supply-chain controls in more depth.
8. Format, validate, plan, and apply
I run the workflow from the directory containing the Terraform files:
terraform fmt -recursive
terraform init
terraform validate
terraform plan -out=tfplan
terraform show tfplan
terraform apply tfplan
What each command does:
terraform fmtgives the configuration a consistent layout.terraform initinstalls providers and initializes the backend.terraform validatechecks the configuration's structure and provider schema.terraform plan -out=tfplancalculates changes and saves the exact proposed plan.terraform show tfplangives you another chance to inspect resource names, region, access rules, and destructive actions.terraform apply tfplanexecutes the plan you reviewed.
The screenshots show terraform apply --auto-approve. That is convenient in a disposable lab, but it removes the human approval step and creates a fresh plan immediately before applying. A saved-plan workflow is safer because the applied actions are the ones you inspected. HashiCorp also warns that saved plan files may contain sensitive data, so never commit tfplan or upload it as an unprotected artifact.
A successful run ends with a summary similar to:
Apply complete! Resources: 9 added, 0 changed, 0 destroyed.

Outputs:

admin_password    = <sensitive>
private_ip_address = "10.0.1.4"
resource_group_name = "webapp-dev-a1b2c-rg"
vm_name             = "webapp-dev-vm"
The exact private IP and random suffix will differ.
9. Verify the deployment
I check the outputs first:
terraform outputThen I I ask Azure for the VM's current power state:
az vm get-instance-view \
  --resource-group "$(terraform output -raw resource_group_name)" \
  --name "$(terraform output -raw vm_name)" \
  --query "instanceView.statuses[?starts_with(code, 'PowerState/')].displayStatus" \
  --output tsv
Expected result:
VM runningIn the Azure portal, open Resource groups, select the name printed by Terraform, and confirm the NIC, NSG, VM, disk, and VNet are present. Tags should also show the environment, owner, project, and managed-by = terraform values.
I do not stop at “Apply complete.” Verify that:
- The VM is in the intended subscription, region, and resource group
- The NIC has a private IP in
10.0.1.0/24 - The NSG is associated with the workload subnet
- RDP is limited to the trusted management range
- The VM has no public IP address
- Boot diagnostics is enabled
- The managed identity exists but has no unnecessary role assignments
How to connect without exposing RDP
The VM is private by design. Choose one of these administration paths:
| Access method | Best fit | Public IP on VM? |
|---|---|---|
| Azure Bastion | Browser or supported native-client RDP to individual VMs | No |
| Point-to-site VPN | Administrators need broader access to resources in the VNet | No |
| Just-in-Time VM access | A VM must retain public connectivity but management ports should normally stay closed | Possibly |
Azure Bastion connects to the VM's private address over RDP without installing an agent or assigning a public IP to the VM. A point-to-site VPN gives the administrator's device a routed path into the VNet. In either design, make management_source_cidr match the source range used by that access path.
Microsoft's developer and administrator access design guide compares these services and recommends avoiding public management endpoints on workloads.
Common problems and practical fixes
Terraform says the subscription ID is missing
Confirm you are using AzureRM 4.x and that ARM_SUBSCRIPTION_ID exists in the same shell running Terraform:
az account show --query "{name:name, id:id}" --output table
printenv ARM_SUBSCRIPTION_ID
Set the environment variable again if it is empty. In CI, configure it through the workload identity environment rather than committing it to source code.
The VM size is not available
VM SKU availability and quota differ by region and subscription. List available sizes:
az vm list-sizes --location eastus --output tableChange the size only after checking the workload requirements and the plan.
The Windows image cannot be found
List image SKUs available in the chosen region:
az vm image list-skus \
  --location eastus \
  --publisher MicrosoftWindowsServer \
  --offer WindowsServer \
  --output table
I do not keep using an old image merely because it appeared in an earlier screenshot or tutorial.
RDP times out
Work from the path inward:
- Confirm the VM is running.
- Confirm your Bastion or VPN path reaches the VNet.
- Confirm
management_source_cidrmatches the real source range. - I check the NIC's effective NSG rules.
- I check effective routes before changing the firewall.
az network nic list-effective-nsg \
  --resource-group "$(terraform output -raw resource_group_name)" \
  --name "webapp-dev-vm-nic" \
  --output table
I do not “fix” a timeout by opening port 3389 to the internet.
Terraform cannot acquire the state lock
Another process may be planning or applying against the same backend. Confirm that no person or CI job still owns the lock before forcing an unlock. The detailed recovery process is in Terraform Apply Stuck Acquiring State Lock.
Production improvements beyond this lab
This deployment is intentionally small, but a real server still needs an operating model. Before using the pattern for production, add:
- A protected Azure Storage backend with state locking, versioning, restricted network access, and Microsoft Entra authorization
- A CI/CD identity based on workload identity federation, not a stored client secret
- Azure Bastion or private VPN access, with no public IP on the workload VM
- Azure Backup and tested restore procedures
- Azure Monitor Agent, data collection rules, alerts, and log retention appropriate to the workload
- Update management and a tested Windows patching policy
- Availability zones or another recovery design where the service-level objective requires it
- Azure Policy controls for allowed regions, VM sizes, tags, encryption, and public IP restrictions
- Cost alerts and an owner tag that points to a real team
- Separate state and access boundaries for development, test, and production
If the workload needs multiple identical servers, load balancing, or autoscaling, do not clone this VM block by hand. Continue with Modular Terraform and Azure VM Scale Sets. For a Linux version of the same Azure foundation, use Terraform on Azure: Resource Groups, VNets, NSGs, and VMs.
Clean up safely
For a disposable lab, save the resource-group name, then create and review a destroy plan:
terraform plan -destroy
terraform show destroy
terraform destroy --auto-approve
Confirm the subscription, backend, workspace, and resource names before approval. A destroy plan targets everything managed by the selected state, not merely the VM you happen to be thinking about.
After the apply finishes, confirm the resource group no longer exists:
az group exists --name "$RESOURCE_GROUP_NAME"The expected response is false.
Frequently asked questions
Can Terraform create a Windows VM in Azure?
Yes. The AzureRM provider's azurerm_windows_virtual_machine resource manages the VM, while separate resources define its network, security, disk behavior, identity, and supporting Azure services.
Does an Azure Windows VM need a public IP for RDP?
No. Azure Bastion and point-to-site VPN connections reach the VM over its private IP address. Keeping the VM private reduces its exposure to internet scanning and password attacks.
Why is RDP port 3389 the destination port?
The Windows VM is the RDP server listening on TCP 3389, so destination_port_range is 3389. The administrator's client normally starts the connection from a temporary source port, so source_port_range should be *.
Is a Terraform sensitive output secure?
It is hidden from normal CLI output, but the value can still exist in Terraform state and saved plan files. Secure the backend, restrict who can read state, and avoid printing sensitive outputs in logs.
Should I run terraform apply --auto-approve?
Not as the normal interactive or production workflow. I review a plan and apply the saved plan. I use automatic approval only inside a controlled automation process that already has policy checks, review gates, the correct identity, and a tightly scoped target environment.
Why split Terraform into several files?
It gives people clear places to find provider, network, security, compute, variable, and output settings. Terraform still loads the files together as one module and resolves dependencies from resource references.
Final checklist
- Azure subscription and region verified before planning
- AzureRM provider uses a valid reviewed version constraint
- RDP destination port is 3389 and the source is restricted
- The Windows VM has no public IP address
- State and saved plan files are excluded from Git
- The saved Terraform plan was reviewed before apply
- Azure resources and effective security rules were verified
- Backup, monitoring, patching, and recovery are planned before production
The most important lesson is not that Terraform can create a VM. It is that the entire deployment, including naming, network placement, access rules, identity, and cleanup, can be reviewed as code and repeated without relying on someone's memory of portal clicks. I keep the management path private, protect state as sensitive data, and make the plan review part of every change.
References
- Microsoft Learn - Create a Windows VM with Terraform
- Microsoft Learn - Developer and administrator access to Azure VMs
- Microsoft Learn - Azure Bastion overview
- Microsoft Learn - Network security groups overview
- Microsoft Learn - Authenticate Terraform to Azure
- Microsoft Learn - Store Terraform state in Azure Storage
- Terraform Registry - AzureRM Windows virtual machine
- HashiCorp - Terraform plan command
- HashiCorp - Manage sensitive data