As part of building a realistic domain-based environment, this lab demonstrates how to create a client computer and join it to an existing Active Directory Domain Services (AD DS) domain hosted on Windows Server 2019, using Hyper-V.
A domain environment is incomplete without client machines. Joining a client computer allows you to validate authentication, Group Policy processing, and centralized identity management, just as in real enterprise networks.
Lab Prerequisites
Before starting this lab, ensure the following are already configured:
- A functioning Domain Controller running Windows Server 2019
- AD DS and DNS installed and operational
- Hyper-V virtual networking configured
- Domain administrator credentials available
The Windows client must run a domain-join-capable edition such as Pro, Enterprise, Pro Education, or Pro for Workstations. Windows Home editions can't join an on-premises AD DS domain. I use a delegated account that is authorized to join computers whenever possible; Domain Admin is excessive for routine joins.
Lab Objective
To deploy a Windows client virtual machine, configure networking correctly, and join the client to the Active Directory domain.
Step-by-Step Lab Tasks
Step 1: Create the Client Virtual Machine
- I create a new virtual machine in Hyper-V
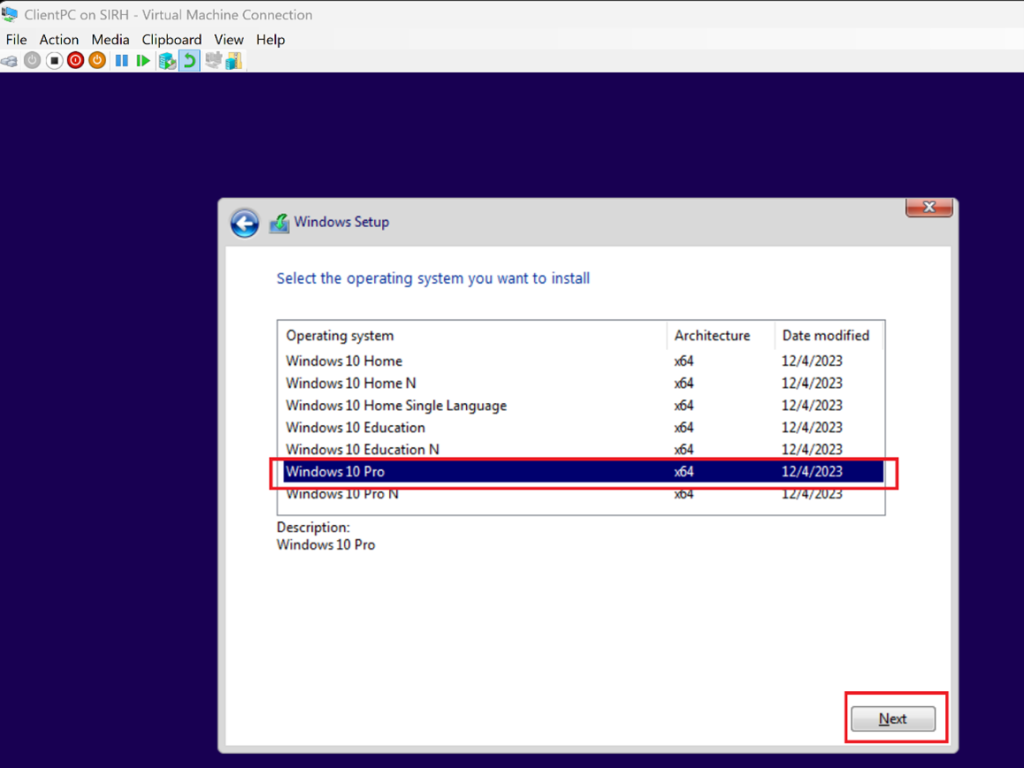
- Install Windows 10 (Pro or Enterprise edition)
- Assign the VM to the same virtual switch used by the Domain Controller
💡 Domain join requires network connectivity to the DC.
In Hyper-V Manager: Right-click on your host → New → **Virtual Machine **→ Name your VM (e.g., “ClientPC”) → Choose Generation 2
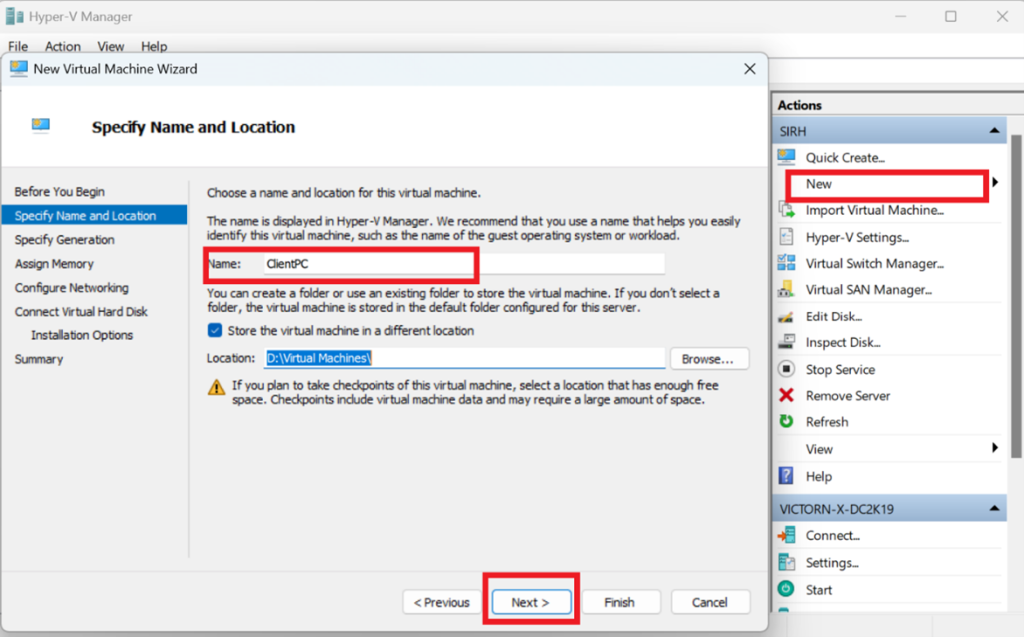
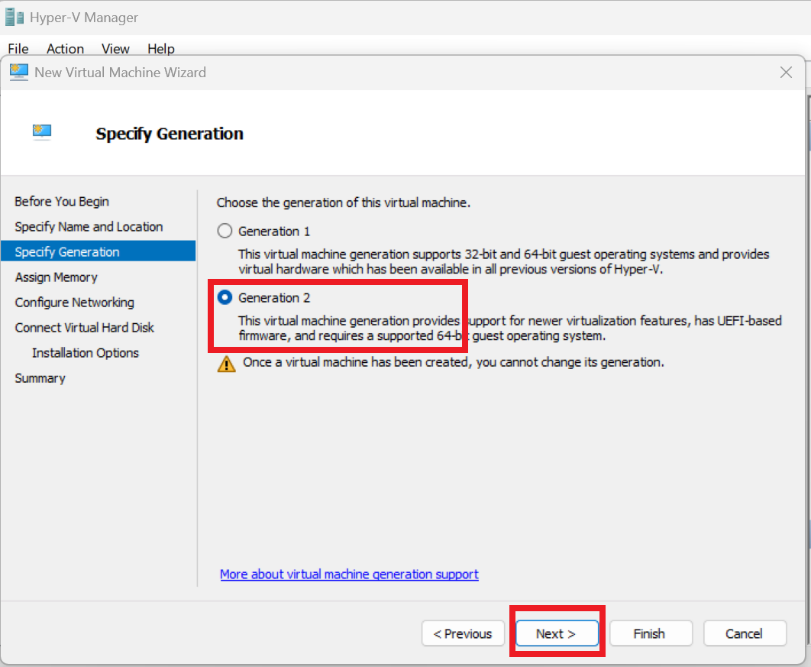
→ Assign Memory (start with 4 GB or more, depending on the Host Machine RAM)
→ Select and connect it to the same virtual switch as the Domain Controller for network visibility.
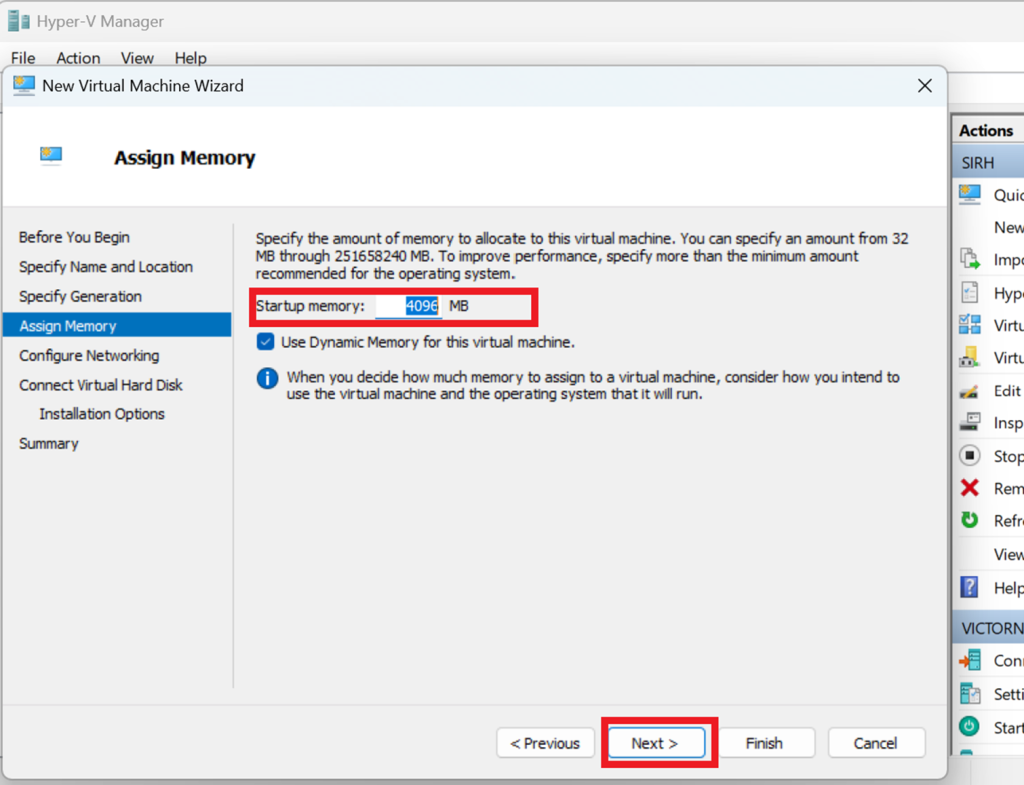
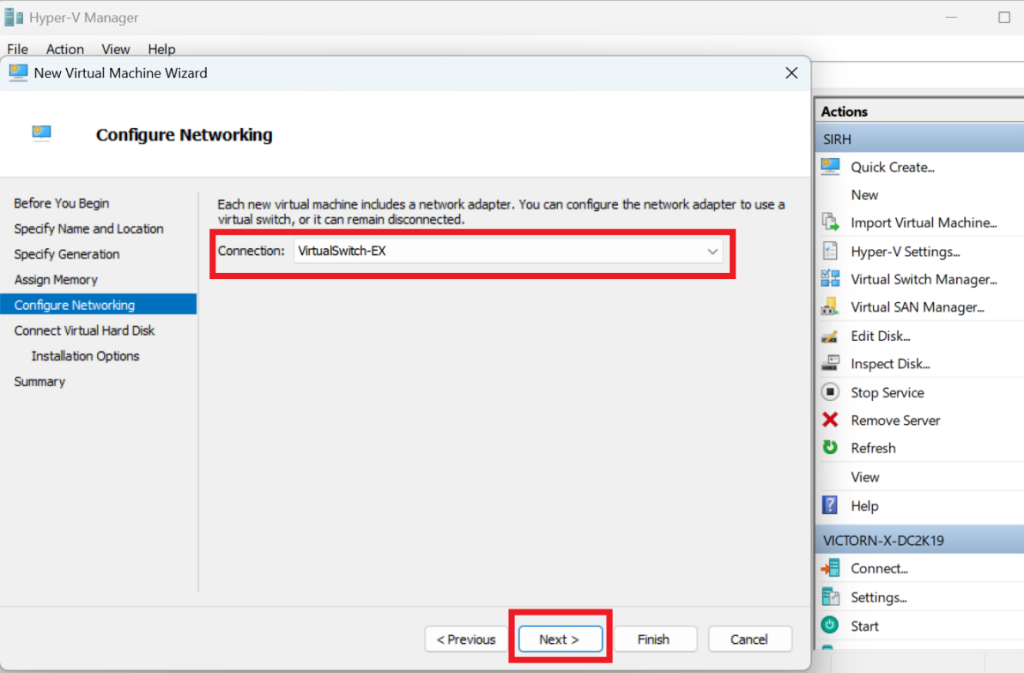
→ Create a new virtual hard disk (e.g., 40GB or more) → choose and install a Windows 10 ISO
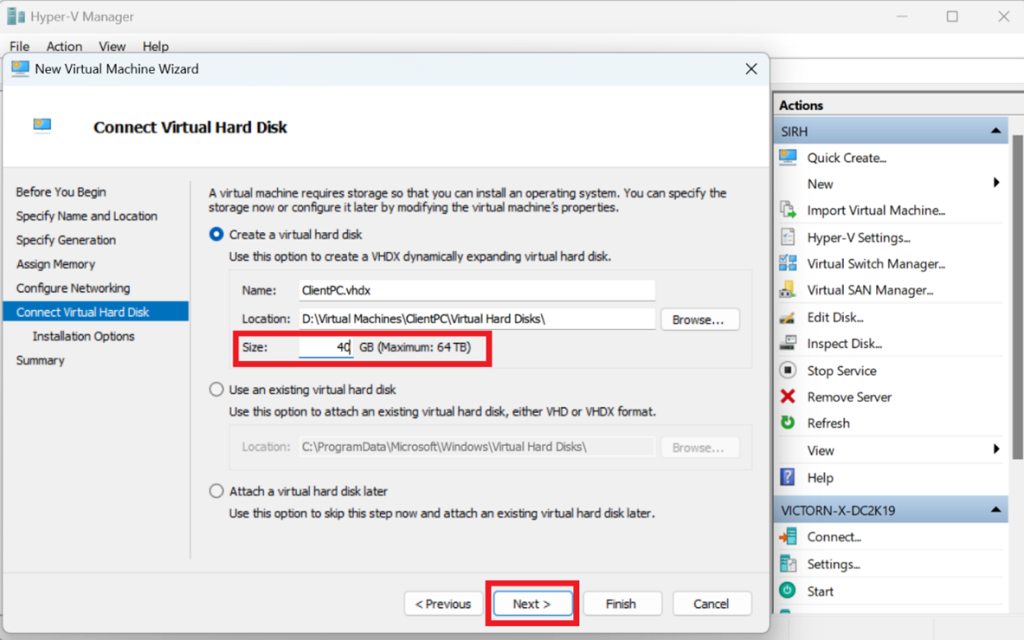
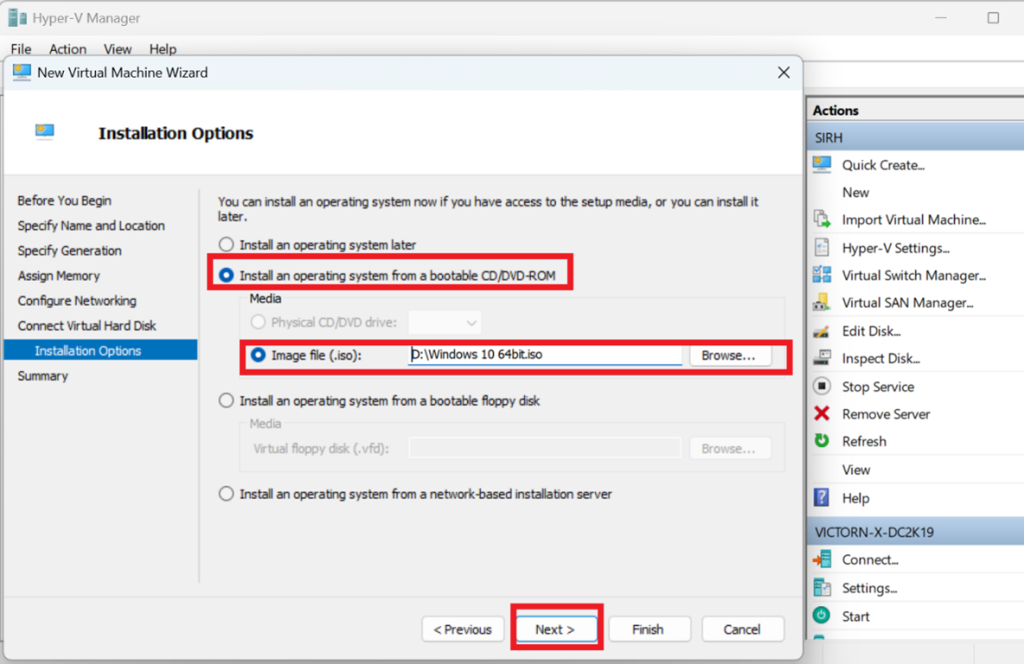
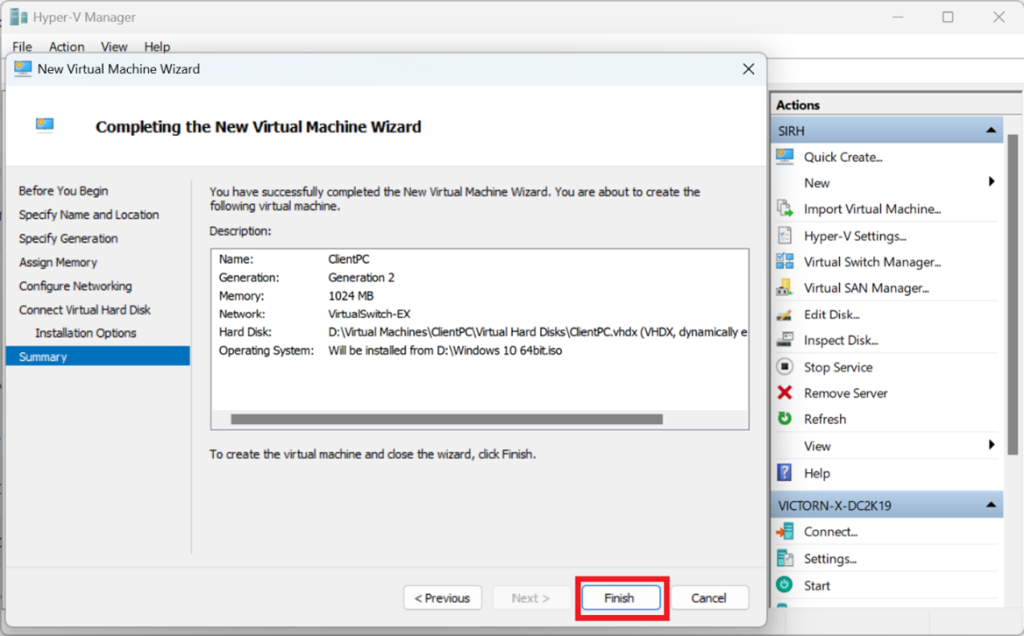
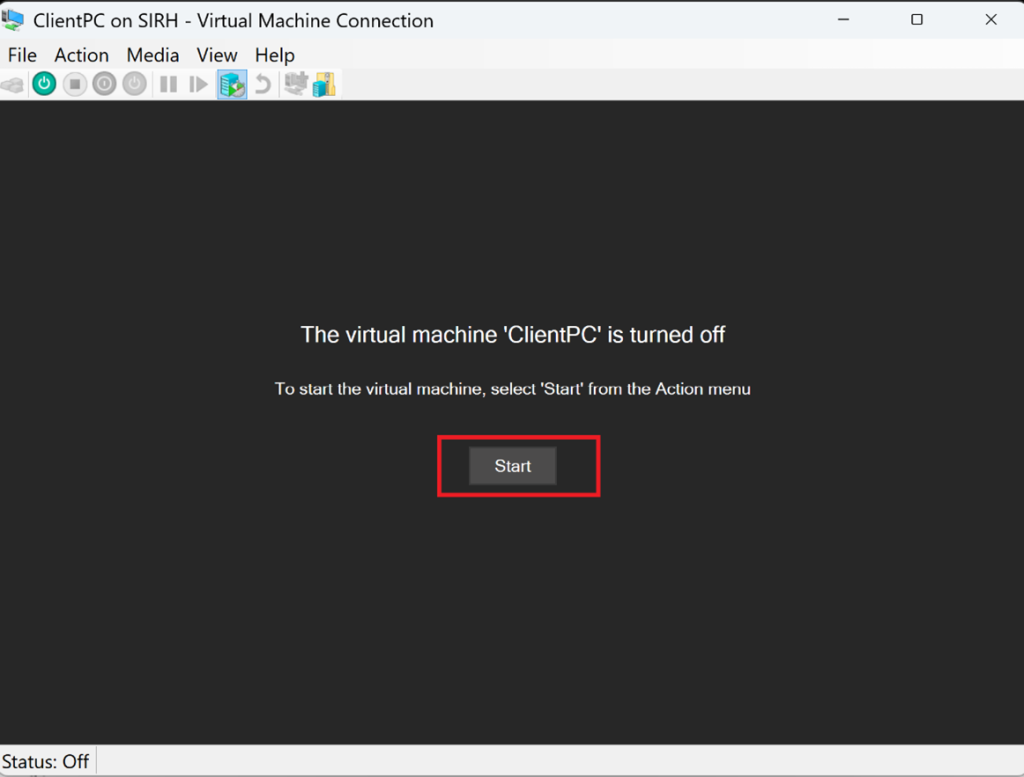
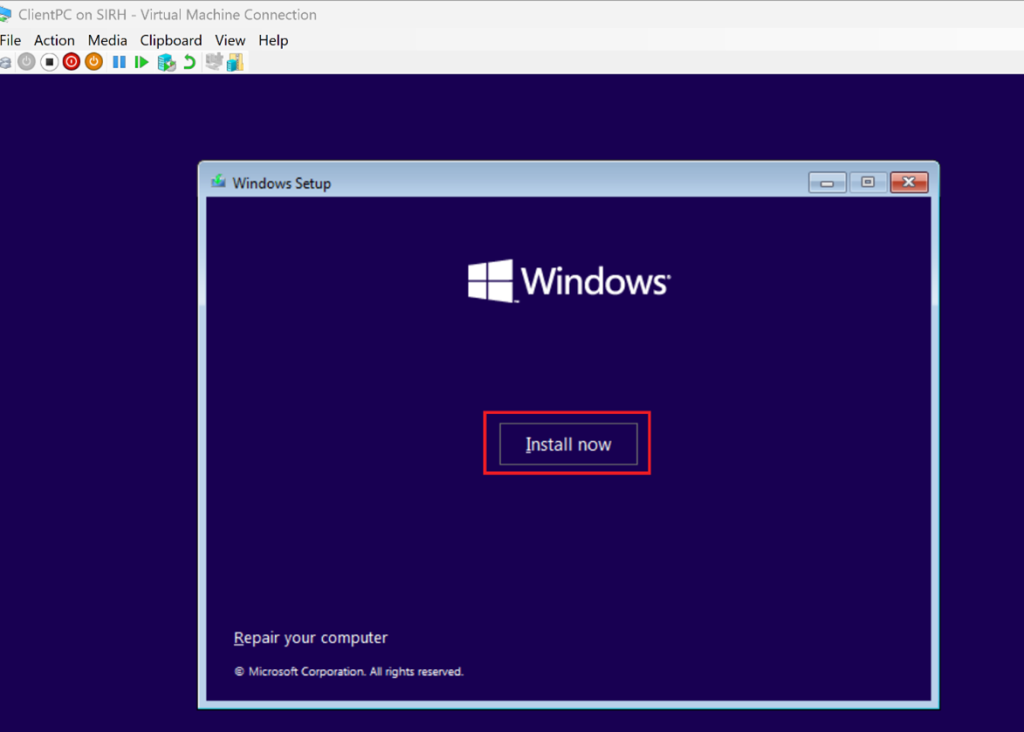
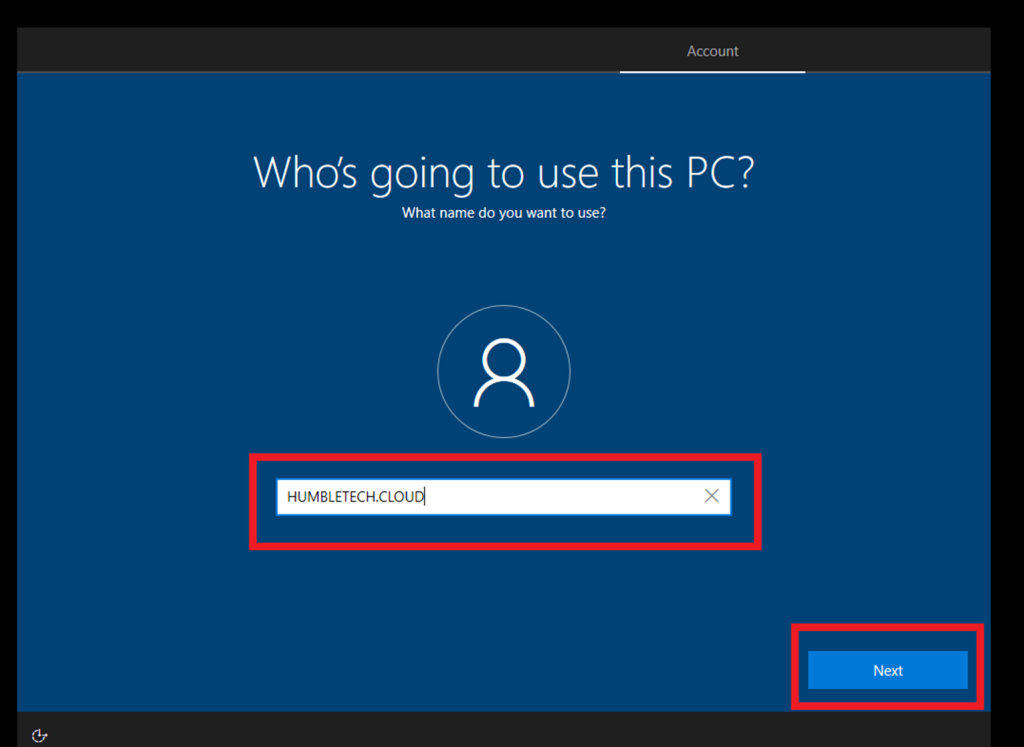
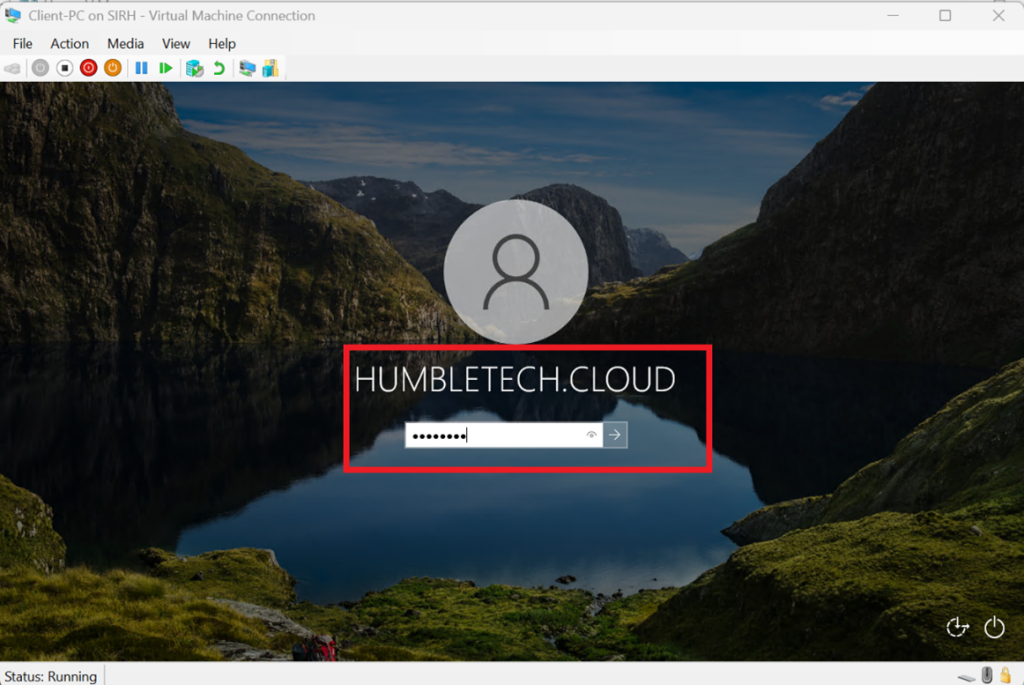
I start the VM → Open the console → Follow the Windows setup wizard
(Choose edition, set password, etc.)
Step 2: Configure Network Settings
- I use DHCP or assign a documented static IP that doesn't conflict with the DHCP pool
- Configure DNS to point to the Domain Controller’s IP address
💡 Incorrect DNS configuration is the most common cause of domain join failures.
Leave IPv6 enabled. Open the IPv4 properties only if the lab requires a static IPv4 address. Microsoft doesn't recommend unbinding IPv6 from Windows adapters.
Configured DNS to point to the Domain Controller’s IP address (e.g., 192.168.21.200)
Don't add a public DNS resolver as the client's alternate DNS server. The client needs an AD-aware DNS server that hosts the domain's records; that internal server can forward external queries upstream.
Before joining, verify name resolution and time rather than relying only on ping:
Resolve-DnsName -Type SRV _ldap._tcp.dc._msdcs.humbletech.cloud
Test-NetConnection -ComputerName '<domain-controller-fqdn>' -Port 389
w32tm /query /status
Replace the example domain with the domain built in your lab. Kerberos authentication can fail when the client and domain controller clocks differ significantly.
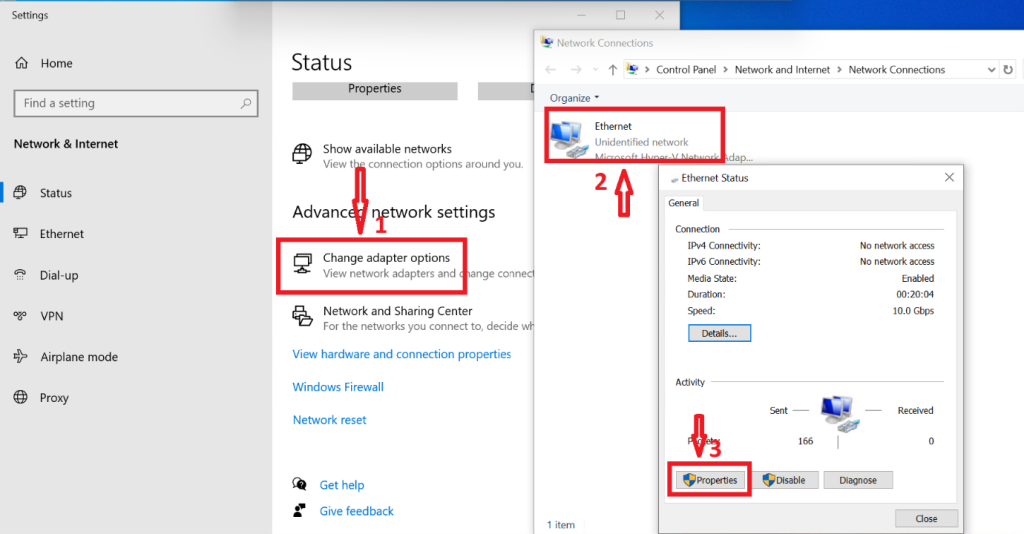
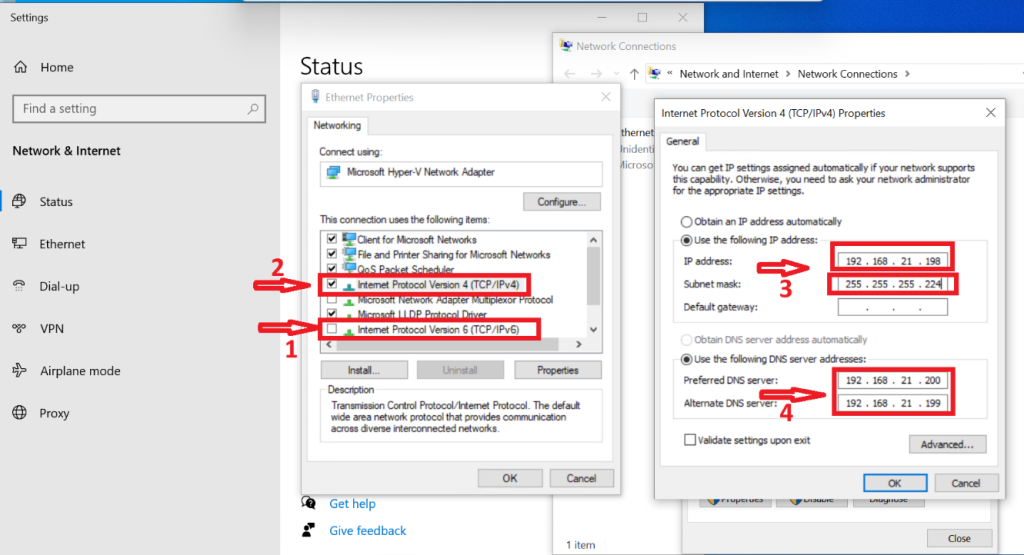
Step 3: Join the Client to the Domain
- Join the client computer to the existing Active Directory domain
- Authenticate using domain administrator credentials
- Restart the client system when prompted
Ping the DNS IP address to contact the server
Opened System Settings → Changed PC name (ClientPC-01)
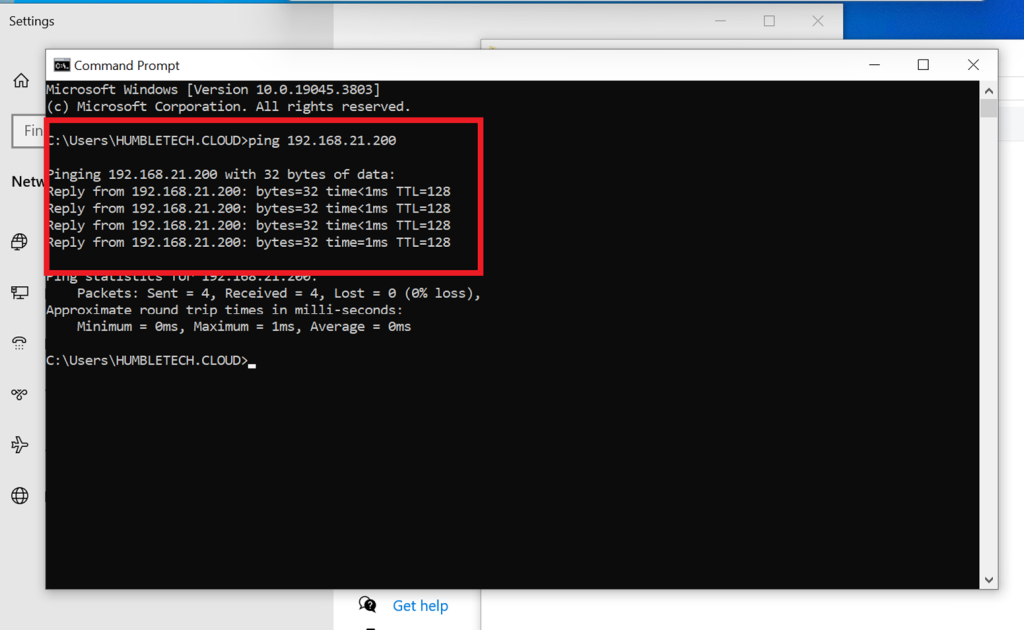
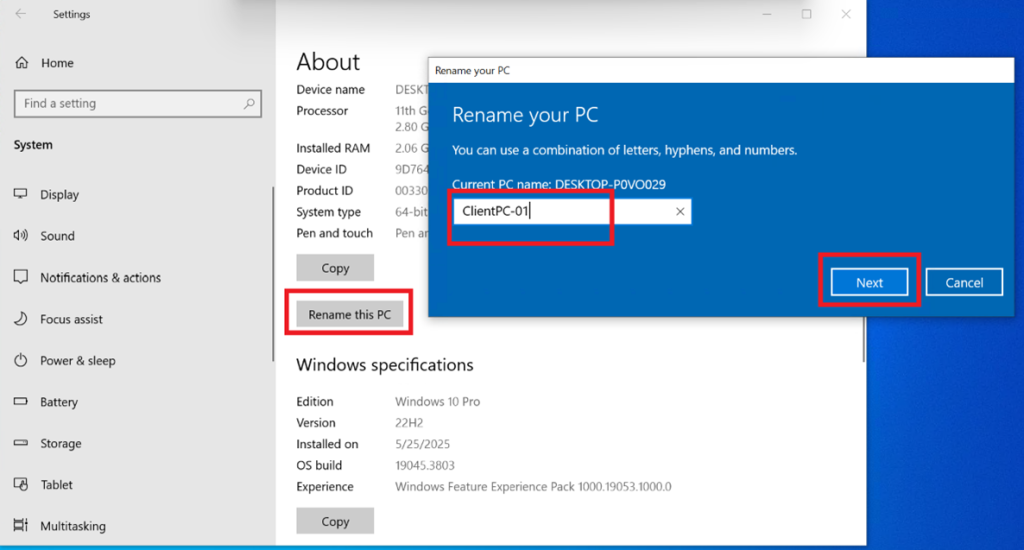
→ Selected Domain and entered Domain (humbletech.cloud)
→ Authenticate with an account delegated to join computers to the domain. A Domain Admin account is acceptable only as a temporary lab simplification, not as the normal operational design.
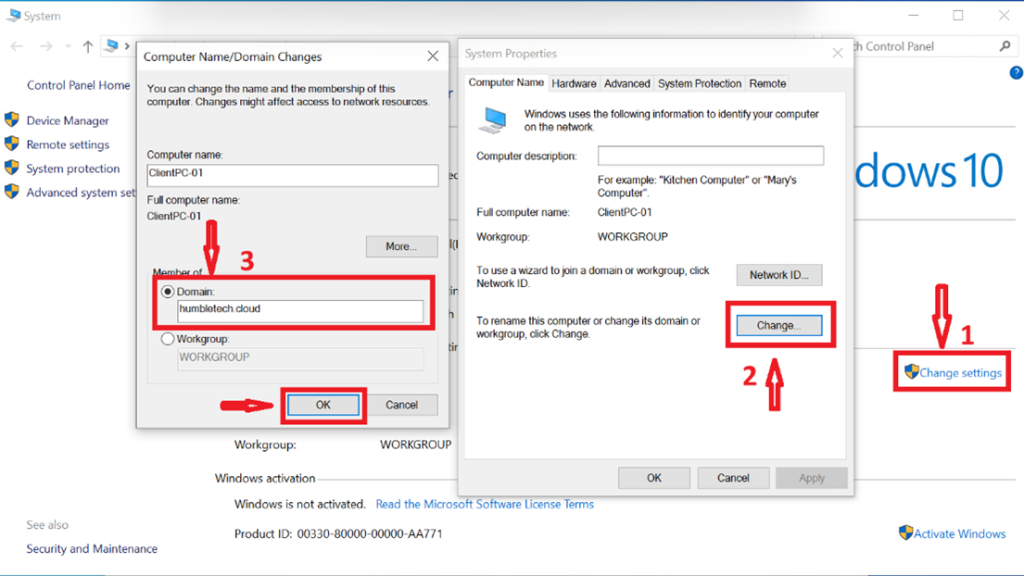
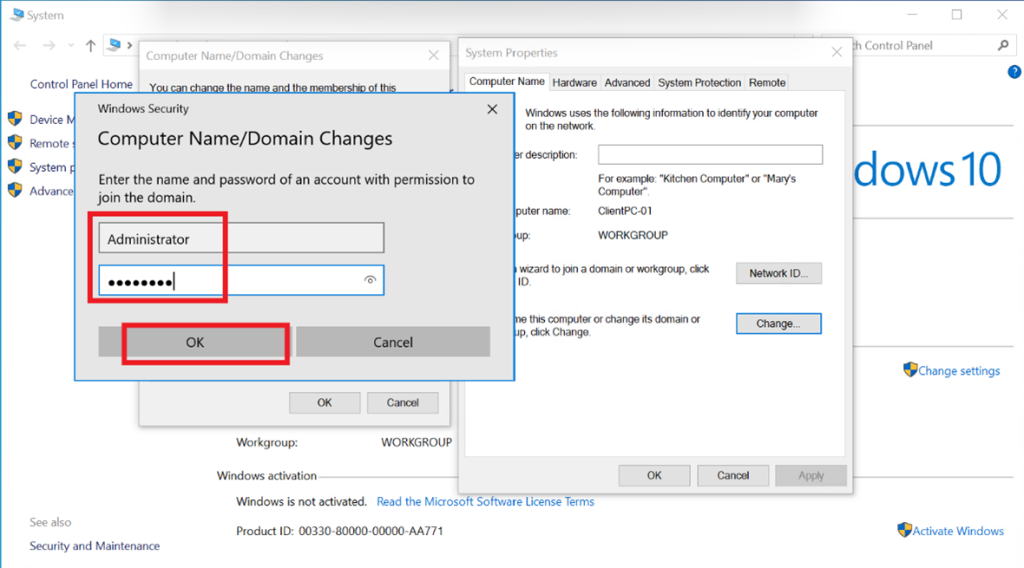
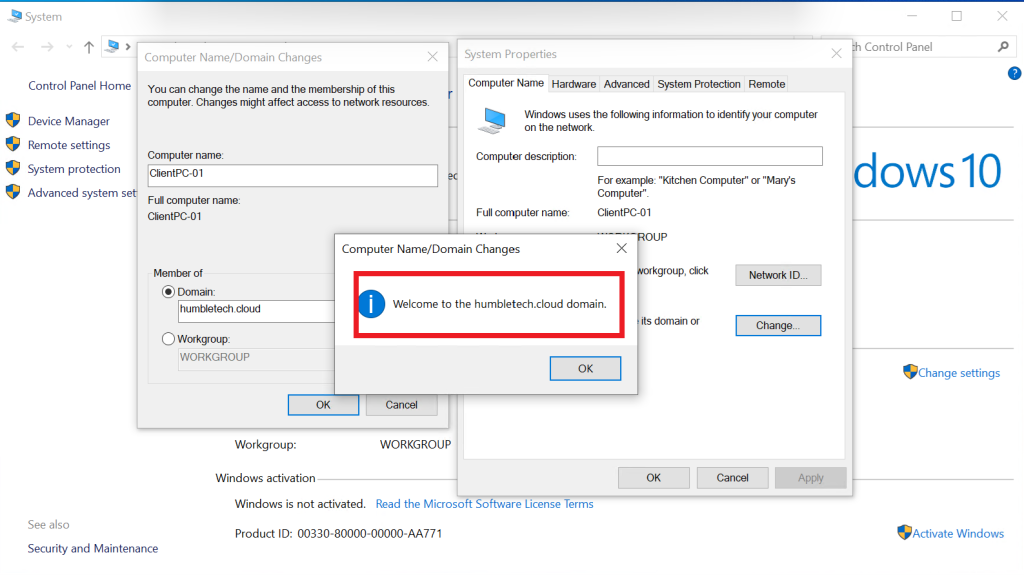
→ You will see a Message “Welcome to the (humbletech.cloud) Domain”
→ Restarted the VM
You can perform the same join through PowerShell:
$joinCredential = Get-Credential -Message 'Enter an account authorized to join devices'

Add-Computer `
    -DomainName 'humbletech.cloud' `
    -Credential $joinCredential `
    -Restart
Get-Credential prevents the password from being embedded in the command or article. In a managed environment, prestage the computer account in the correct OU and delegate the minimum required permissions instead of granting broad domain privileges.
Step 4: Verify Domain Membership
- Confirm the computer account appears in Active Directory Users and Computers
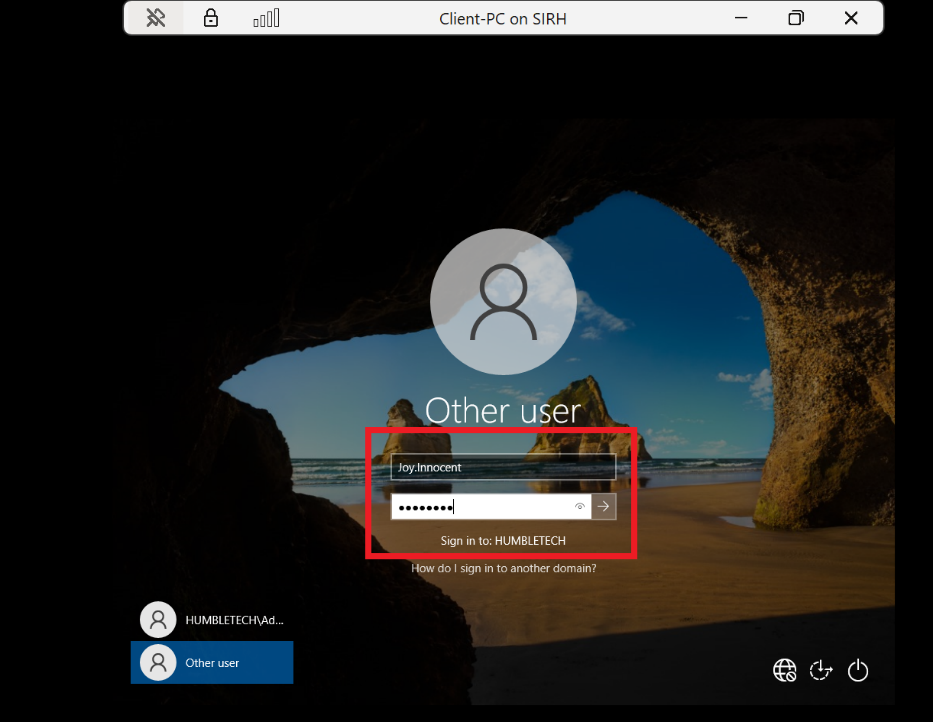
- Validate successful domain logon using a domain user account
Logged in with the domain user account
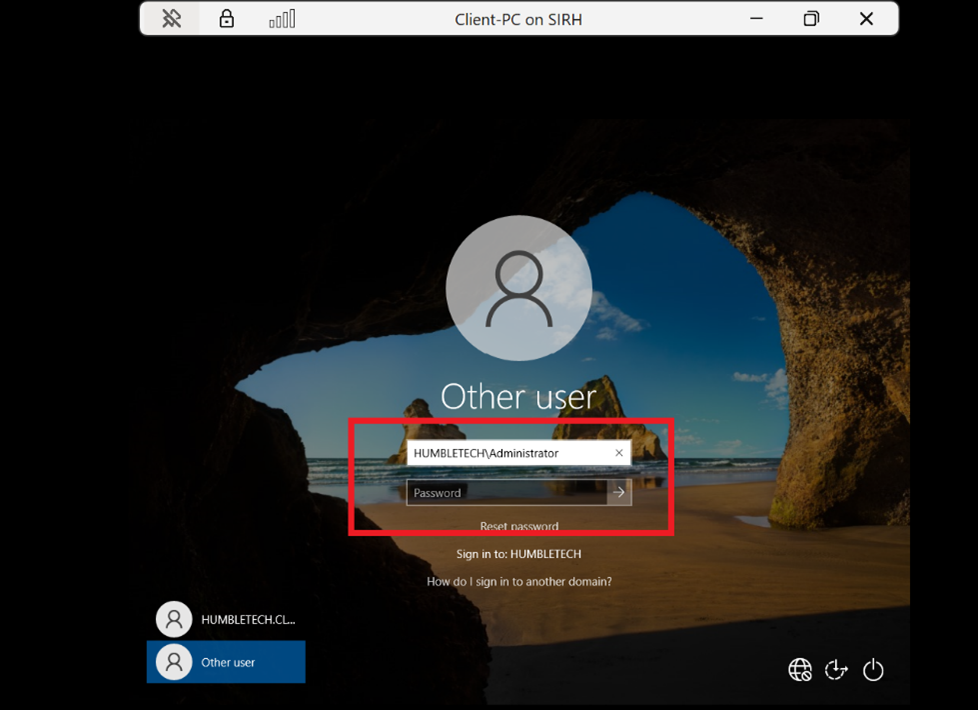
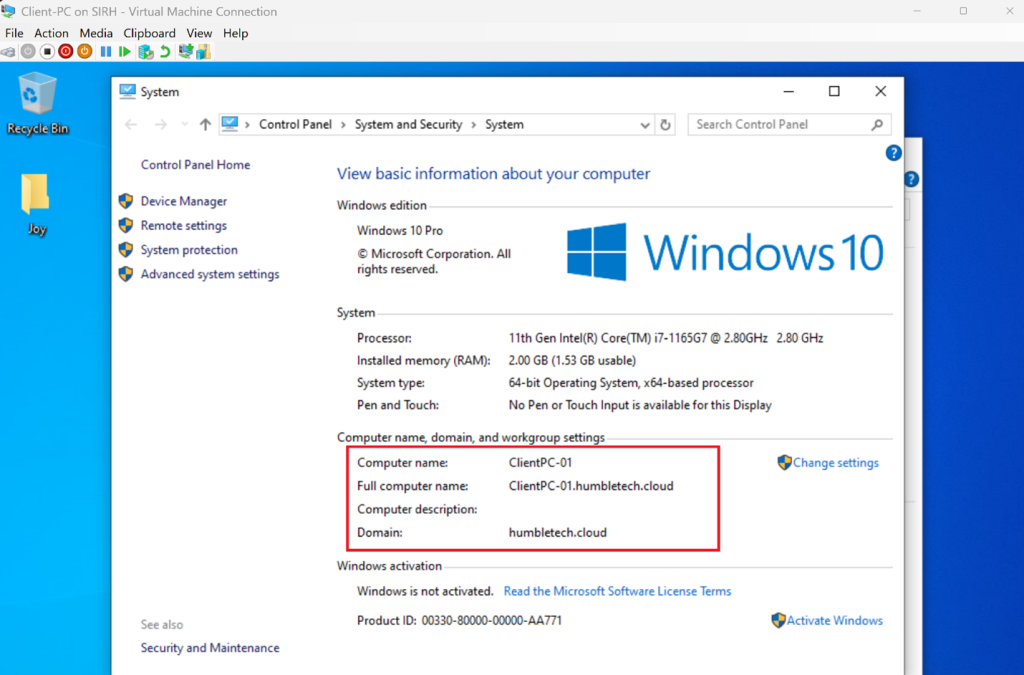
Confirmed in Active Directory Users and Computers (ADUC) that the machine appeared under Computers
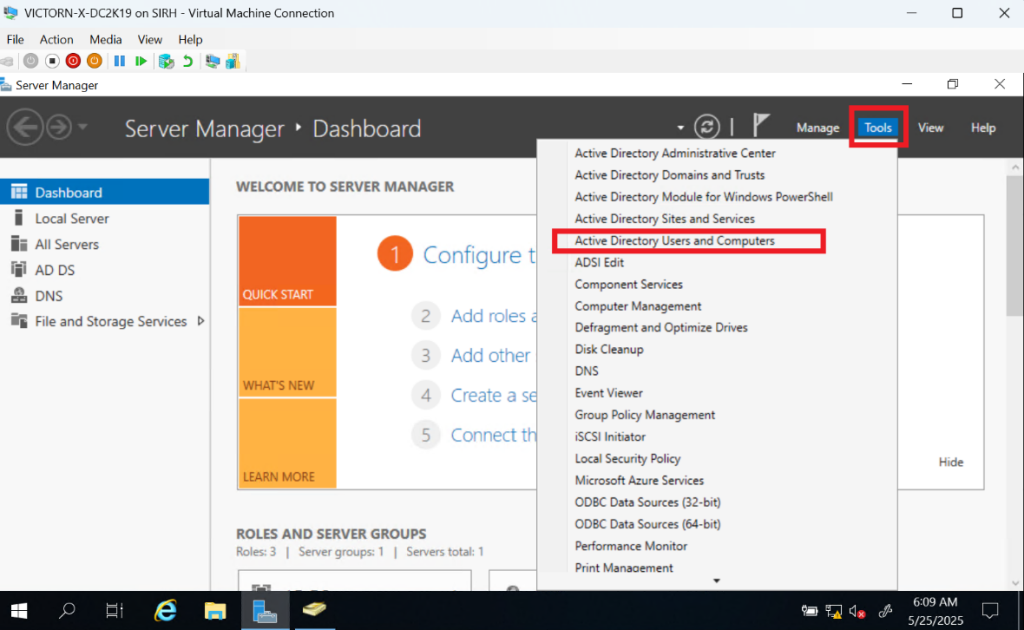
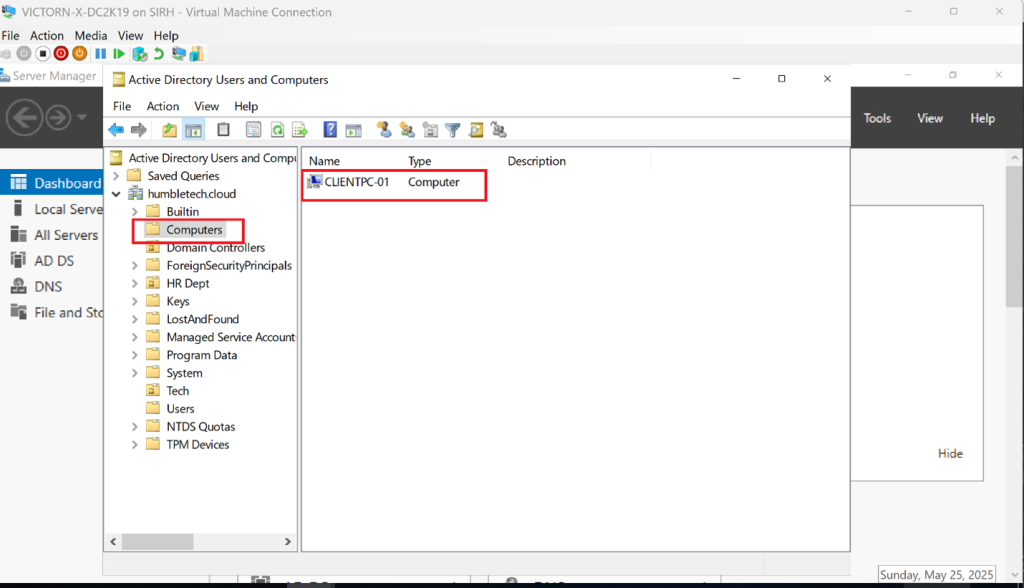
Congratulations! You Have Successfully Join a Windows Client to Active Directory on Windows Server 2019
Also verify the secure channel, domain discovery, DNS, and applied policy:
Get-CimInstance Win32_ComputerSystem |
    Select-Object Name, Domain, PartOfDomain

Test-ComputerSecureChannel -Verbose
nltest /dsgetdc:humbletech.cloud
gpresult /r
If the device appears in the default Computers container, move or prestage it in the workstation OU where the intended computer GPOs are linked. A container isn't an OU and can't have a GPO linked directly to it.
Troubleshooting Domain Join Failures
I check these in order:
- The client edition supports AD DS domain join.
- The client's DNS server is the internal AD DNS server.
- The domain SRV records resolve and required ports aren't blocked.
- Client and domain-controller clocks are synchronized.
- The joining identity has permission to create or reuse the computer account under current domain-join hardening rules.
- A stale computer account with the same name isn't blocking reuse.
- The NetSetup log at
C:\Windows\debug\NetSetup.logcontains the exact join error.
Why This Lab Matters
Domain-joined client computers are essential for:
- Centralized user authentication
- Applying and testing Group Policy Objects (GPOs)
- Enforcing enterprise security controls
- Simulating hybrid and cloud-integrated identity environments
Microsoft documentation treats domain-joined clients as a core component of Active Directory infrastructure.
Lab Outcome
By the end of this lab, you will have:
- A Windows client VM successfully joined to the domain
- Verified communication between the client and Domain Controller
- A complete environment ready for Group Policy and security testing
This setup forms the foundation for advanced labs such as GPO deployment, login scripts, software distribution, and hybrid identity scenarios.
Continue with managing Active Directory OUs, groups, and users, then use the domain-joined client to validate the Group Policy lab.