Building reliable, scalable infrastructure starts with mastering the fundamentals. I revisited one of the most essential skills in systems administration: deploying and configuring Windows Server on Hyper‑V, complete with proper networking and static IP assignment.
This hands‑on project mirrors real enterprise workflows and lays the foundation for future services like DNS, Active Directory, DHCP, and RDP.
This is a lab, not a complete production build. A production Hyper-V design also needs host redundancy, storage and backup architecture, patching, monitoring, capacity planning, licensing, secure administration, and tested recovery.
Prerequisites and Lab Plan
Before starting:
- Confirm hardware virtualization and Data Execution Prevention are enabled in firmware.
- Confirm the Windows edition supports the Hyper-V role and the host has enough CPU, memory, and storage for both host and guests.
- Obtain a trusted Windows Server ISO and decide whether the lab uses Windows Server 2025, 2022, or an intentionally older version.
- I record the virtual-switch type, network prefix, gateway, DNS servers, and addresses reserved for infrastructure.
- I keep the lab isolated from production unless its routing, DHCP, and security effects are understood.
How I Built and Networked a Windows Server on Hyper‑V
- Enable Hyper‑V on Your Host Machine
Ensure your Windows 10/11 Pro or Enterprise supports virtualization.
Enable Hyper‑V through Control Panel → Programs and Features → Turn Windows features on or off → Hyper‑V
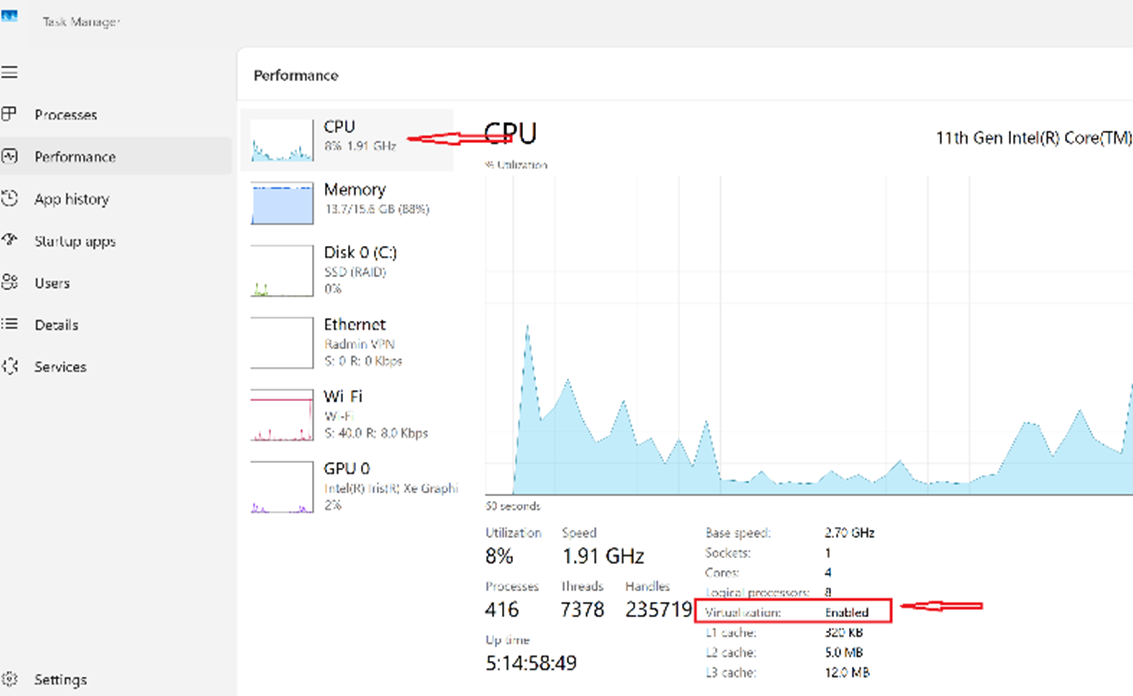
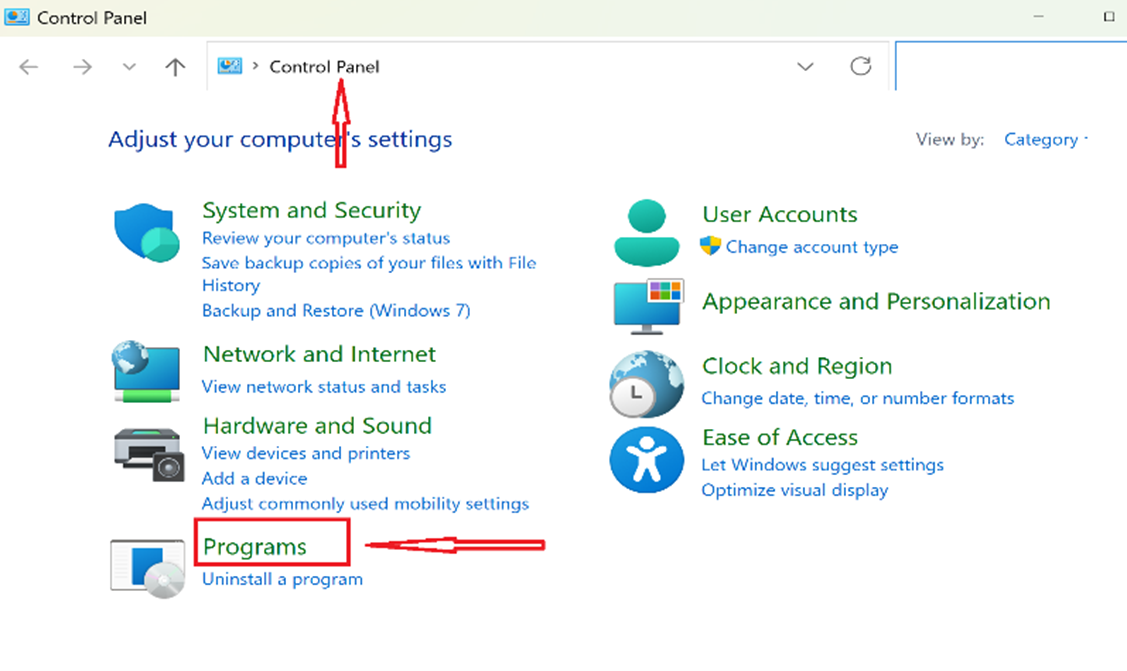
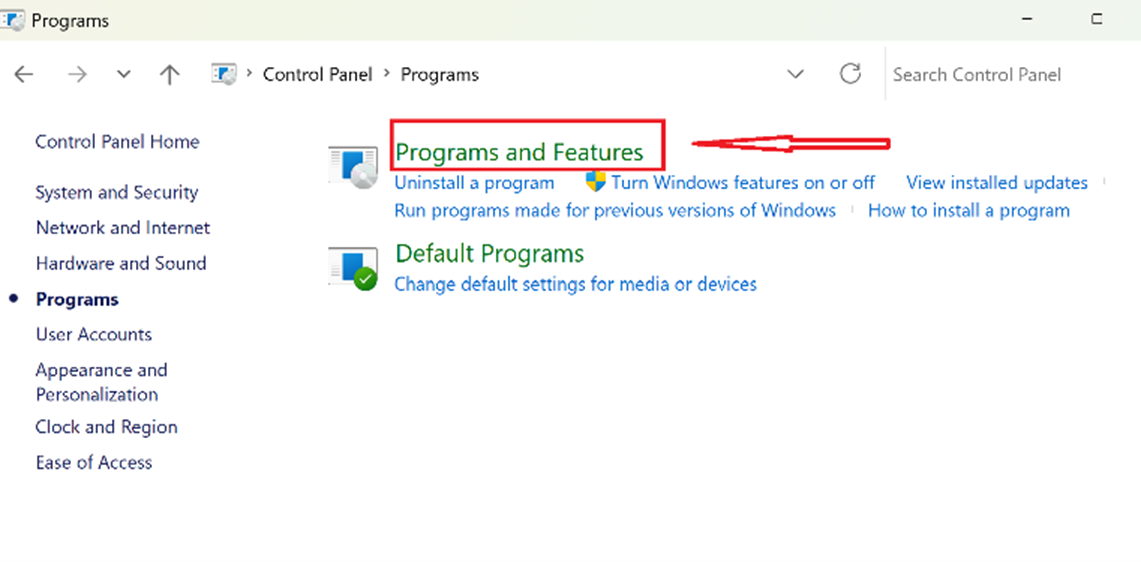
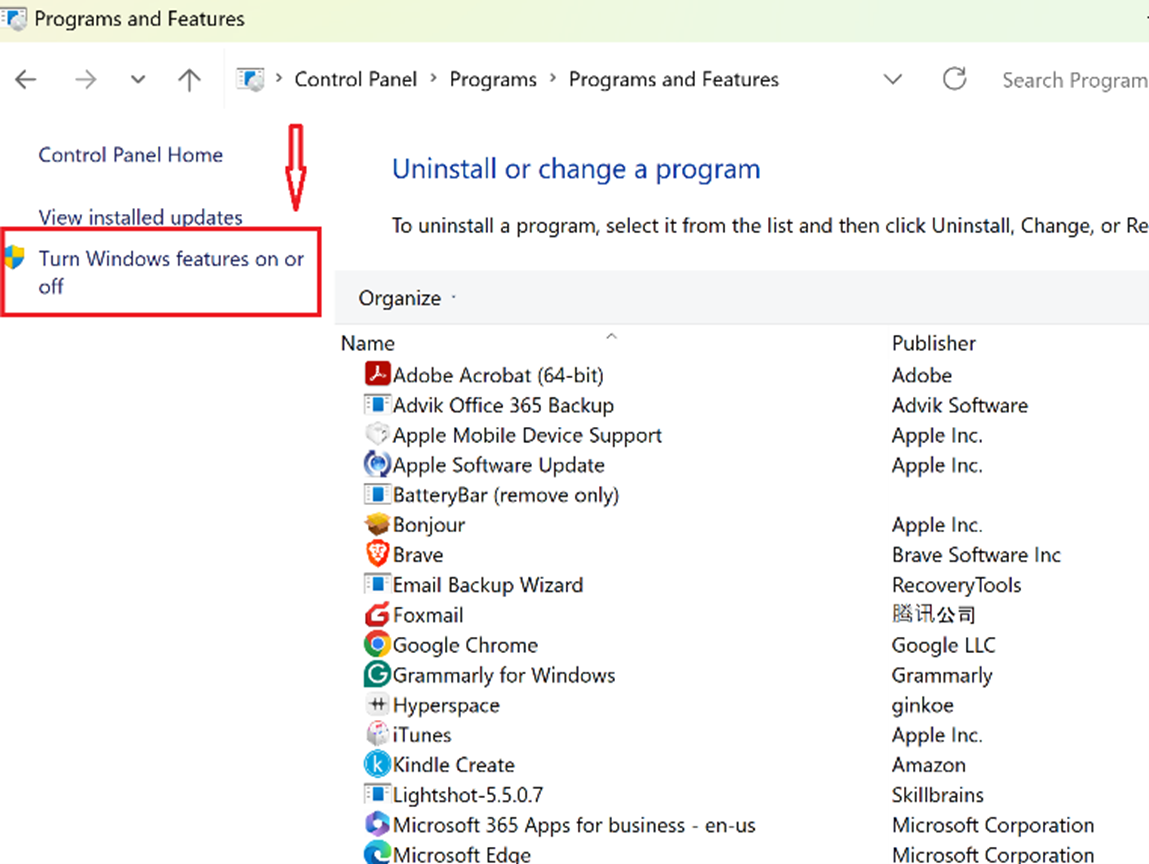
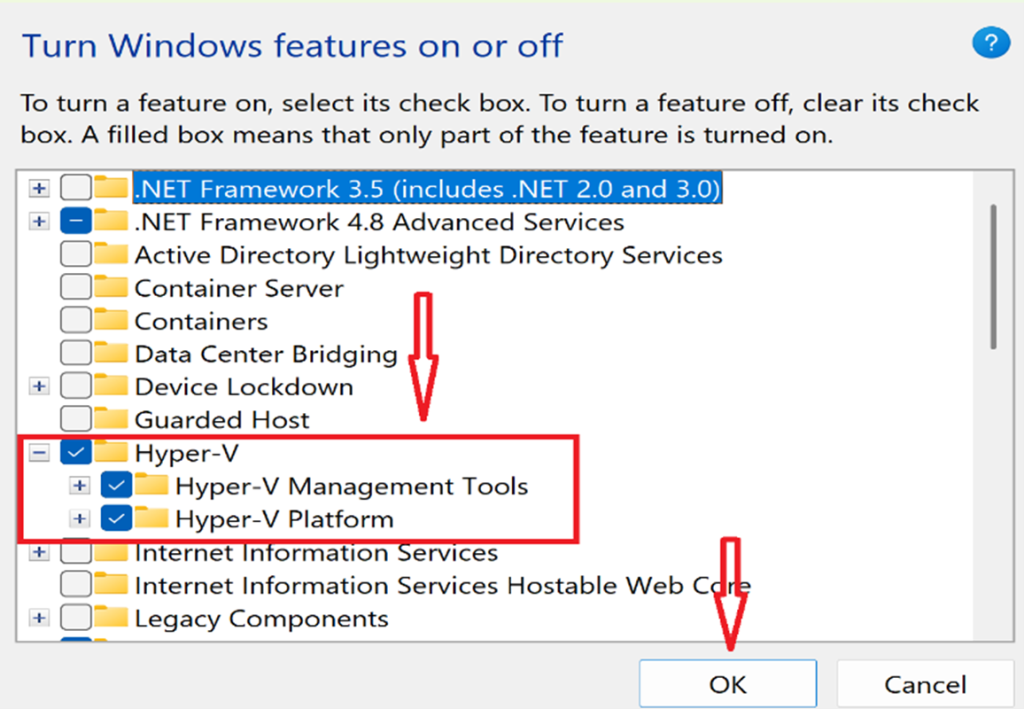
Reboot when prompted.
- Launch Hyper‑V Manager
Open the Start Menu → Search Hyper‑V Manager → Launch.
- I create a Virtual Switch
This provides network access for your VM.
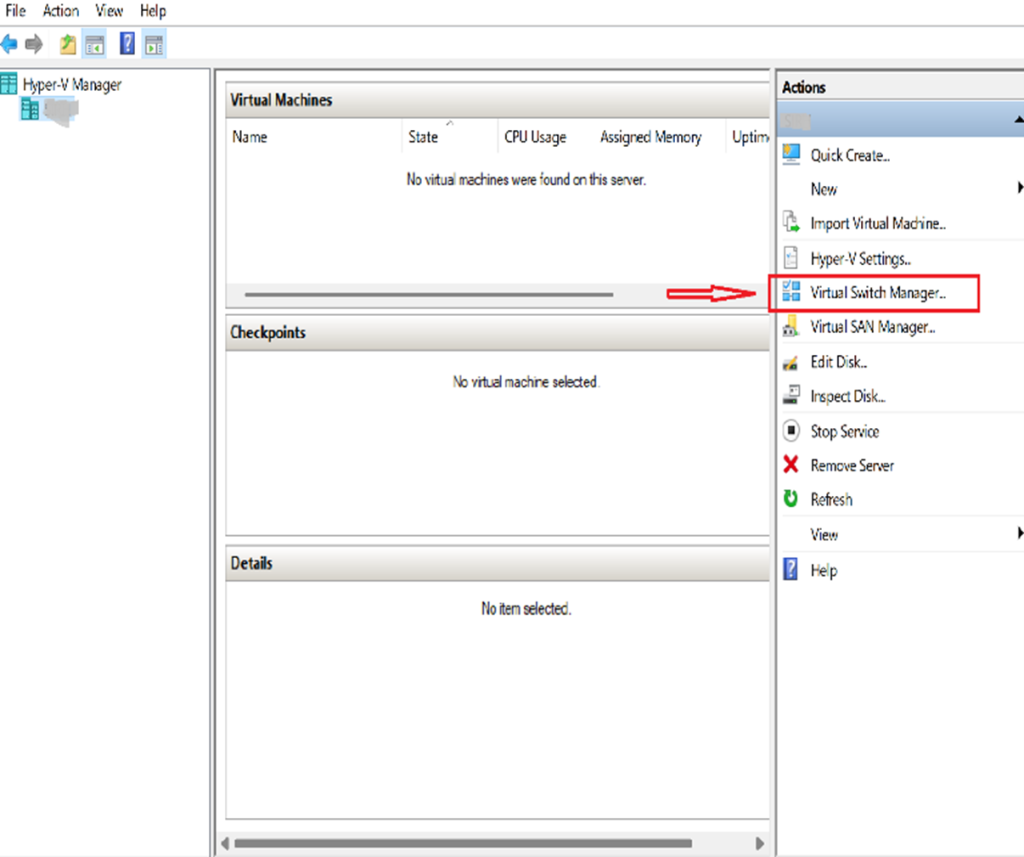
In Hyper‑V Manager:
- Open Virtual Switch Manager
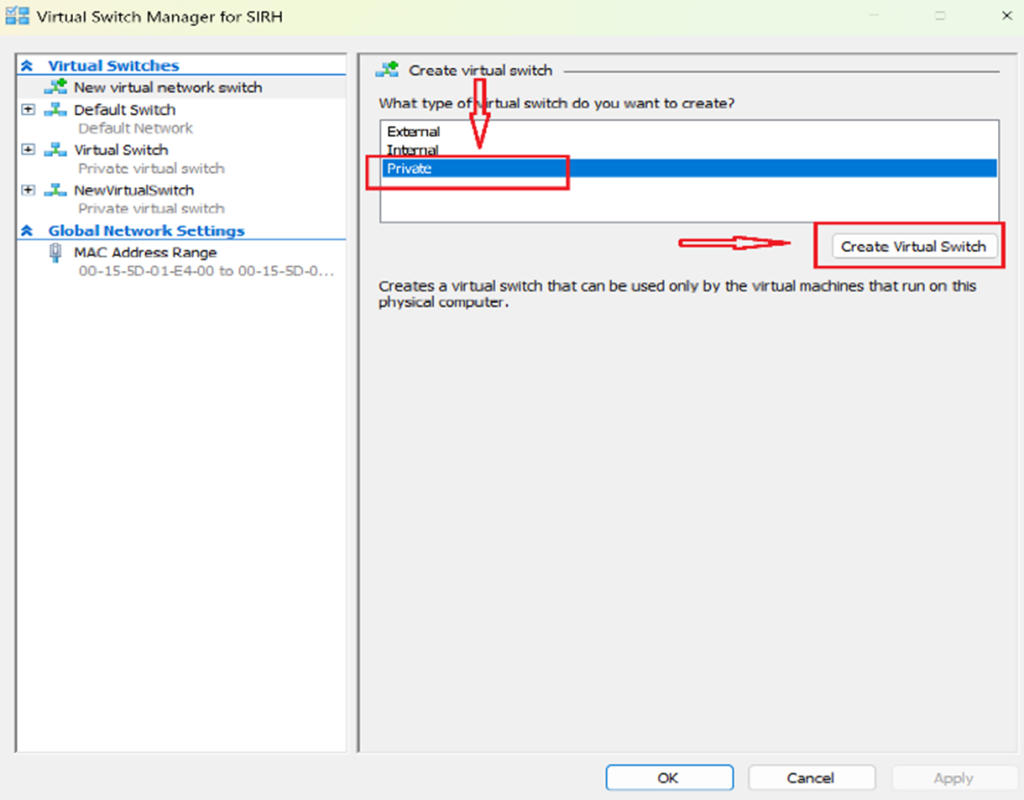
- Choose the switch type that matches the lab
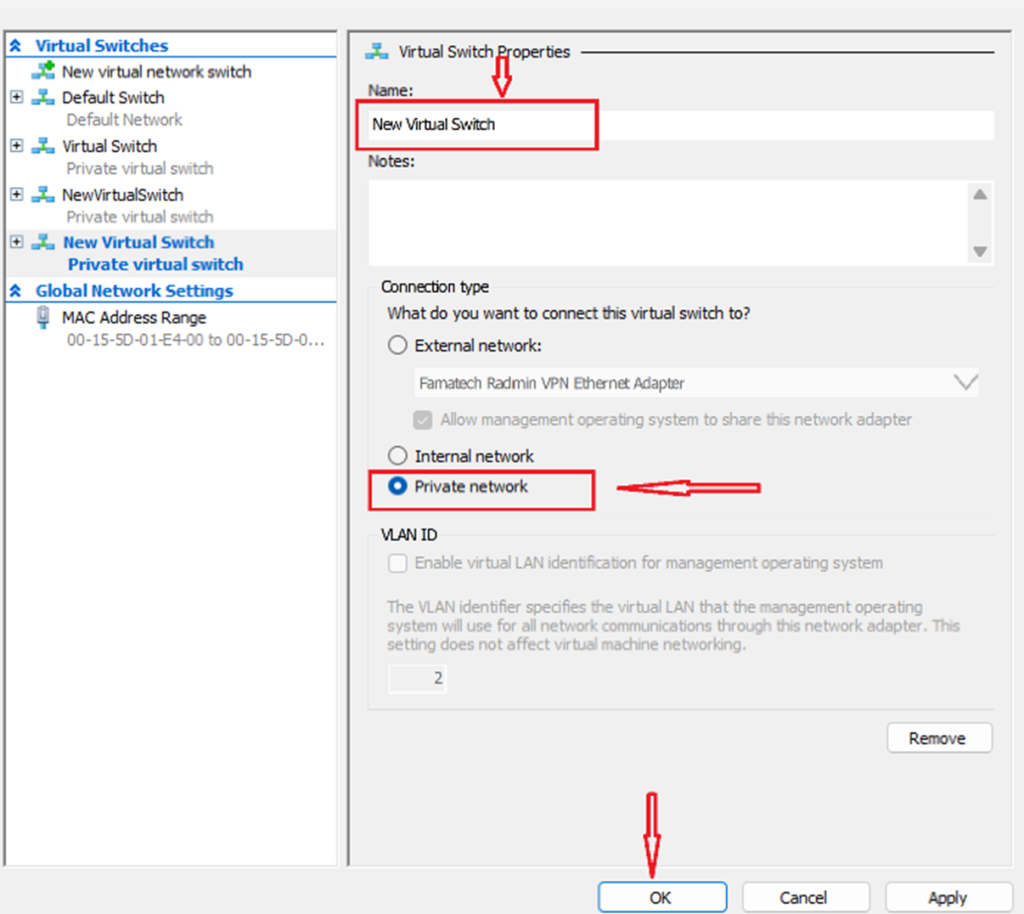
- Bind a physical adapter only when creating an External switch
- Name it (e.g., NewVirtualSwitch)
- Click Apply
Hyper-V provides three switch types:
- External connects VMs to the physical network through a selected host adapter.
- Internal connects VMs to each other and to the Hyper-V host, but not directly to the physical network.
- Private connects only VMs attached to that switch; the host itself isn't connected.
For an isolated AD lab, an internal or private switch reduces the chance of accidentally advertising lab services on the physical LAN. Internet access on an internal lab network requires an intentional NAT or routing design.
- I create a New Virtual Machine
In Hyper‑V Manager:
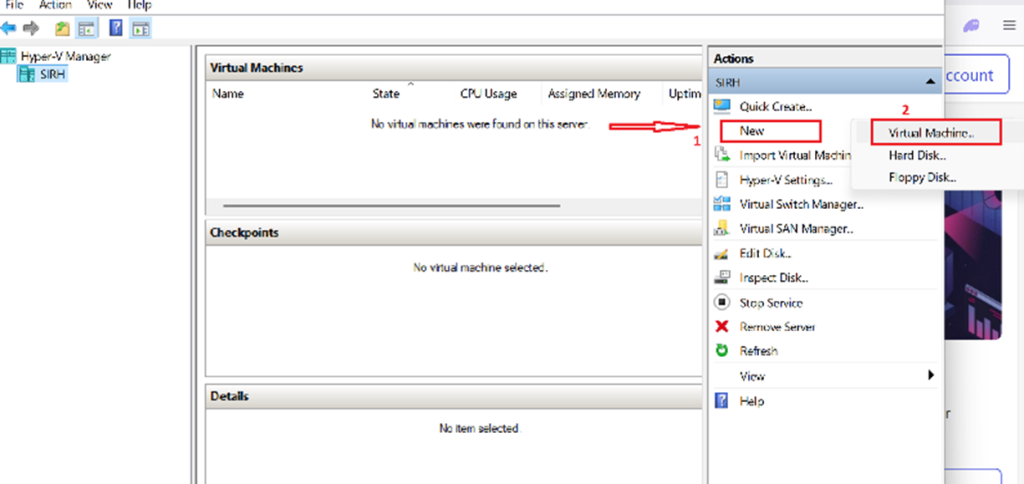
- Right‑click your host → New → Virtual Machine
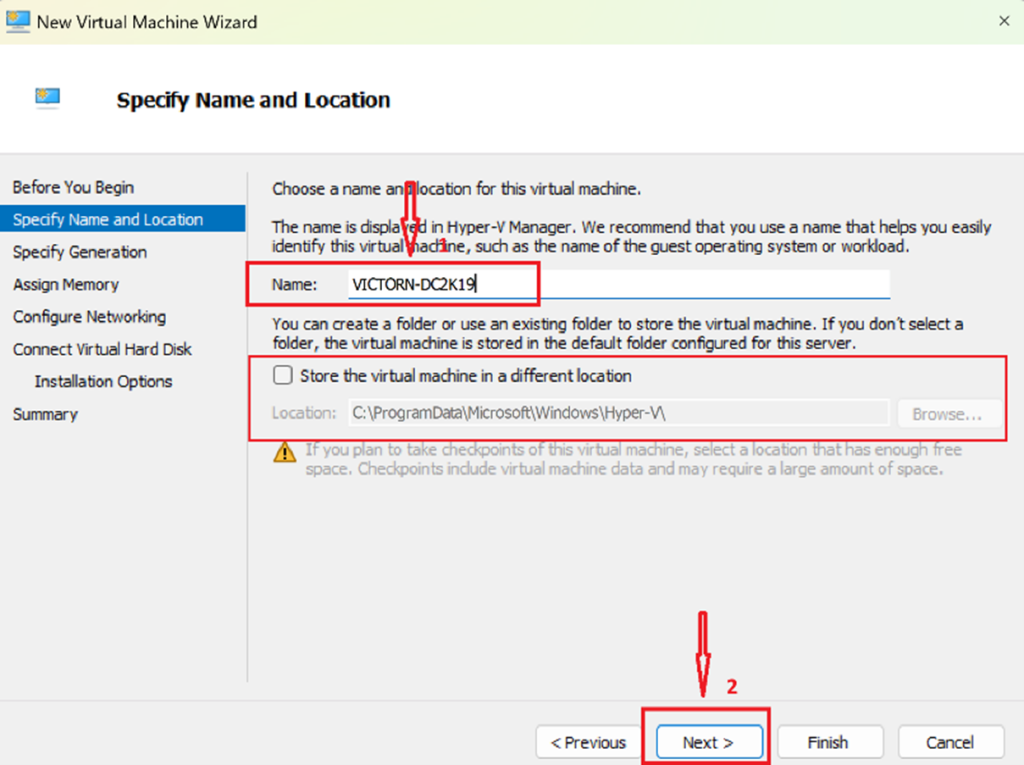
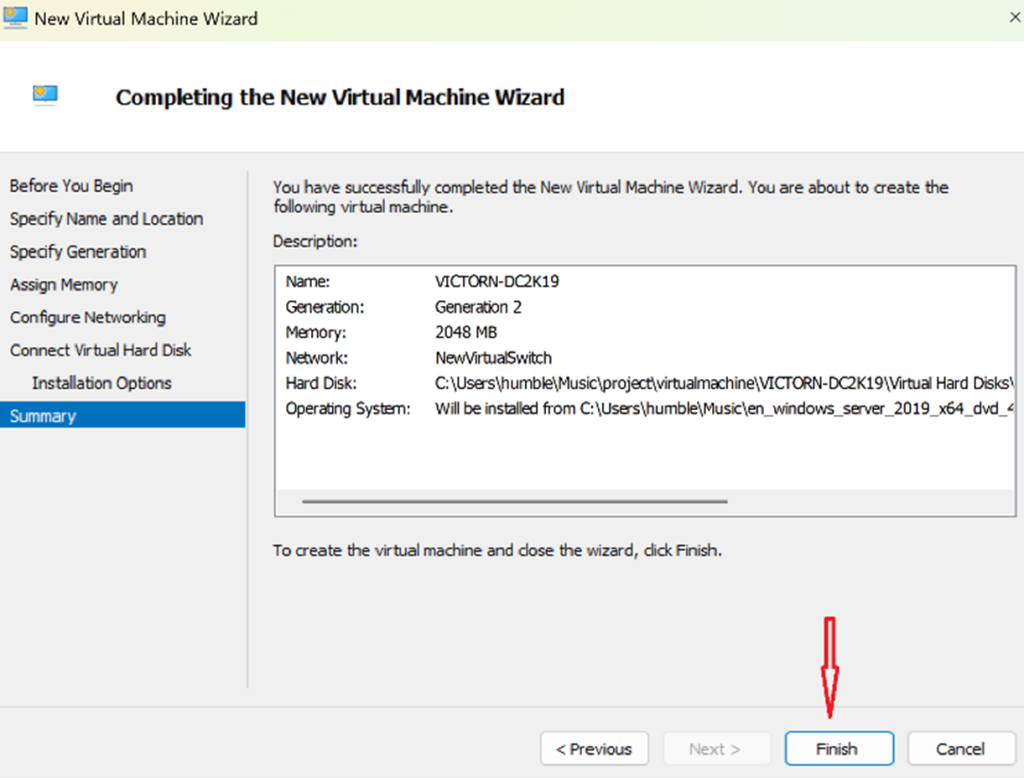
Name your VM (e.g., VICTORN‑DC2K19)
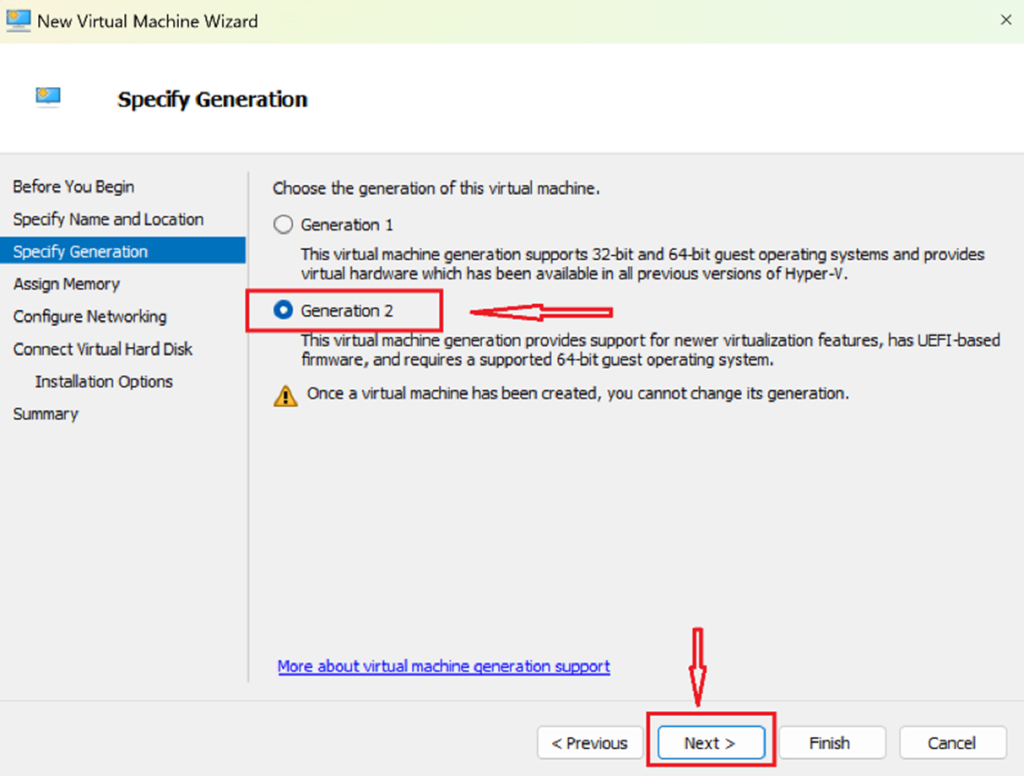
- Select Generation 2
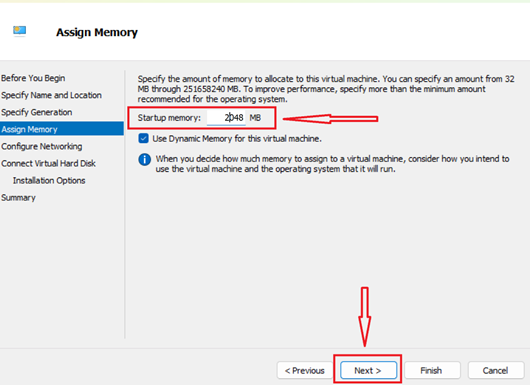
- Assign memory (2–4 GB minimum depending on your host)
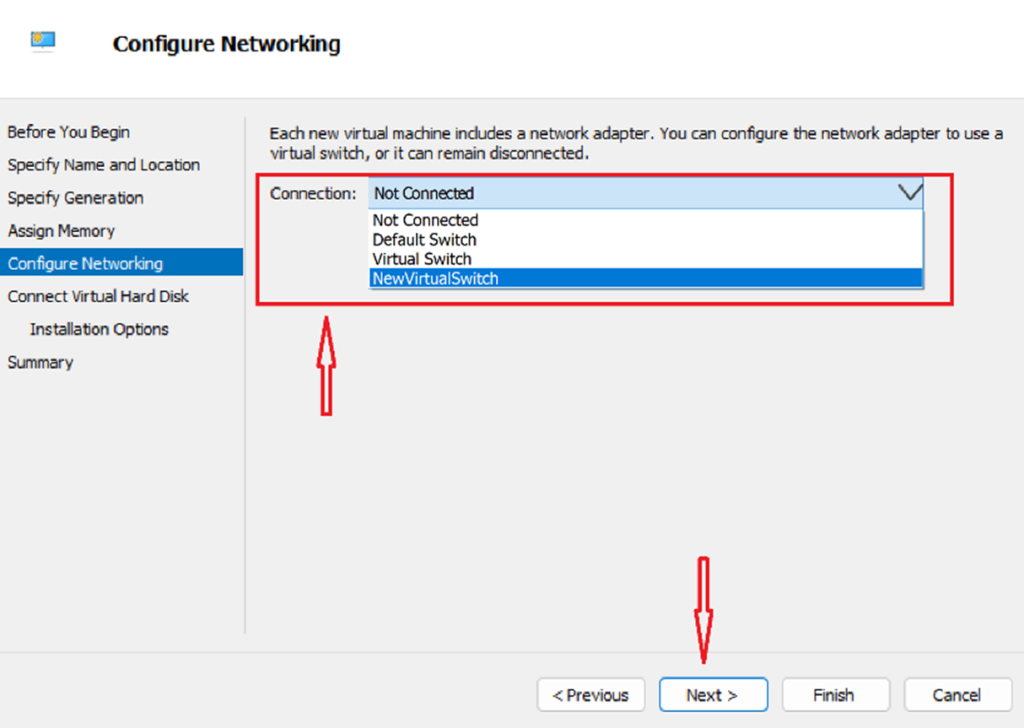
- Select the virtual switch you created
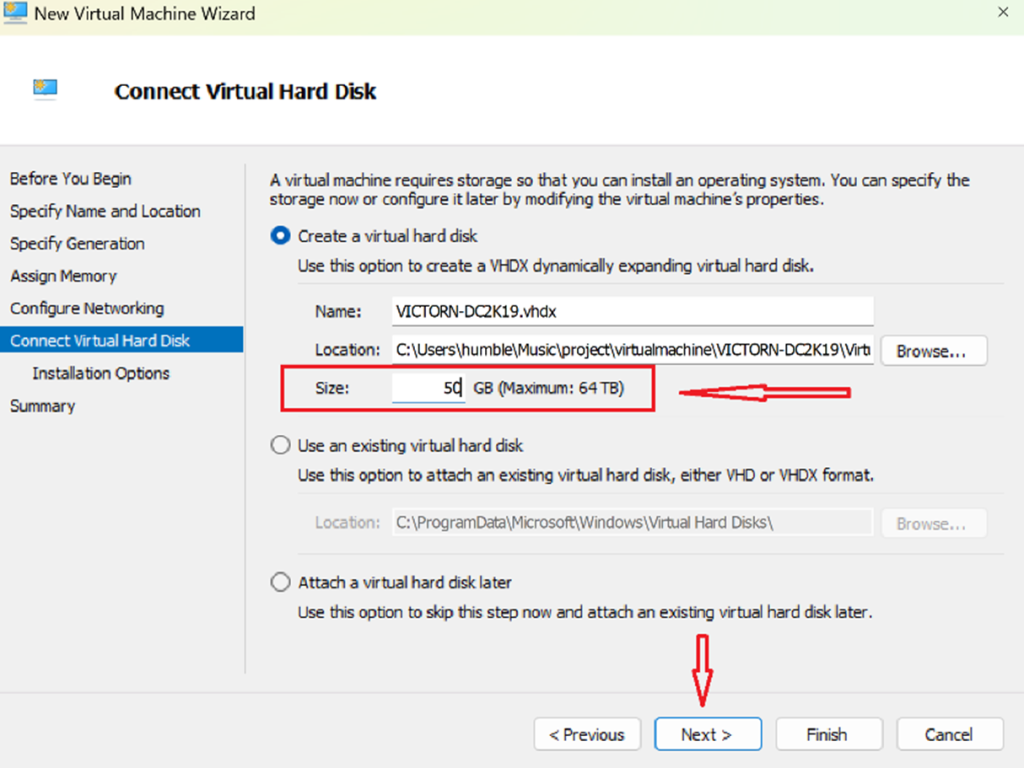
- I create a new virtual hard disk (40 GB or more)
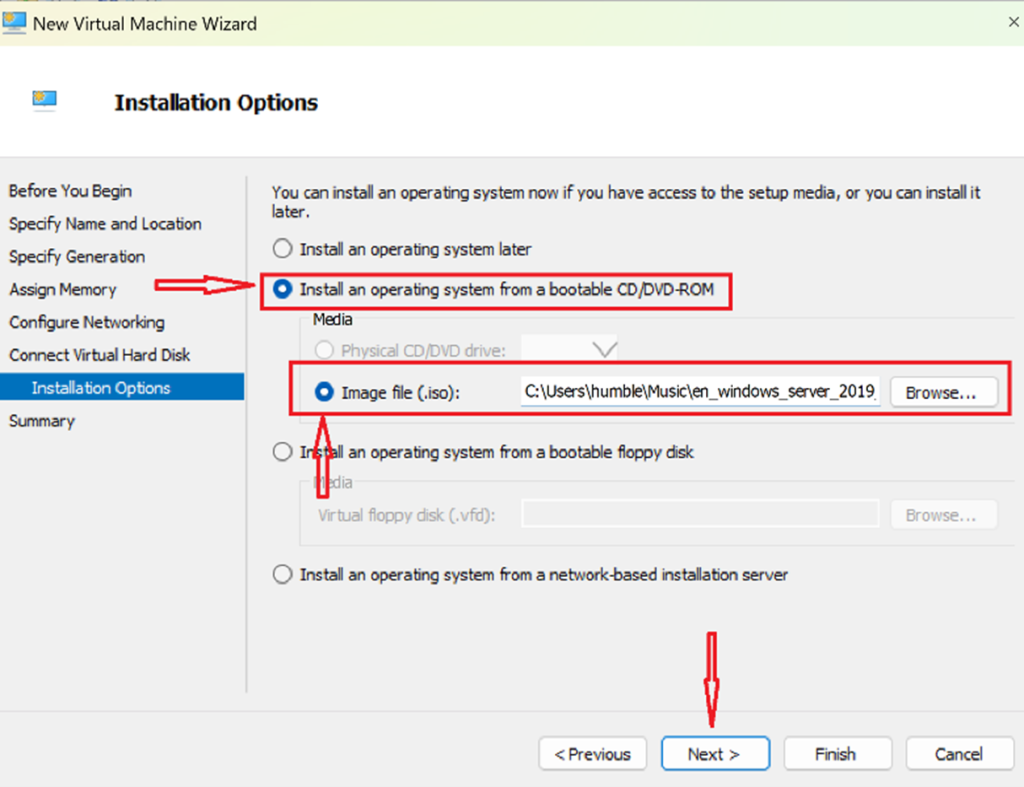
- Mount the Windows Server ISO
- Install Windows Server
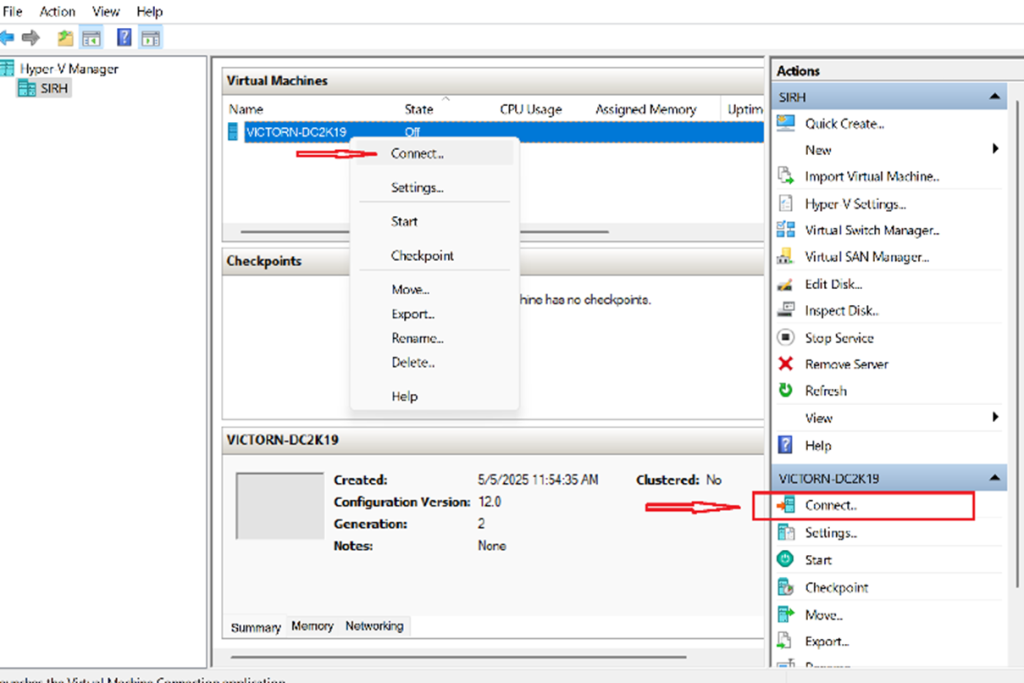
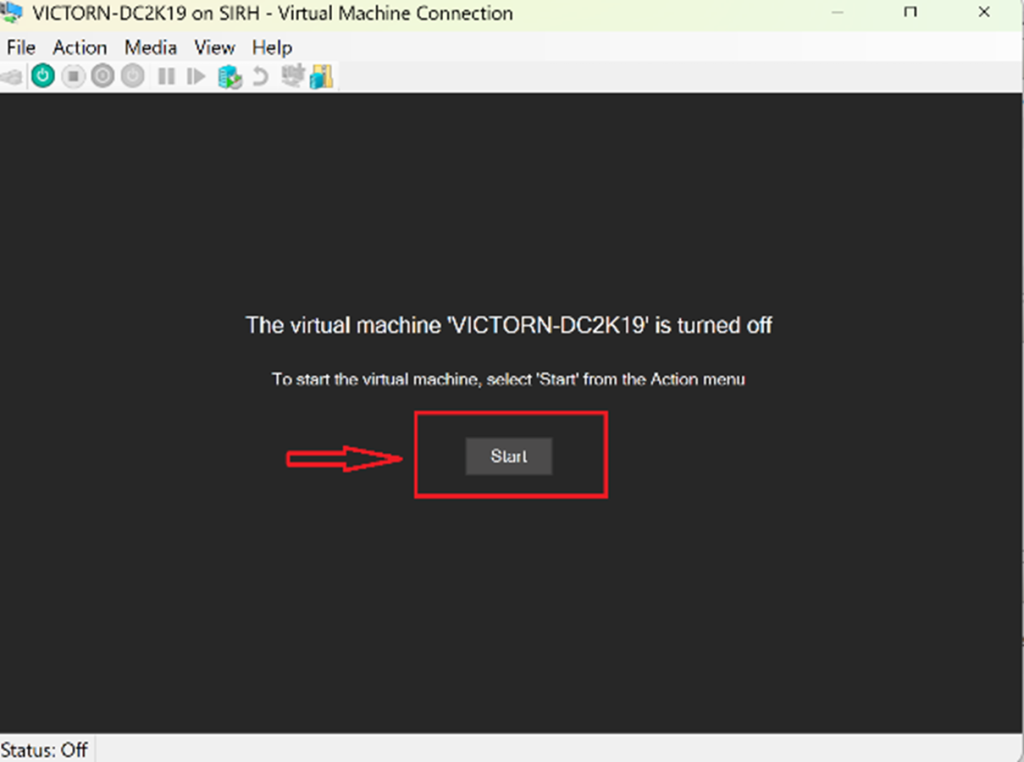
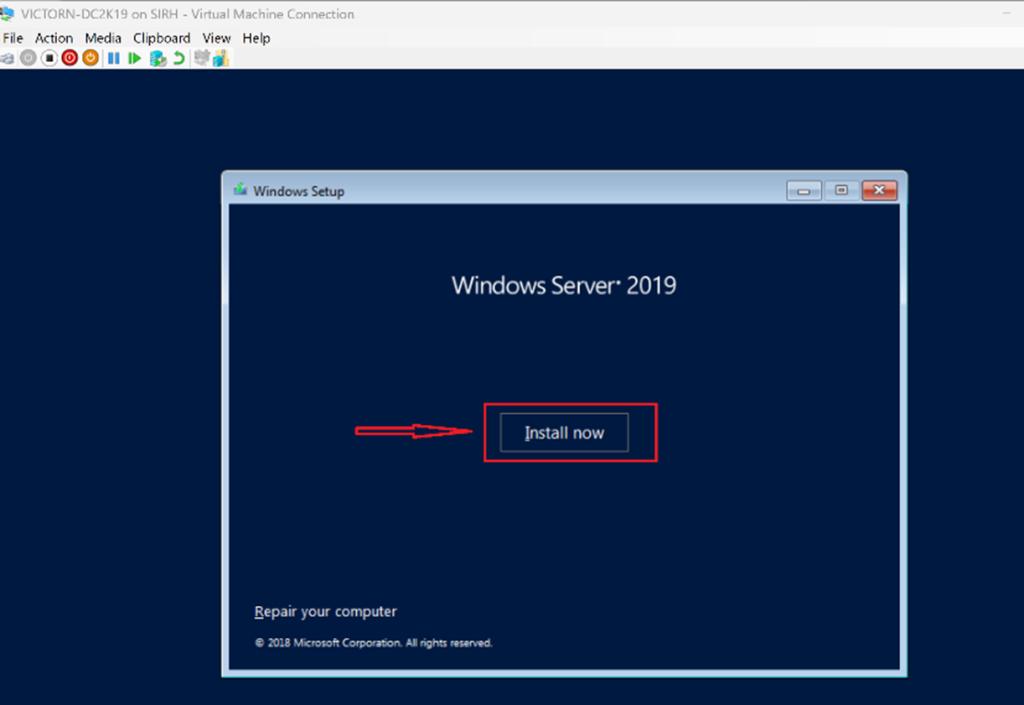
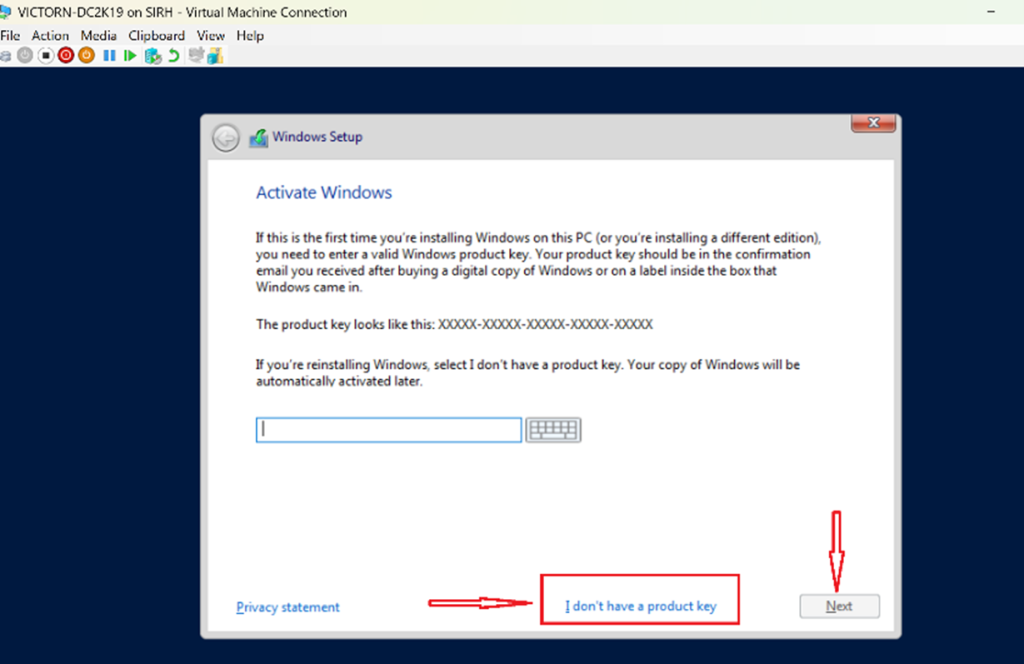
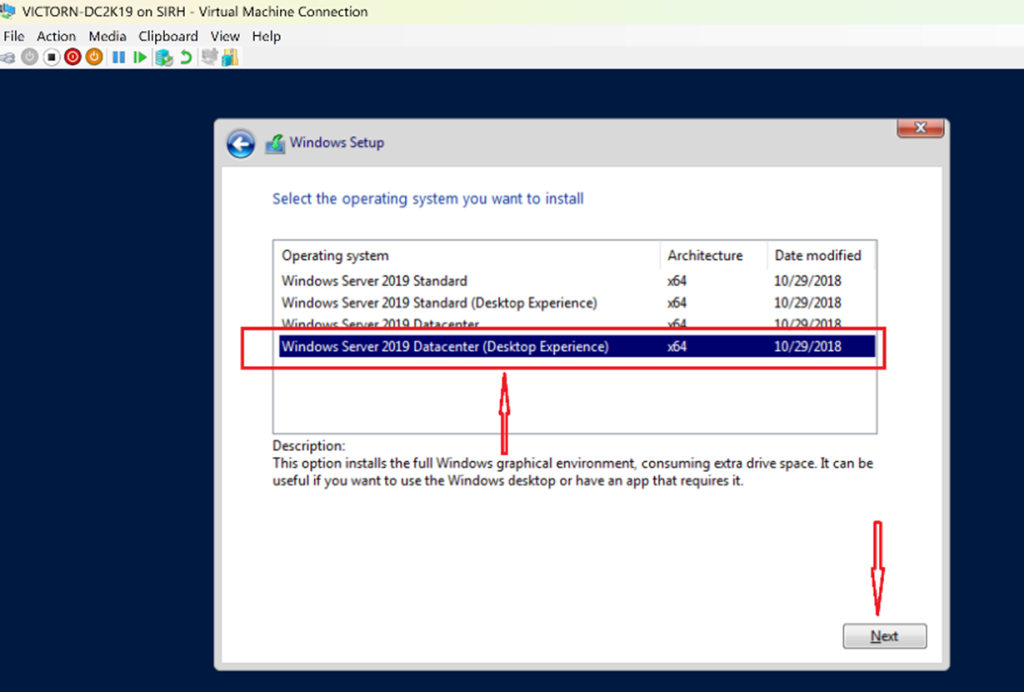
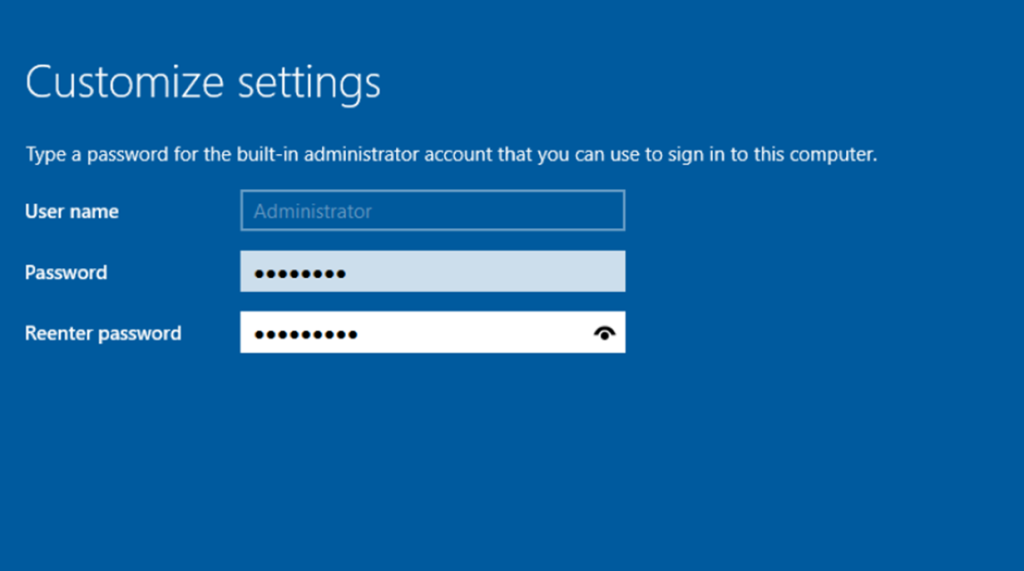
I start the VM → Open the console → Follow the installation wizard:
- Choose edition
- Set administrator password
- Complete setup
- Configure Initial Network Settings
Inside the VM:
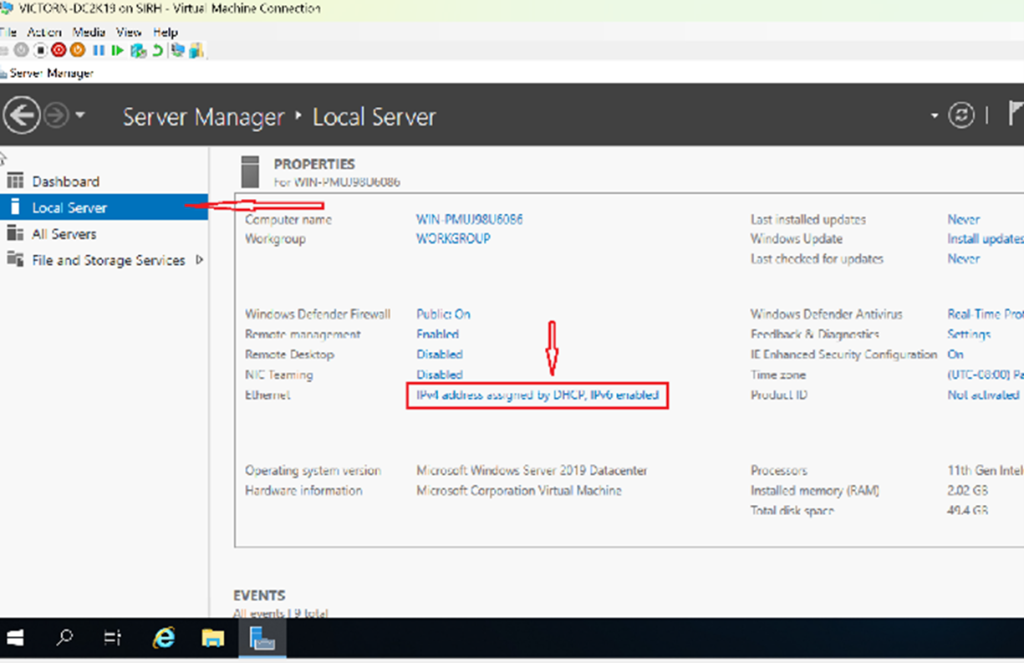
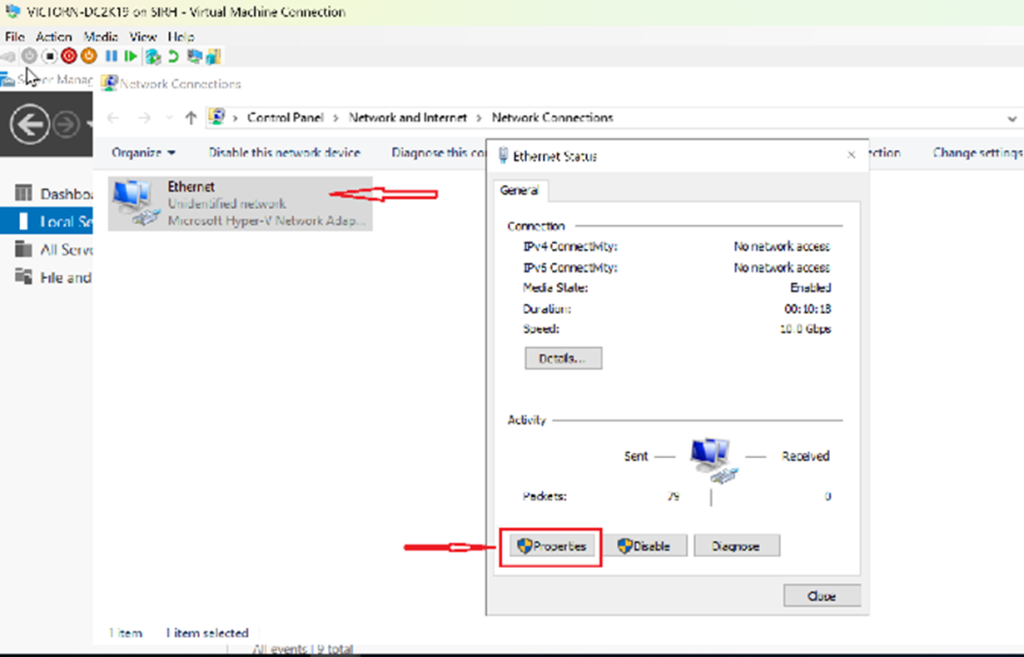
- Open Network & Sharing Center
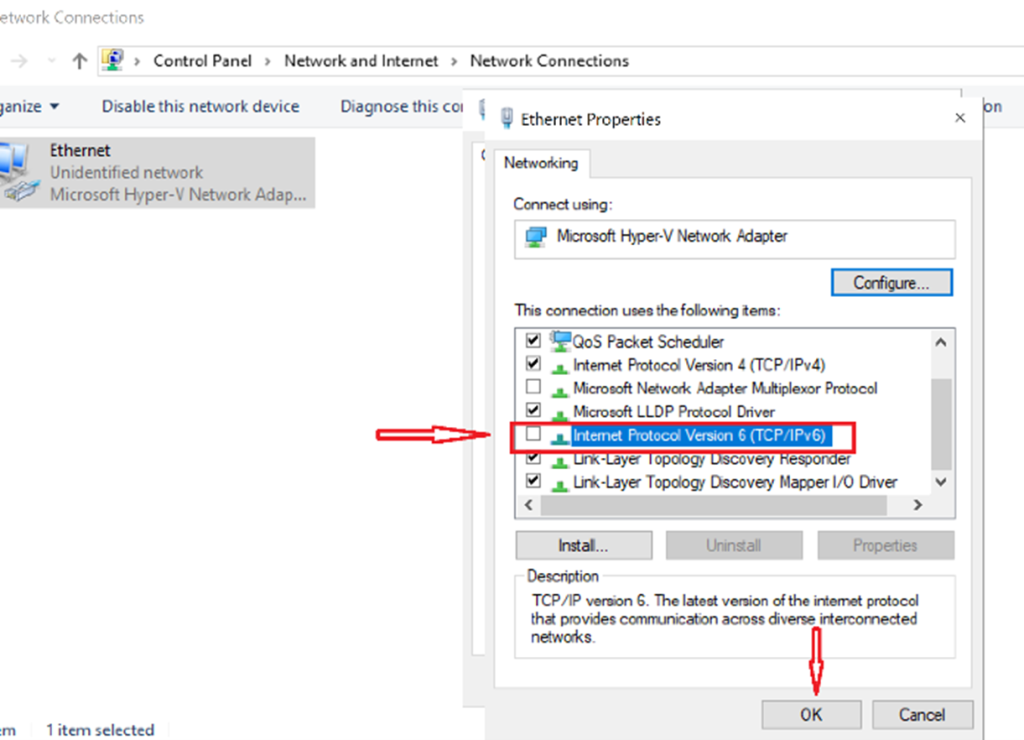
- Leave IPv6 enabled unless a documented, tested application requirement says otherwise
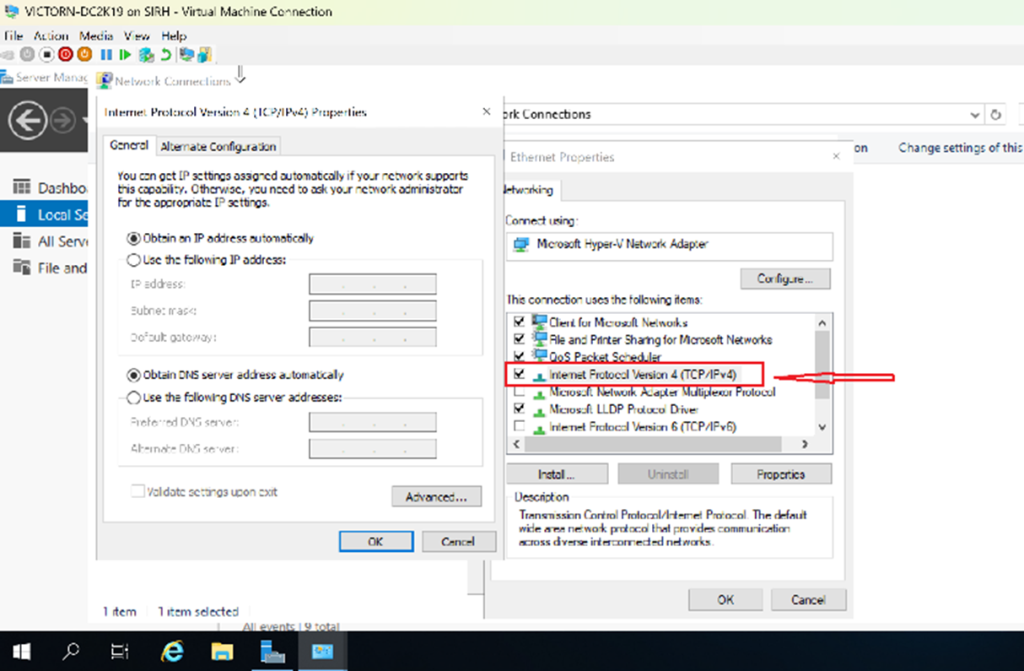
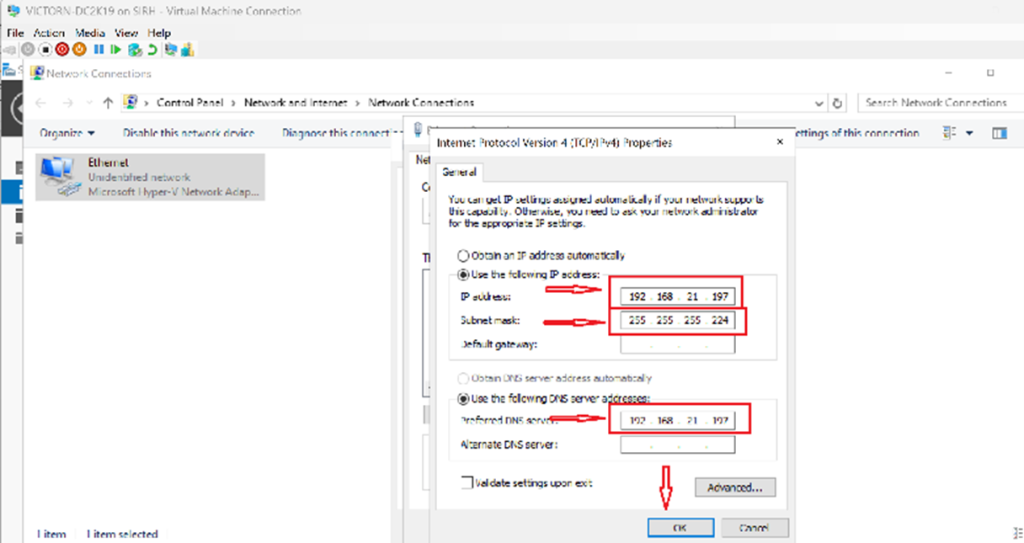
- Open IPv4 settings → Assign a static IP address
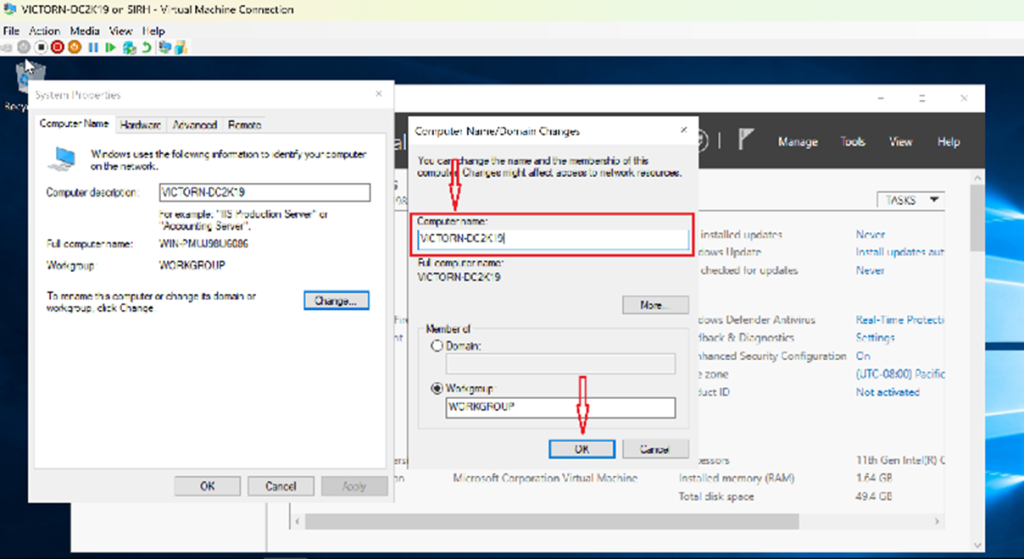
- Rename the server
Microsoft doesn't recommend disabling or unbinding IPv6. Windows components expect it to be available, and removing it can create an unsupported configuration. If troubleshooting requires IPv4 preference, use Microsoft's prefix-policy guidance rather than disabling IPv6.
Understanding the IP Address Used
The lab network is 192.168.21.0/24. That value identifies the subnet; it isn't a usable address for the server. A complete example plan is:
- Hyper-V host or lab gateway:
192.168.21.1 - First domain controller:
192.168.21.10 - Future second domain controller:
192.168.21.11 - DHCP dynamic pool:
192.168.21.100-192.168.21.199 - Subnet prefix:
/24
I use values that match your actual virtual-switch and routing design. Don't copy this gateway if no router exists on the isolated switch.
Breakdown
- IP Address Range: 192.168.21.0/24
- Subnet Mask: 255.255.255.0
- Network Address: 192.168.21.0
- Usable Host Range: 192.168.21.1 - 192.168.21.254
- Total Usable Hosts: 254
The /24 prefix means the first 24 bits define the network portion, leaving 8 bits for host addresses.
For the first domain controller that also hosts DNS, configure its DNS client to point to its own static address after AD DS/DNS is installed. Member servers and clients should use the internal AD DNS server, not a public DNS resolver; the AD DNS server can forward unresolved internet queries upstream.
Configure and Verify with PowerShell
The GUI is useful for learning, but recordable commands make the final state easier to verify. Replace the interface alias and addresses with the lab plan:
Get-NetAdapter

New-NetIPAddress `
    -InterfaceAlias 'Ethernet' `
    -IPAddress '192.168.21.10' `
    -PrefixLength 24 `
    -DefaultGateway '192.168.21.1'

Set-DnsClientServerAddress `
    -InterfaceAlias 'Ethernet' `
    -ServerAddresses '192.168.21.10'

Rename-Computer -NewName 'LAB-DC01' -Restart
If the isolated network has no gateway, omit -DefaultGateway. After restart, verify the result:
Get-NetIPConfiguration
Get-DnsClientServerAddress -AddressFamily IPv4
Test-NetConnection 192.168.21.1
Operational Checklist
- Install Windows updates before promoting the server to a domain controller.
- Confirm the time zone and time source; Kerberos is sensitive to clock differences.
- I use a checkpoint only as a short-lived lab convenience, not as an AD DS backup strategy.
- Protect the host and VM administrator credentials.
- Document the ISO version, VM generation, virtual switch, MAC/IP allocation, disk location, and recovery method.
- I test a clean shutdown and restart before installing directory services.
Key Takeaway
Deploying Windows Server on Hyper‑V with a properly planned static IP configuration is a foundational skill for any cloud or systems engineer.
By mastering VM deployment, virtual networking, and subnet planning, you build the groundwork for advanced services like Active Directory, DNS, DHCP, Group Policy, and hybrid cloud integrations.
This is the kind of core knowledge that scales from home labs to enterprise production environments.
Continue with installing Active Directory Domain Services, then add a second domain controller so the lab can demonstrate DNS and directory replication rather than remaining a single-server environment.