For many years, organizations have relied on traditional methods of sharing files, most commonly through mapped network drives connected to on‑premises Windows servers. This approach has served businesses well, especially those with domain‑joined computers and centralized IT infrastructure.
However, as organizations grow, adopt hybrid work models, and support remote or non–domain‑joined devices, these legacy methods start to show limitations. Companies increasingly need highly available, scalable, and secure file-sharing solutions that work across locations, devices, and networks.
This is where Azure File Sync becomes a game‑changer.
Azure File Sync lets you centralize Windows file-server data in an SMB Azure file share while keeping one or more Windows Servers as local caches. Users can continue reaching the server through familiar protocols and applications, while Azure Files becomes the cloud endpoint for the synchronized namespace. Cloud tiering can keep frequently used files local and replace colder files with space-saving placeholders.
In this guide, I’ll walk you step-by-step through setting up Azure File Sync, configuring both local and cloud file shares, and demonstrating how files stay available and synchronized across:
✔ A domain‑joined computer connected to your local server ✔ A client mapped directly to the Azure file share for a controlled lab comparison
By the end, you will clearly see how Azure File Sync provides seamless file availability across your entire organization, whether on-premises or in the cloud.
Before implementing the service, read Azure Storage for the differences between Azure Files, Blob Storage, and managed disks. Azure File Sync is a synchronization and caching service; it is not a general-purpose replacement for every file-transfer protocol.
What Is Azure File Sync?
Azure File Sync is a Microsoft service that synchronizes a supported Windows Server path with an SMB Azure file share. It enables you to:
- Maintain your existing Windows Server file shares
- Sync your data to Azure automatically
- Cache frequently accessed data locally for fast performance
- I use cloud tiering to store infrequently accessed data in Azure, saving local disk space
- Preserve Windows Server access methods and local application compatibility while Azure File Sync synchronizes the underlying files to an SMB Azure file share
- Deploy multiple servers across global locations and keep them all in sync
In simple terms: Azure File Sync doesn't support NFS Azure file shares. It also doesn't turn Azure Files into an FTP or FTPS endpoint. Clients normally access the Windows Server namespace, or mount the Azure file share directly over SMB when the identity, network, and authorization design supports it.
Prerequisites and Design Decisions
Before creating resources, confirm:
- The server runs a currently supported Windows Server version and the data resides on a supported NTFS volume.
- TCP 443 access to the required Azure endpoints is allowed through any firewall or proxy.
- The Azure file share, Storage Sync Service, and server location meet the latency, residency, redundancy, and recovery requirements.
- The Azure file share capacity and transaction model fit the workload.
- The namespace doesn't contain unsupported constructs such as symbolic links or overlapping server endpoints.
- You have a backup plan for the Azure file share. Synchronization isn't a backup, and deletion or corruption can synchronize to other endpoints.
For production, also decide whether clients use the Windows file server namespace, mount Azure Files directly with identity-based SMB authentication, or use both. I review the current Microsoft planning documentation before assuming that an existing DFS, antivirus, backup, deduplication, or tiering design is compatible.
Create the Storage Account
Step 1: Sign into the Azure portal
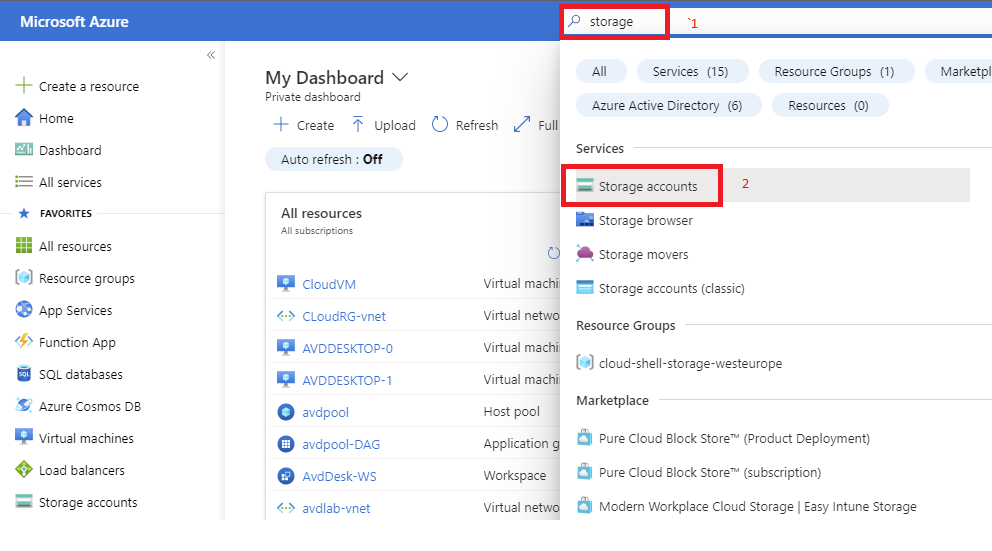
Step 2: Under Azure services, select Storage account or search for Storage and select the Storage accounts.
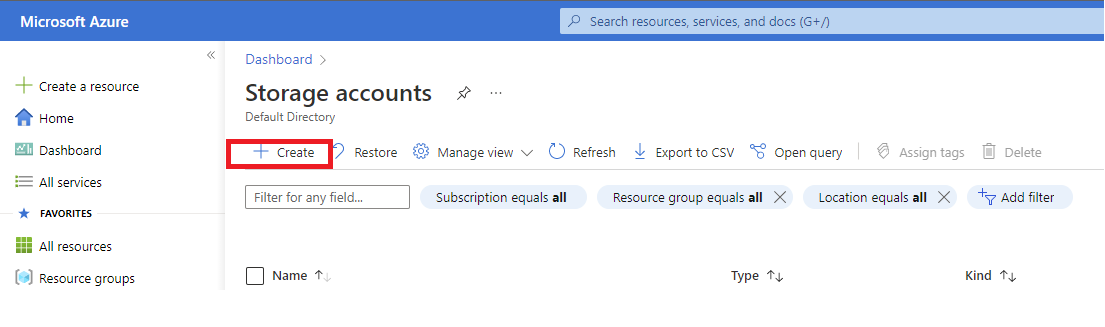
Step 3: On the Storage Accounts page, click on create.
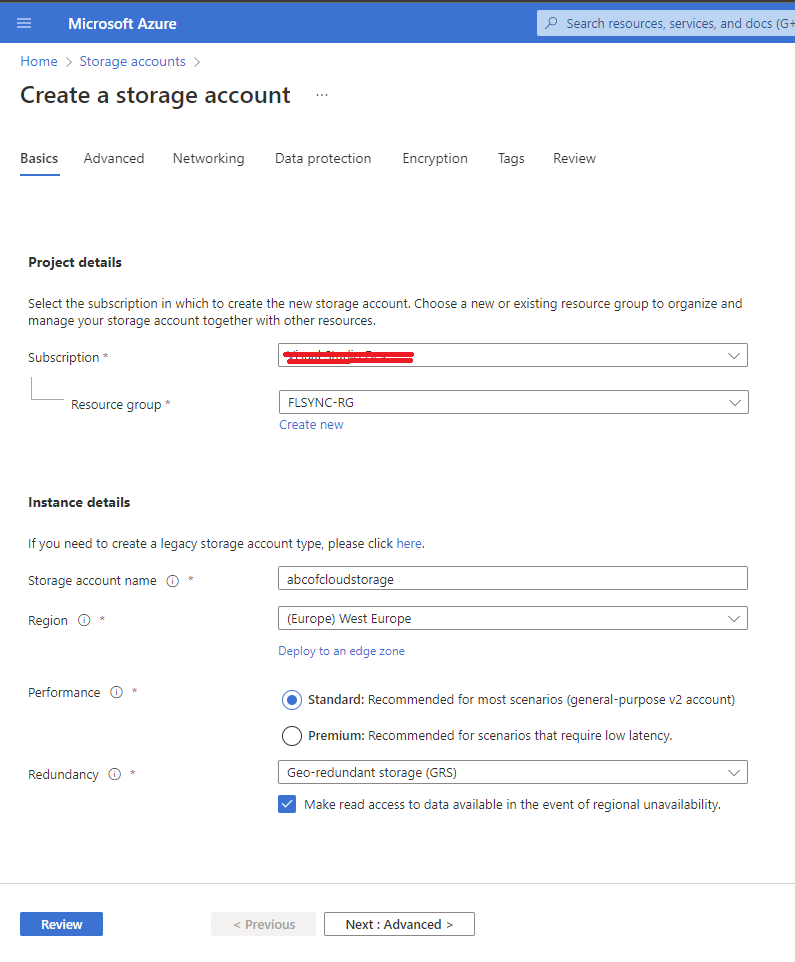
Step 3: On the Basics blade, select the Subscription, the desired Resource group, or create a new Resource group.
Step 4: Enter the name of your storage account, for this tutorial we will be using abcofcloudstorage. The name must be unique across Azure. The name must also be between 3 and 24 characters long and may include only numbers and lowercase letters.
Step 5: Select the region for the storage account.
Step 6: Select the performance tier for the storage account.
Step 7: Choose how you want the Storage account to be replicated.
Step 8: Additional options are available on the Advanced which you can select based on your requirement.
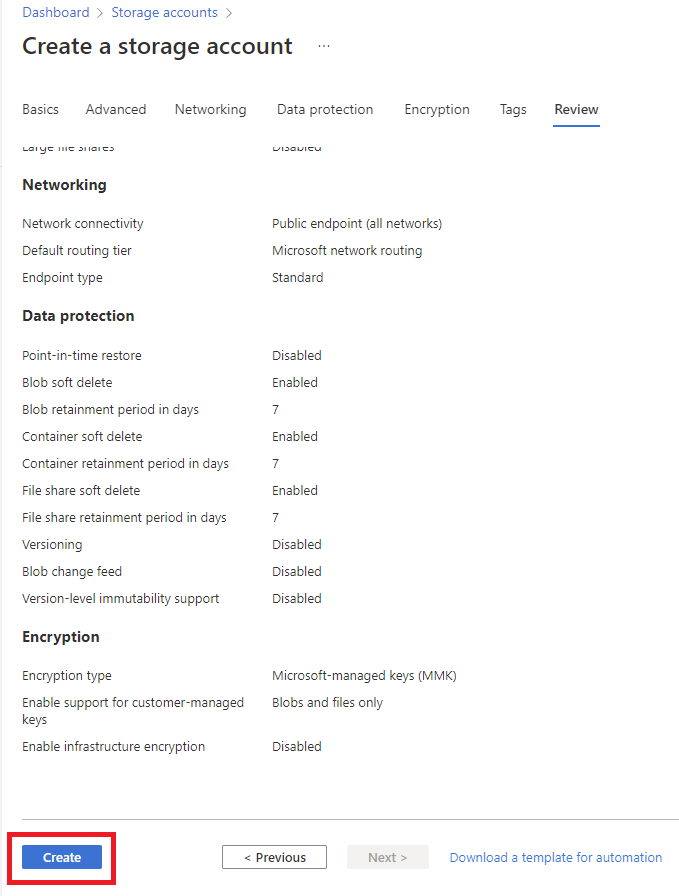
Step 9: Select Review + Create to have a review of all the options you selected then Click on Create.
Create an SMB File Share
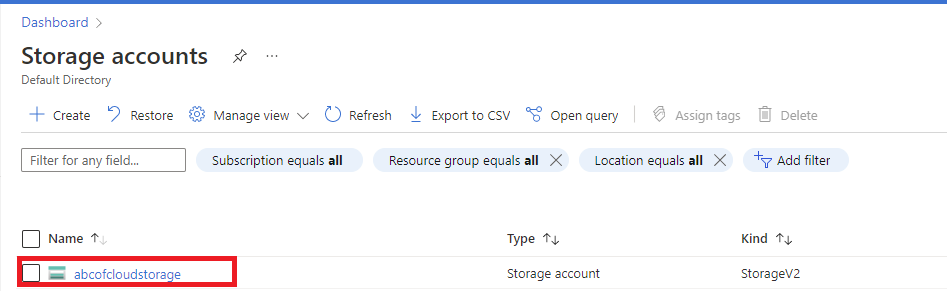
Now that we are done with creating the Storage account, we will go ahead to view the storage account and create a file share.
Step 1: Click on the storage account (abcofcloudstorage) that was created.
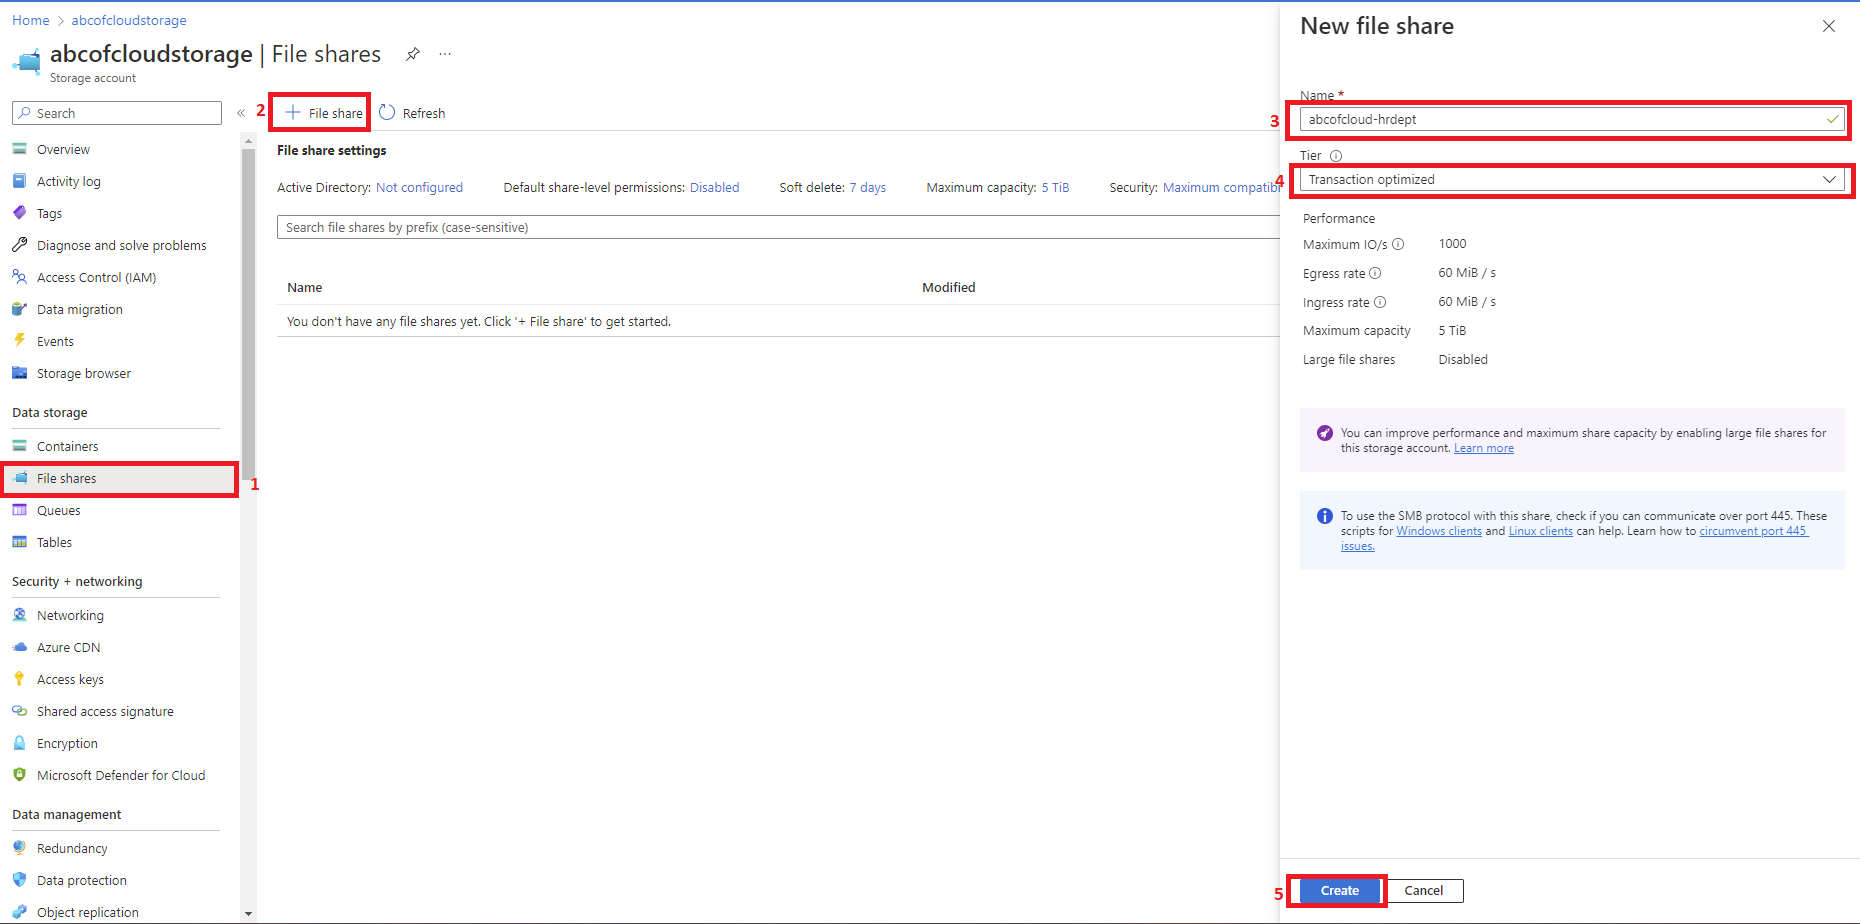
Step 2: From the left menu, Under Data storage select File shares then click on the plus (+) button beside File share.
Step 3: On the right pop-out, Name the New file share, for this tutorial we will be using abcofcloud-hrdept leave the tier set to Transaction optimized and then select Create.
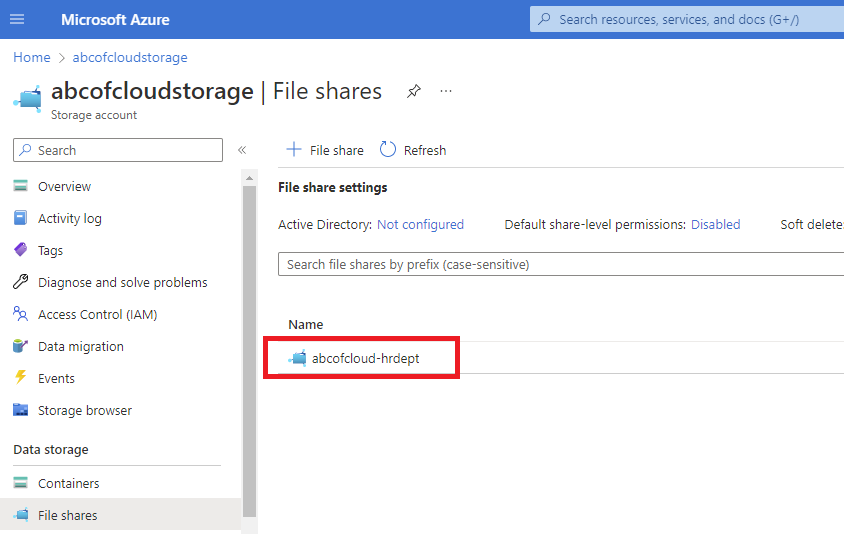
Step 4: Now double-click on the new File share you created.
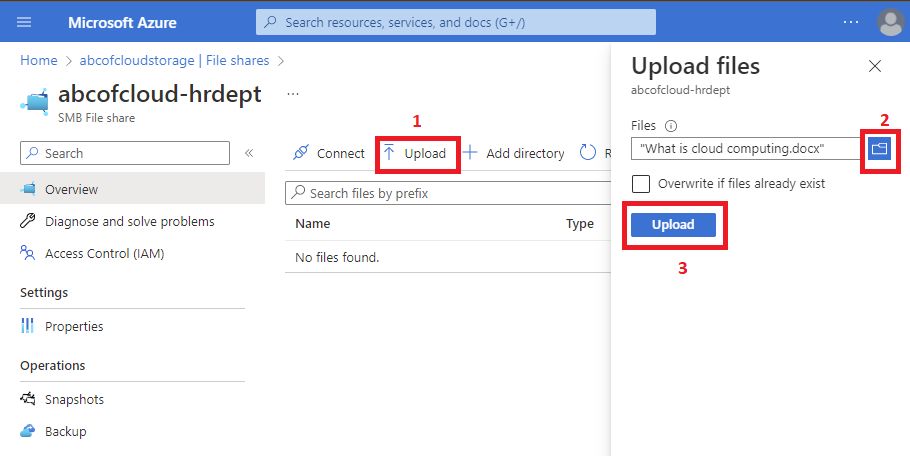
Step 5: Now click on Upload then on the pop up click on the folder icon. You can browse through your local disk and select any file you want to upload and Click the upload button.
What we will be doing now is connecting this New File share to a computer that is not domain-joined to our local server just to show how every file will sync together at the end.
Connect to the Azure File Share from Windows
Step 1: Click on the Connect button on the pop-out by the right, select Windows, and Under the Drive, letter select the letter you want to use for the drive from the drop-down.
Step 2: For this isolated lab only, choose Storage account key and copy the displayed script.
Do not distribute storage account keys
A storage account key authorizes broad access and is effectively an administrator credential for the share. Microsoft recommends identity-based SMB authentication in nearly all production cases. If a temporary lab must use a key, restrict the storage account network path, protect the script and shell history, rotate the key afterward, and never commit it to source control.
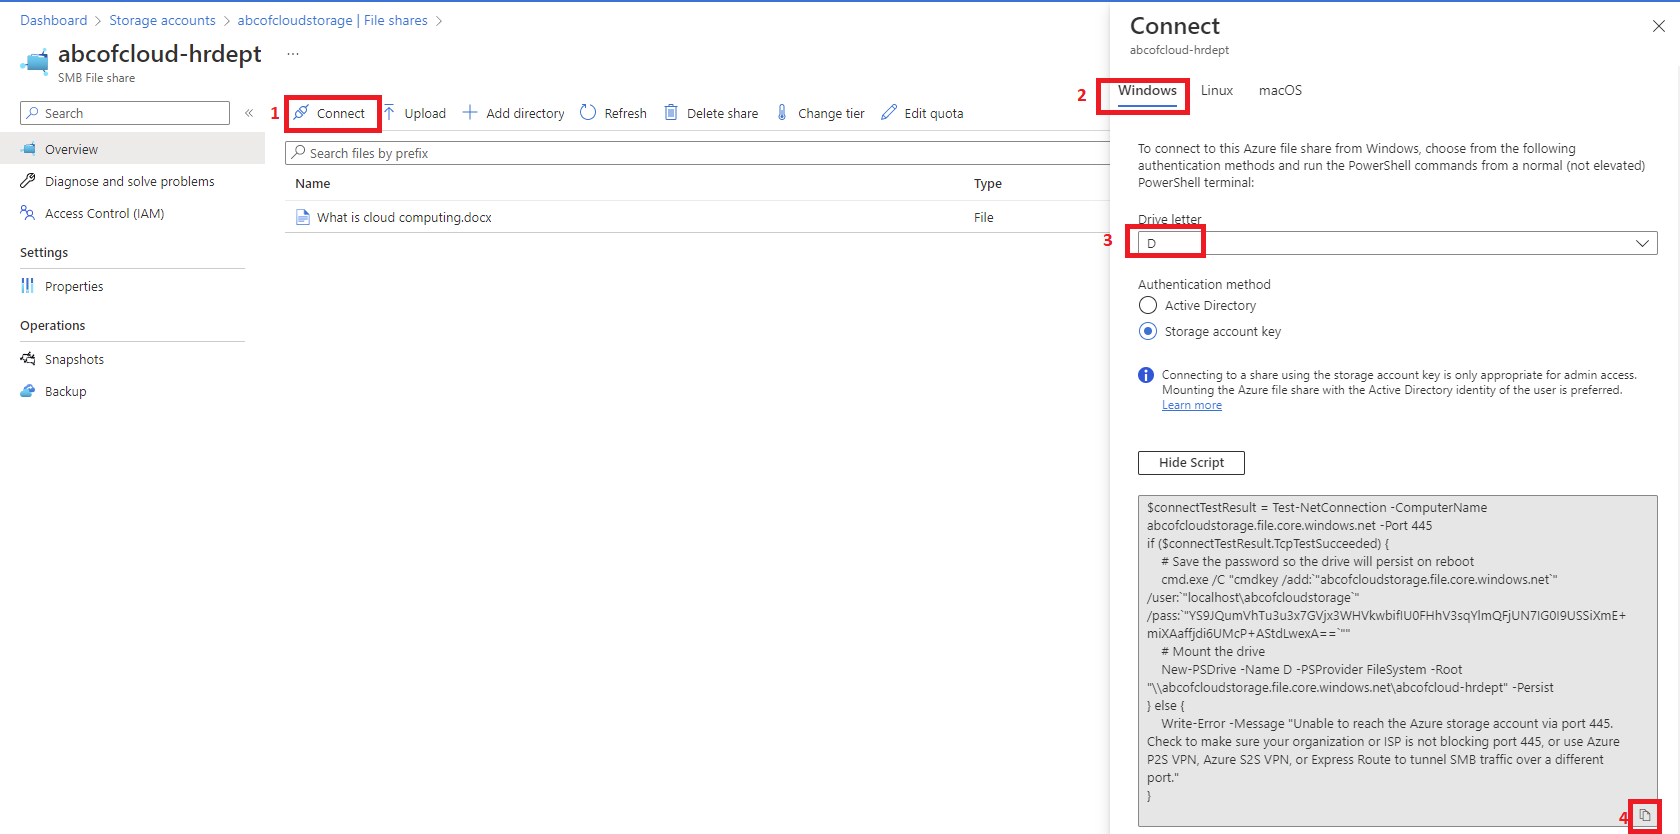
Step 3: Log in to the computer, Open PowerShell and paste the script, then hit the enter key.
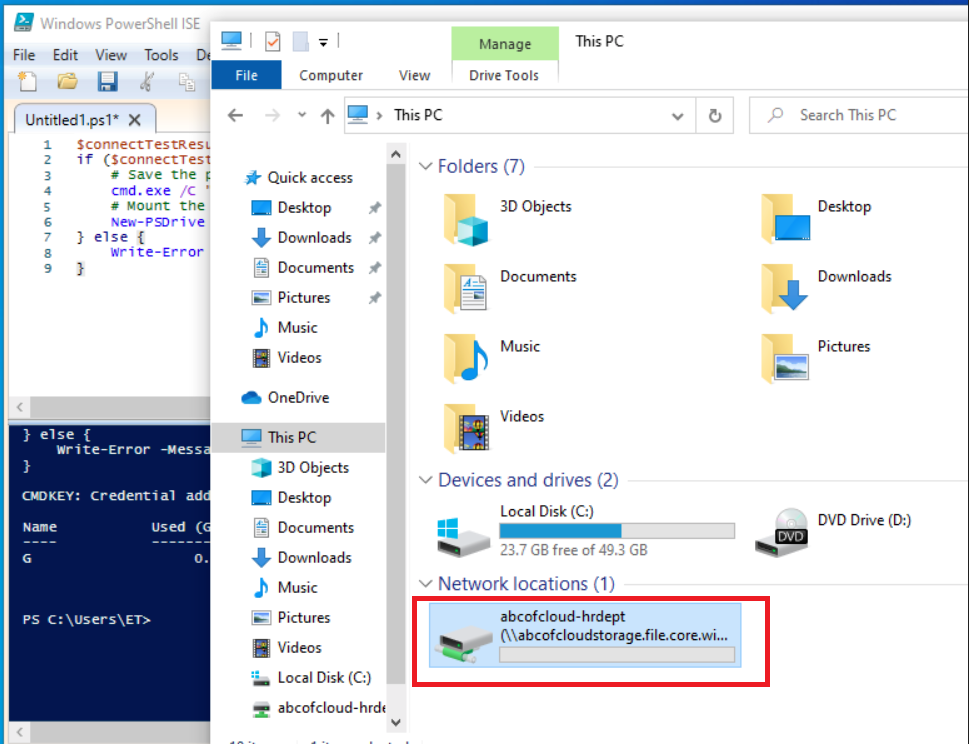

Now that we have successfully created and connected the file share to our computer we can then move to the next part.
Create the Storage Sync Service
Step 1: Search for the Azure File Sync in Azure portal.
Step 2: In the search results, select Azure File Sync.
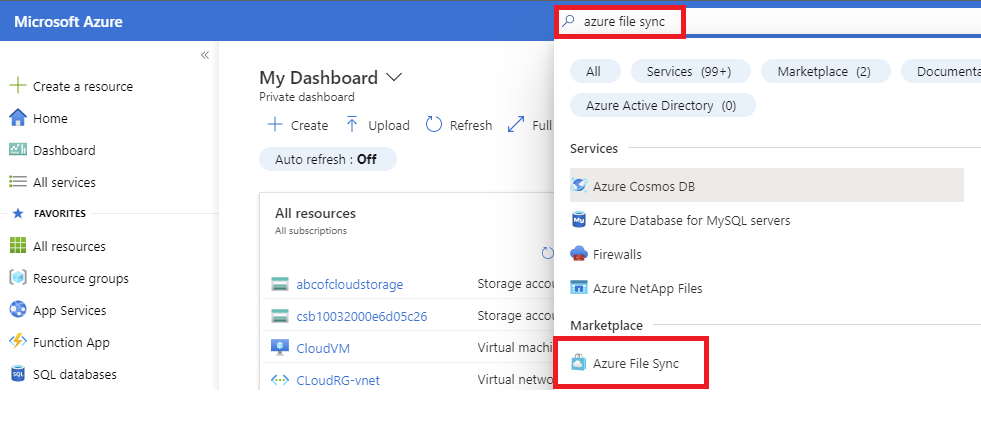
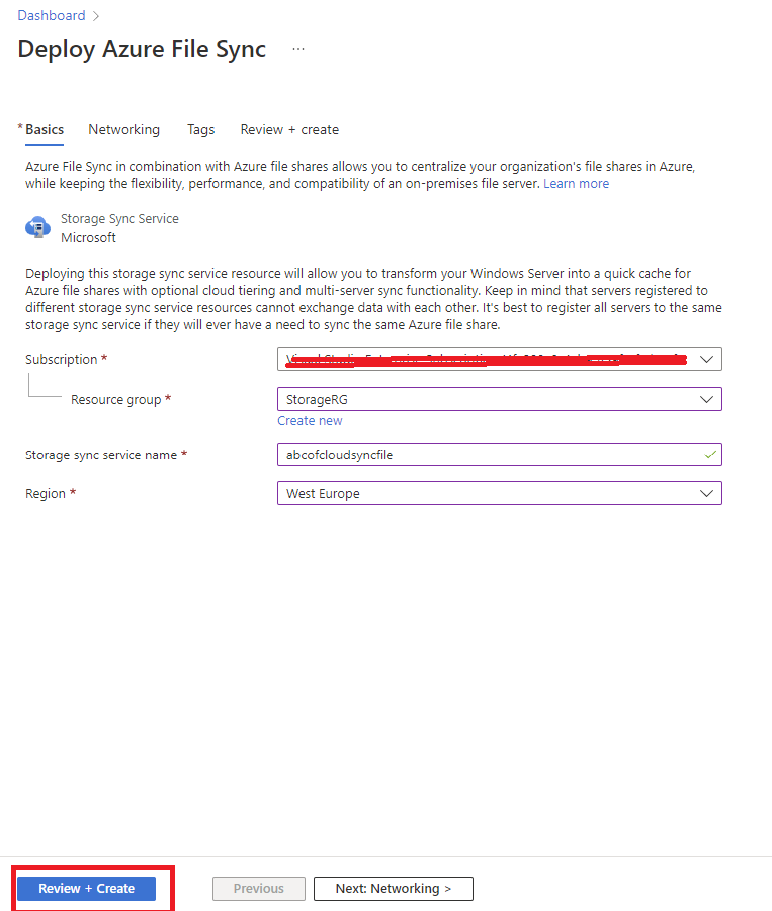
Step 3: Select create to open the Deploy Azure File Sync tab.
Step 4: Select the Subscription.
Step 5: Select the desired Resource Group.
Step 6: Give the Storage sync service name a unique name, we will be using abcofcloudsyncfile.
Step 7: The Networking and tags can be selected based on your requirements and after that click on Review and create.
Create the Sync Group and Cloud Endpoint
A sync group defines the sync topology for a set of files. A sync group must contain one cloud endpoint, which represents an Azure file share. A sync group also must contain one or more server endpoints. A server endpoint represents a path on a registered server. To create a sync group:
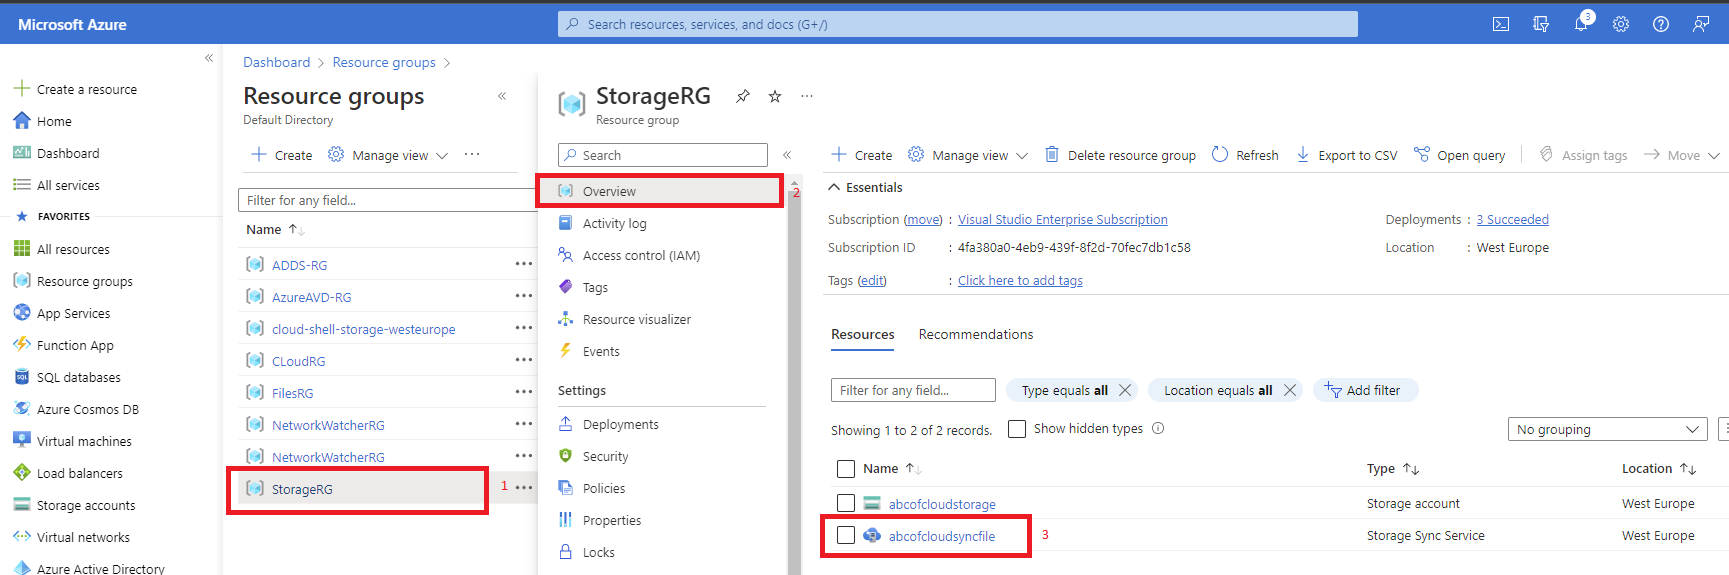
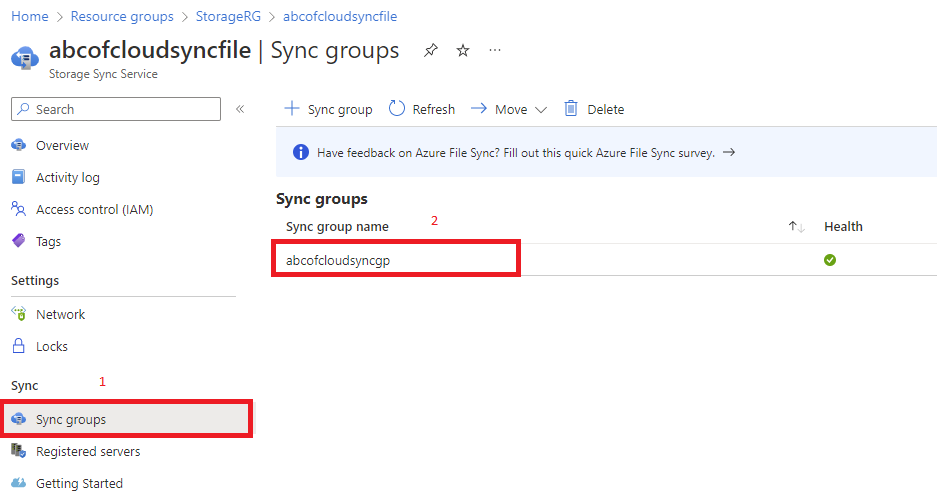
Step 1: Go to the Resource Group and select the Storage Sync Service we just created.
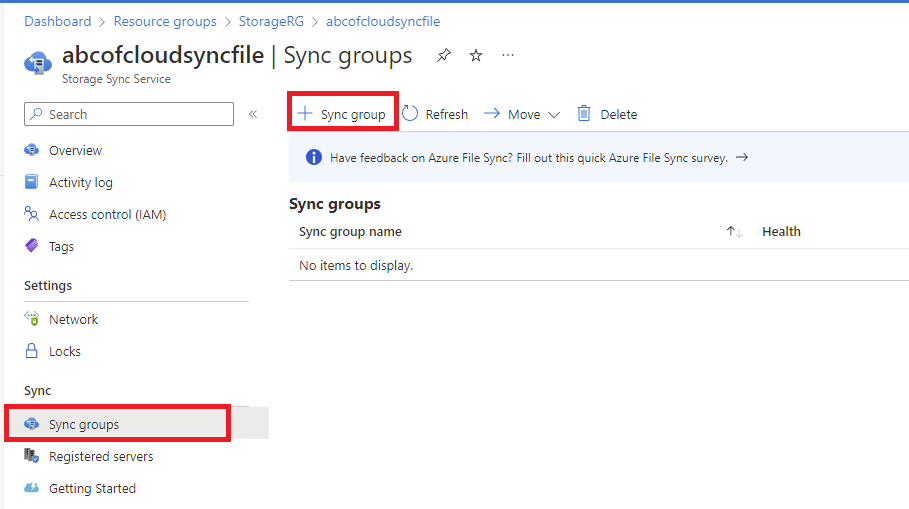
Step 2: On the left menu under Sync, select the Sync groups and then click on the plus(+) button to add a Sync group.
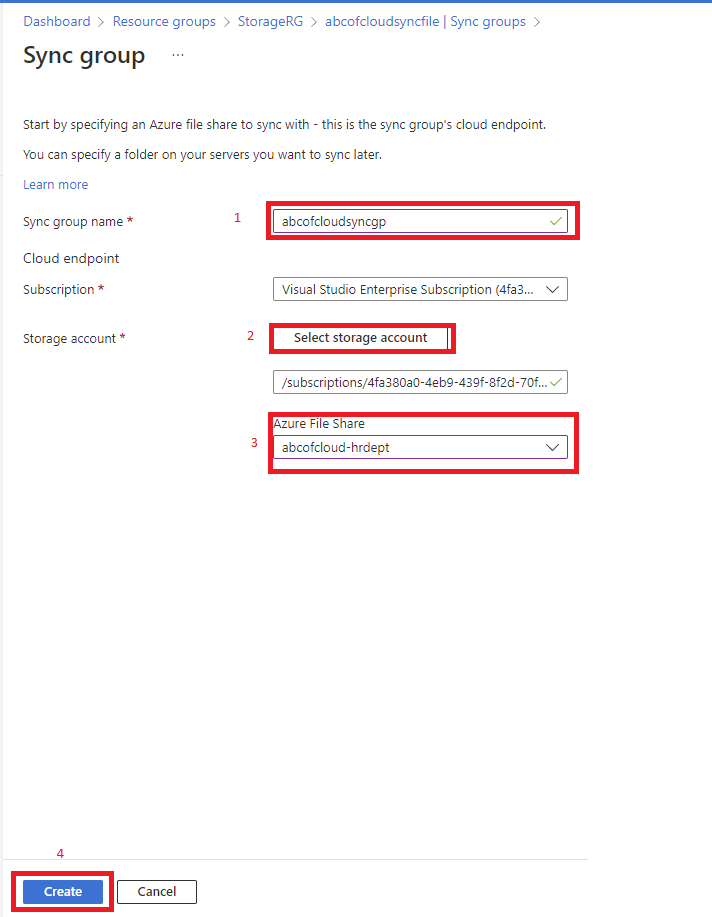
Step 3: Name the Sync group with a name that is unique within the Storage Sync Service, but can be any name that is logical for you.
Step 4: Select the subscription where the Storage Sync Service is deployed.
Step 5: Select the storage account of the Azure file share that was created.
Step 6: Select the Azure File share that was created.
Install the Agent and Register Windows Server
Registering your Windows server with a Storage Sync Service establishes a trust relationship between your server (or cluster) and the Storage Sync Service. A server can only be registered to one Storage Sync Service. It can sync with other servers and Azure file shares that are associated with that Storage Sync Service.
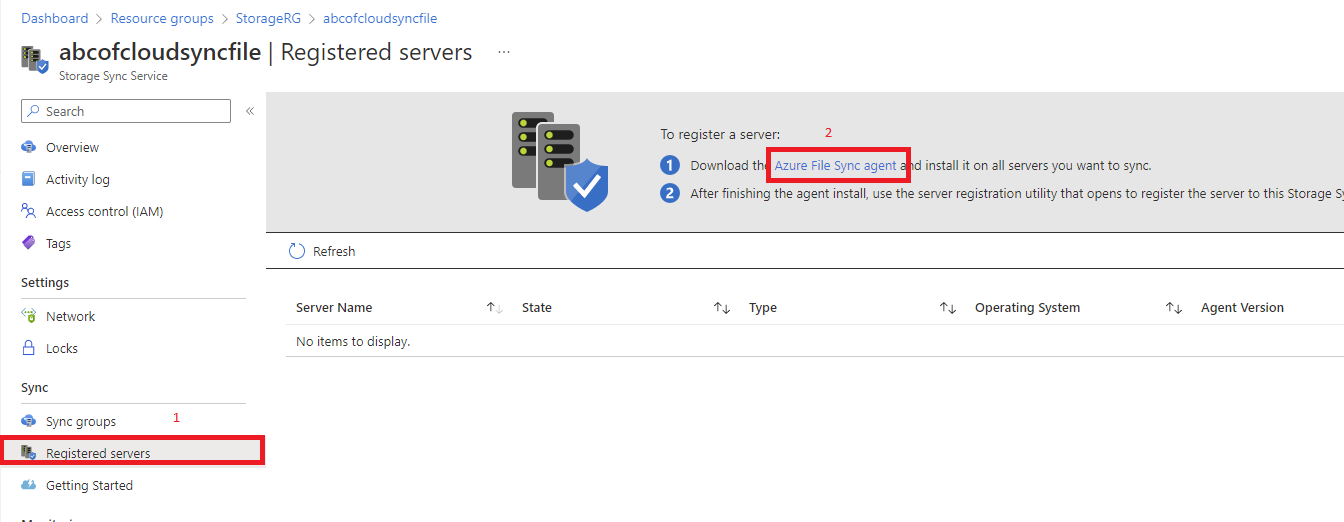
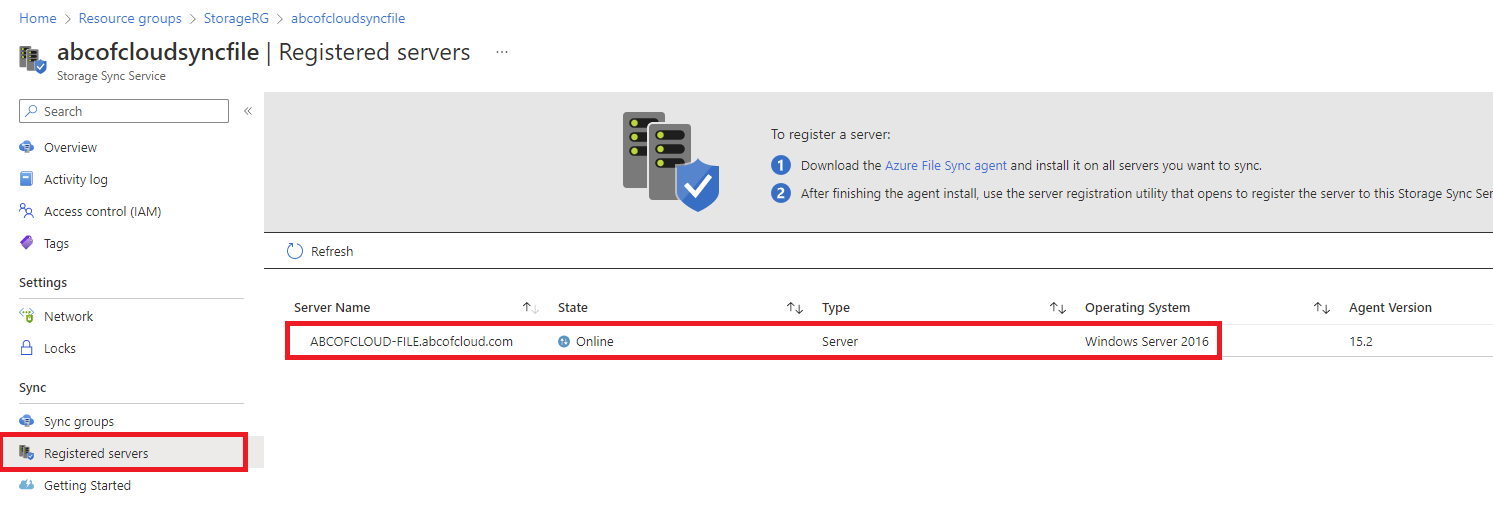
Step 1: While you’re still in the Storage Sync Service, on the left menu click on Registered servers.
Step 2: Click on the Azure File Sync agent to download it and install it on all the servers you want to sync.
Step 3: Download the agent that matches the server version. This original lab used Windows Server 2016; check Microsoft's current support matrix and install all required Windows updates before installing the latest agent.
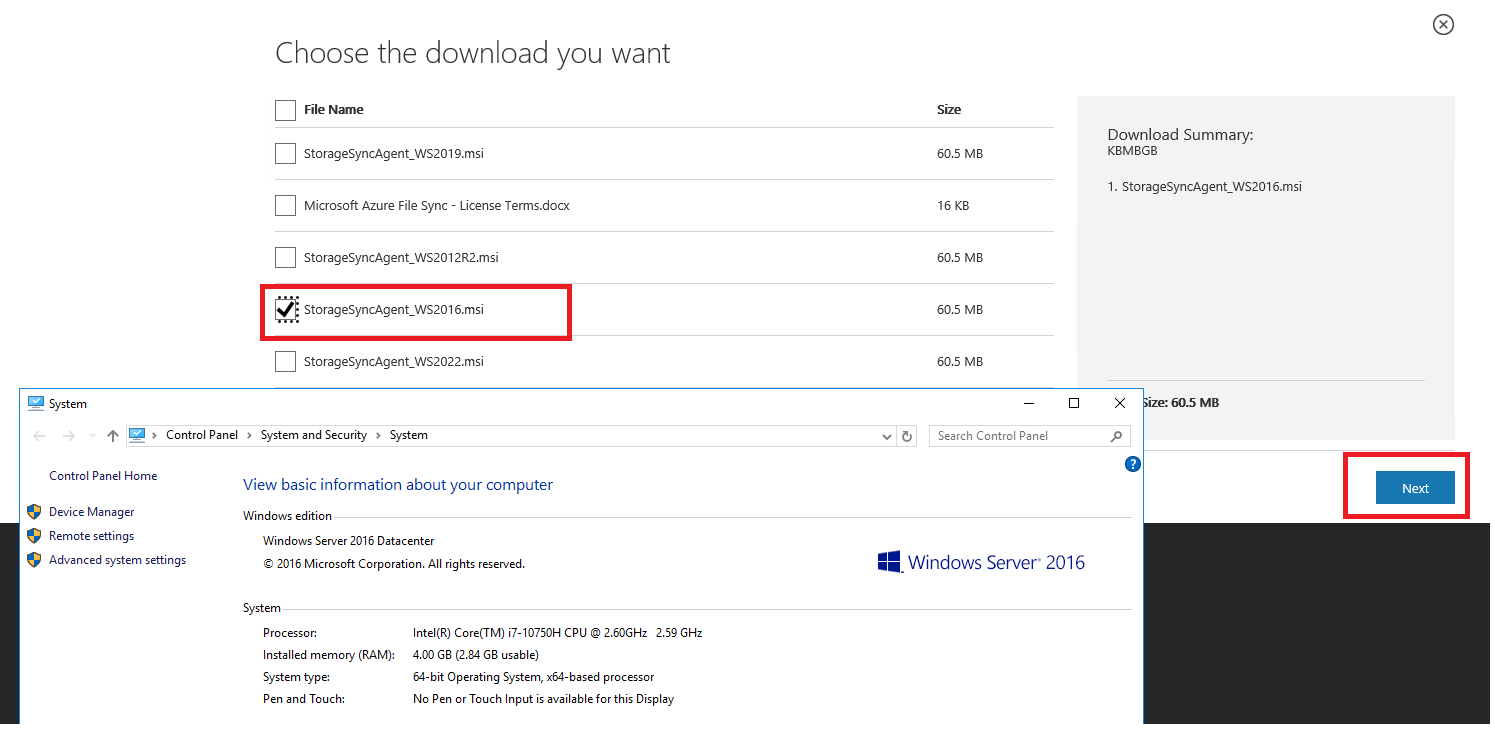
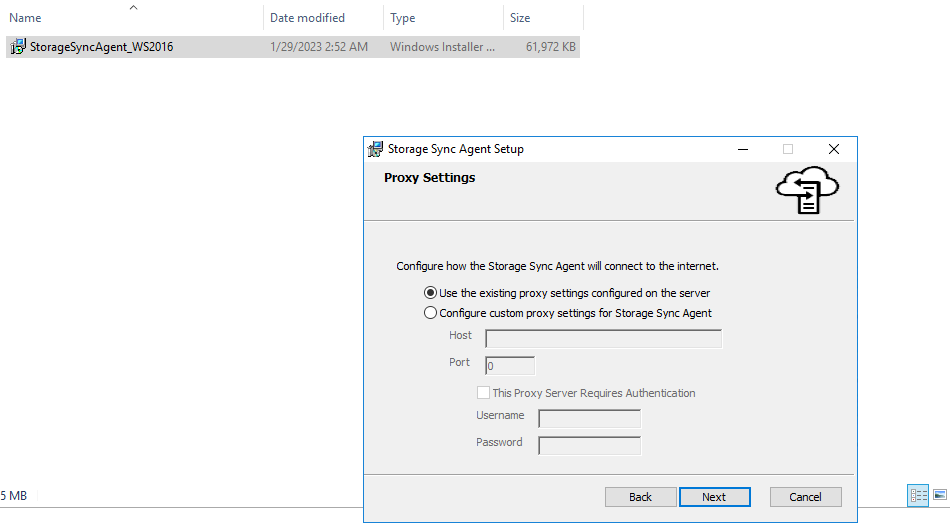
Step 4: Accept the defaults when installing the Storage Sync Agent Setup Wizard and select Finish.
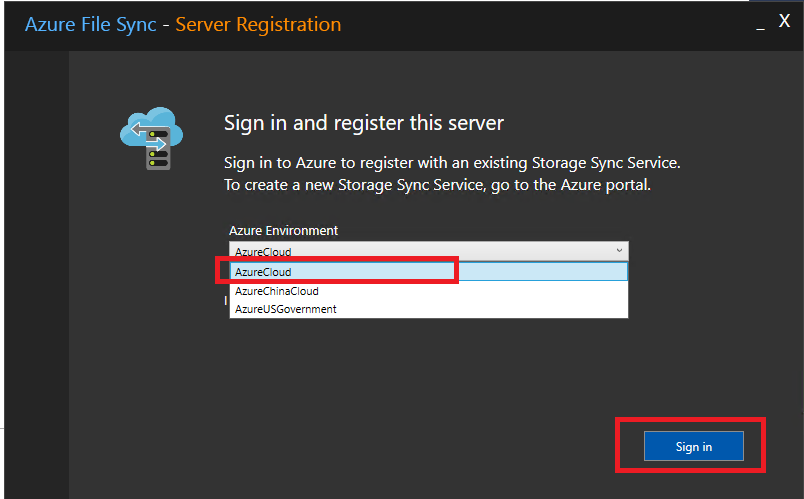
Step 5: When the Server Registration UI opens on the local server, select Sign in.
Step 6: Now select the subscription that contains the Storage Sync Service.
Step 7: Then the Resource group that contains the Storage Sync Service.
Step 8: And finally the Storage Sync Service.
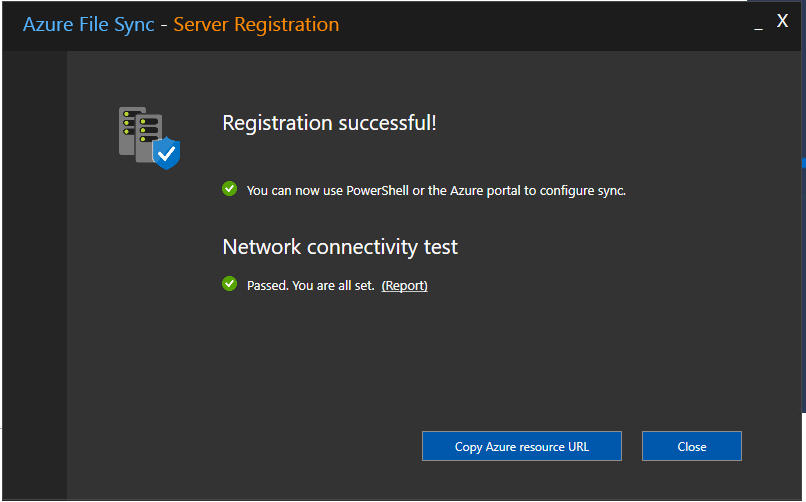
You have now successfully registered your server.
Add the Server Endpoint
A server endpoint represents a specific location on a registered server. For example, a folder on a server volume. To add a server endpoint:
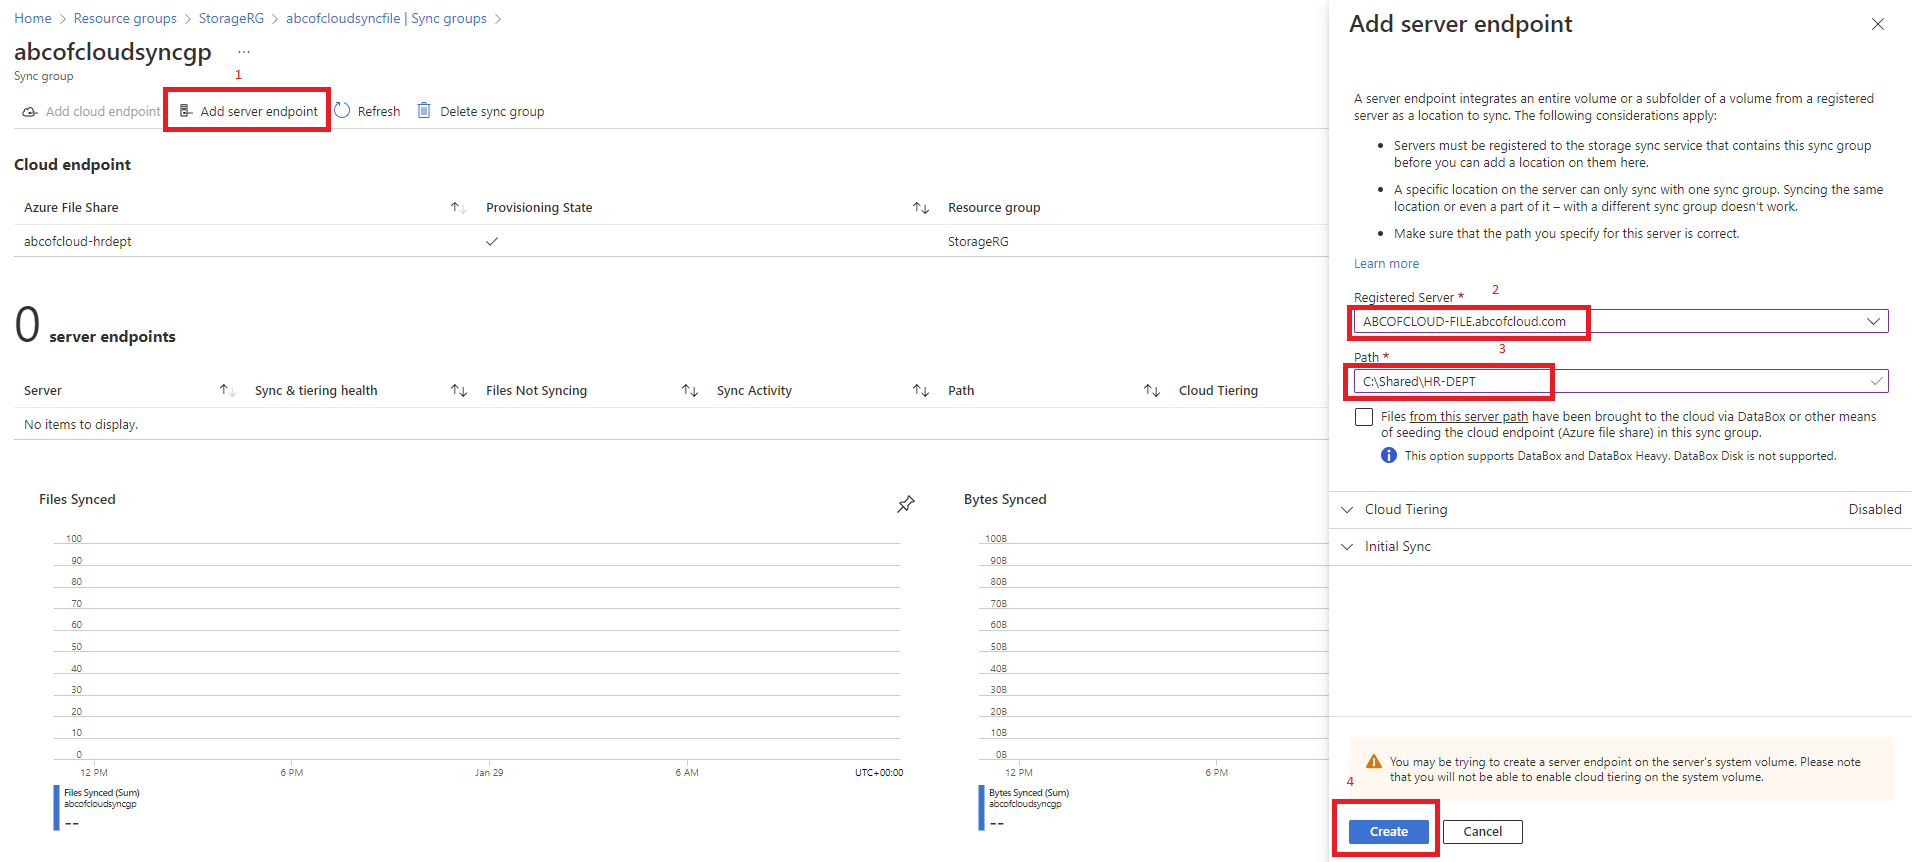
Step 1: Browse to the newly create sync group.
Step 2: Now Select Add server endpoint.
Step 3: On the right pop-out use the drop-down under Registered server and select the Windows server that was registered.
Step 4: Paste or type the Windows server path to the drive you want to share, for this tutorial the path I will be sharing is the C:\Shared\HR-DEPT and then create.
The Cloud tiering and Initial sync choices control important behavior; don't treat them as cosmetic defaults. This lab leaves cloud tiering disabled so every synchronized file remains fully present on the server. When tiering is enabled, choose volume-free-space and optional date policies from observed capacity and recall patterns. Cloud tiering isn't supported on the Windows system volume, so use a dedicated data volume for a tiered production endpoint.
For the first endpoint, the default Merge initial-sync behavior is appropriate when one side is empty or when both namespaces should be combined. I use an authoritative-upload option only for a planned migration where the server copy is intentionally authoritative.
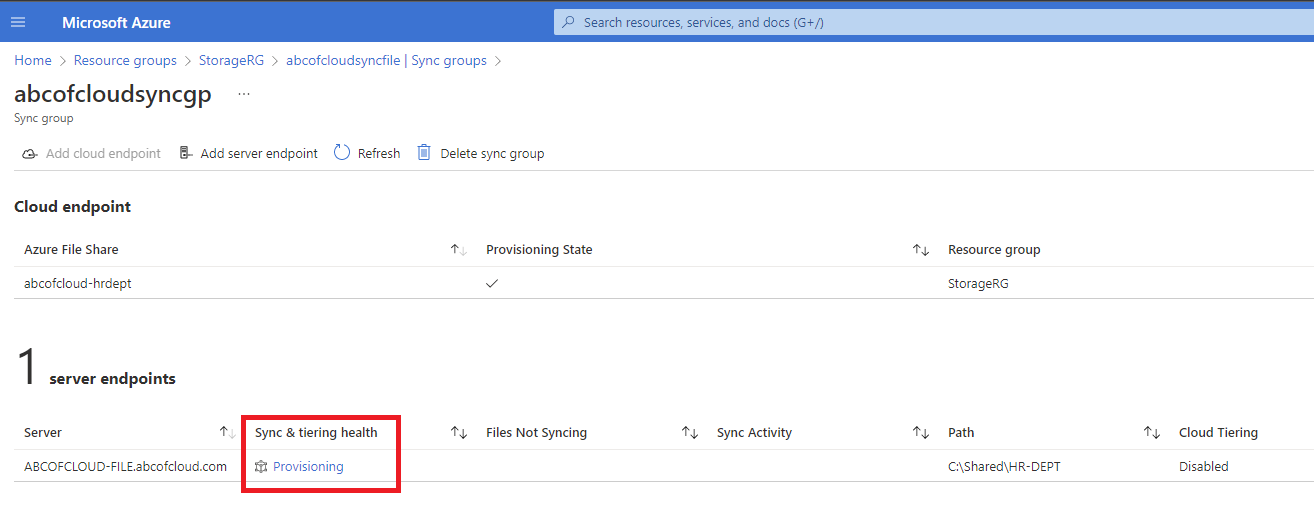
By the side menu under Sync click on Registered servers to confirm the server state is online.
Comparing the files now, you will notice the file Staff Data on the Windows Server has now been synced to Azure File Share and the file What is Cloud computing on Azure File Share has now been synced to the Windows Server.
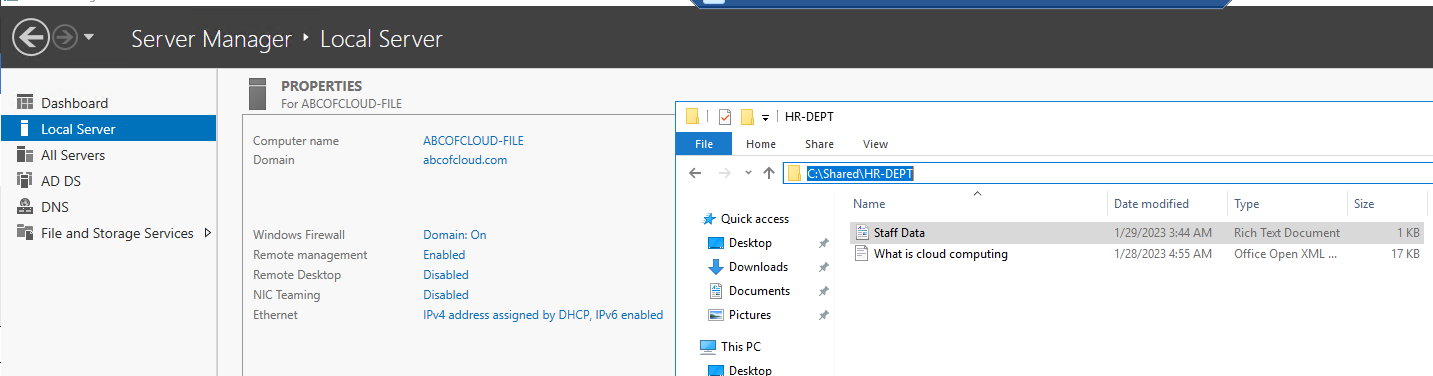
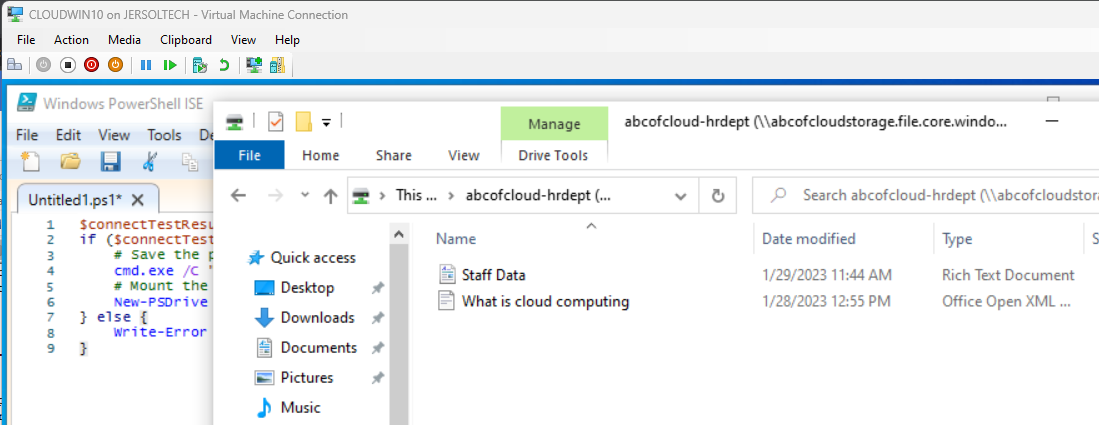
Client computer showing the file synchronized from Windows Server.
Validate Synchronization and Health
Do more than confirm that one file appears:
- I check that the registered server status is Online and the server endpoint health is healthy.
- I create a uniquely named test file on the server and confirm it reaches the cloud endpoint.
- I create a second test file in the Azure file share and confirm it reaches the server.
- Confirm that NTFS permissions and expected timestamps are preserved for the workload.
- I review sync-session results and Azure Monitor metrics rather than repeatedly changing files when synchronization is delayed.
- If cloud tiering is enabled, test recall behavior and measure the effect on users, bandwidth, and egress cost.
Common failures come from unsupported server versions, missing updates, blocked HTTPS endpoints, proxy configuration, expired agent versions, insufficient disk space, or unsupported namespace objects. I use Microsoft's troubleshooting guide and record the correlation or error information before reinstalling the agent.
Security, Backup, and Operations
- Prefer identity-based SMB authentication and least-privilege share/file permissions for direct mounts.
- Restrict the storage account with service endpoints or private endpoints when the architecture requires private access.
- Protect the Azure file share with Azure Backup or another Azure Files-aware backup product. I avoid backing up a tiered server endpoint with software that recalls every placeholder.
- Monitor agent currency, server endpoint health, storage capacity, transactions, tiering recalls, and backup jobs.
- I test recovery independently. A healthy sync relationship proves replication, not recoverability.
For related platform concepts, continue with Azure Networking and the secure Azure Blob Storage PowerShell lab. Although Blob Storage and Azure Files use different access models, the same principles of identity, private networking, least privilege, monitoring, and recovery still apply.